«Camera damage / overlap / vandalism detection» analytics type. Viewing and editing
On this page:
View case
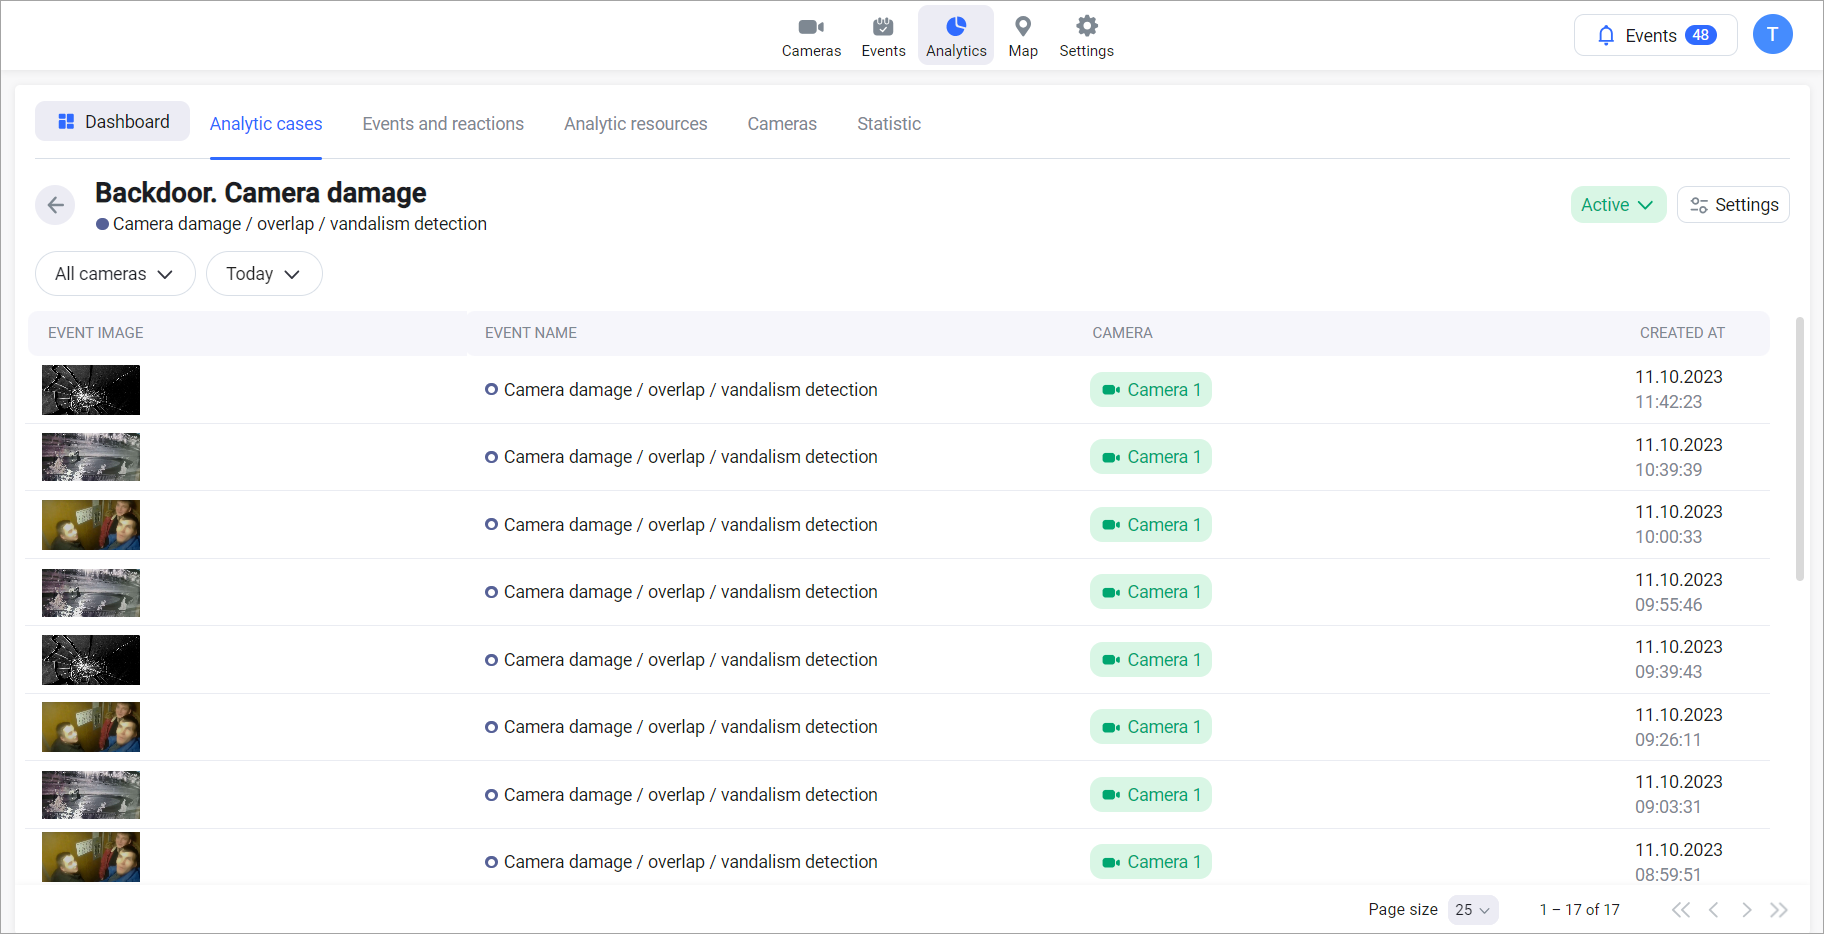
When viewing a case with the «Camera damage / overlap / vandalism detection» analytics view, a table is displayed that displays:
Event image (includes the last «normal» frame before the event and the frame at the moment of the event)
Event name
Camera
Event creation dates

Viewing the case with the «Camera damage/overlap/vandalism detection» analytics type
You can click on the camera name to access the archive of the camera at the time of the event.
Filters
A set of filters is available:

Filters
Cameras – only events which were recorded by the selected cameras are displayed
Period – only events that occurred during the specified period are displayed
Editing the case
To edit the case, click the «Settings» button on the analytics case viewing page.
To edit a case, select the step and make changes.
You can edit all previously specified settings, except for changing the type of analytics in step 1.
After finishing editing the case, click «Save».
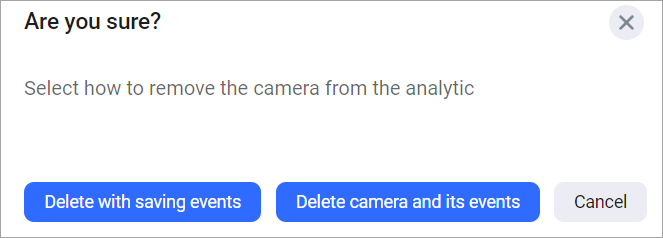
If, when editing a case, a camera with existing events is deleted, then you must select a method for deleting the camera:

Deleting the camera
Delete camera with saving events
Delete camera and its events
When you select the «Delete with saving events» option, all events that were recorded by this camera will be displayed in the analytics case. In this case, events will be taken into account when generating a report, when viewing the list of events, a transition to viewing the archive at the time of the event will be available, etc.
If you select the «Delete camera and its events» option, all events that were recorded by this camera will be completely deleted.
Generating a report
To generate a report, click «Create report».
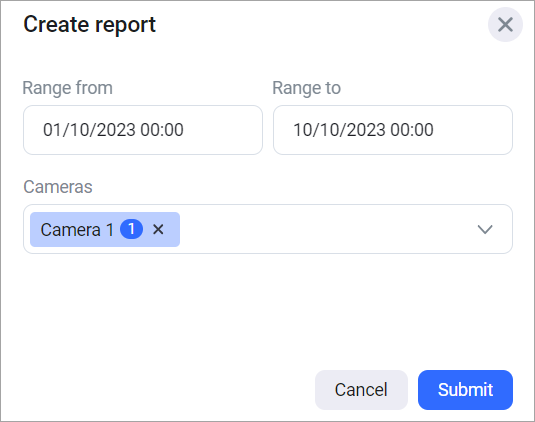
As a result, the report setup form will be displayed:

Setting up the report
Specify the period for which the report will be generated.
Specify for which cameras the report will be generated.
Click «Submit».
Once the report is generated, a message with a link to the report will be displayed. Click to download the report in XLXS format.
