Video Archive
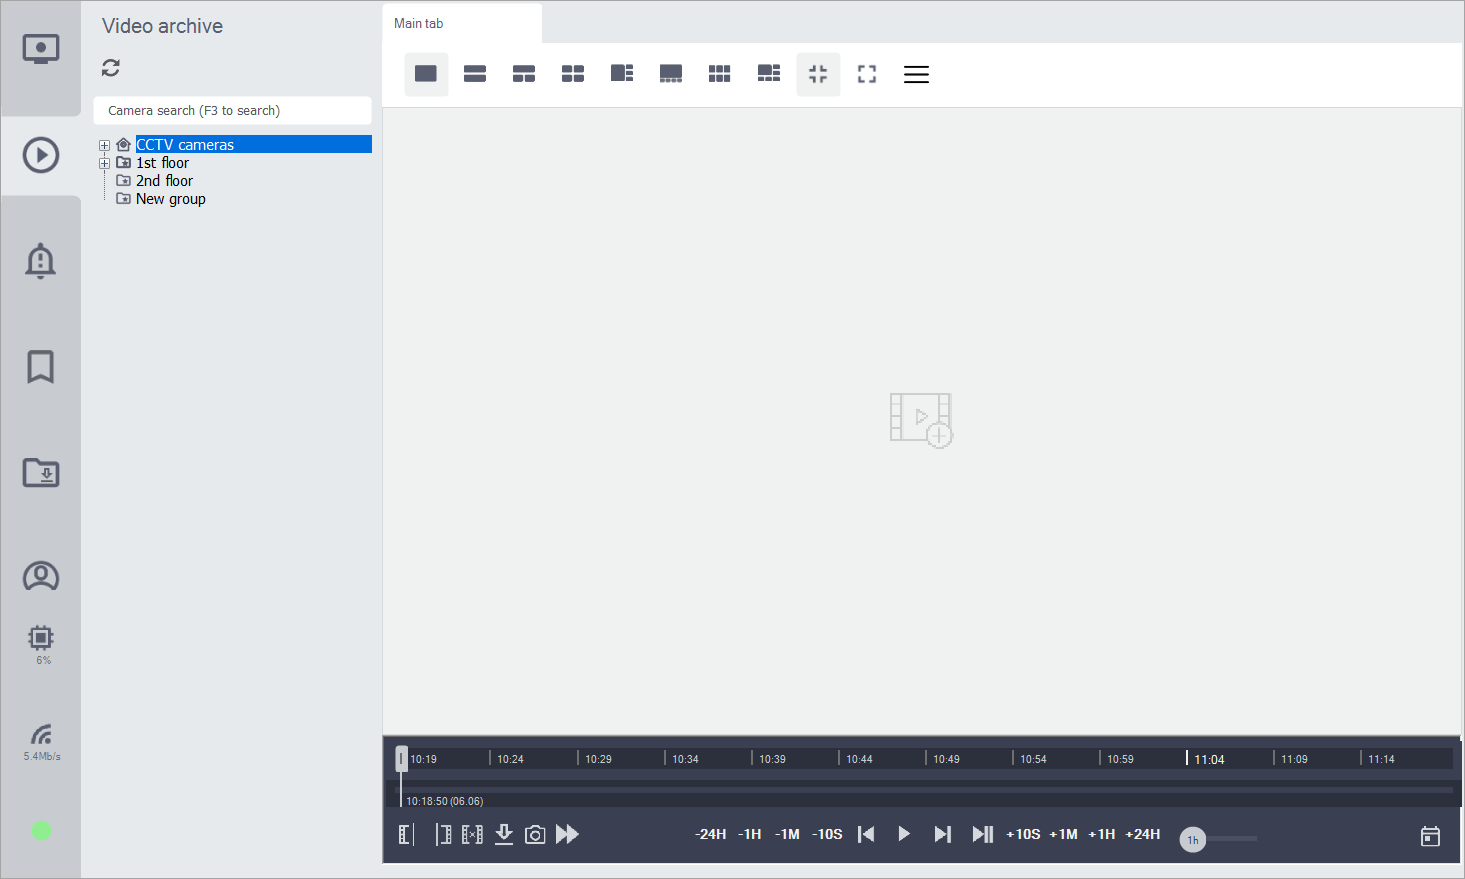
When accessing the «Video Archive» menu, the following elements are displayed on the page:
Camera tree
Search
Refresh camera tree
Main player

«Video Archive» menu
The main player is designed for general actions and settings when viewing multiple cameras.
Key functions of the player include:
Enable label display
Switch between labels
Close camera archive
Pause playback
Download the required video fragment
Save an image (screenshot)
Work with the timeline (rewind backward and forward)
Set the time range on the timeline
Select the archive date
The archive is stored for 30 days.
To add a camera to a specific layout on the video wall, select the desired cell by clicking on it and then select the desired camera.
To view the camera's video archive, select it from the camera tree:
Drag it to the workspace or double-click on the selected camera
Select the time range on the timeline (1h, 3h, 6h, 12h, 24h)
Choose a date on the calendar
If necessary, download an archive fragment:
Move the slider to the desired time
Set the start point and click on the «Start of fragment for saving» icon
Set the end point and click on the «End of fragment for saving» icon
Click «Save selected video fragment»
To download a fragment or take a screenshot:
Click on «Save selected video fragment»
Click on «Save camera images in the current position»
In the opened window, check the export parameters, then click the «Export» button

Selecting the time range

Selecting a date on the calendar
The available archive on the camera is highlighted in red on the timeline.
If the selected archive is not available, you will be offered to access an available archive segment from earlier dates. Such an archive is also displayed on the calendar.
All timeline functions are only available for the current camera.
There is an option to control the playback speed.

Playback speed control function

Playback speed
