Link a B2B user and cameras
A created B2B user should be linked to specific cameras via private folders or addresses.
This option is only available when addresses are created in the system and linked to private folders, which in turn contain cameras.
Link with private folders
To link a B2B user with a camera, that is located in a private folder, follow the steps:
Navigate through the Users section > B2B Users. Select a relevant user to access their card. For this, select the ID for this user or select the View (eye) icon.
On the opened page, under Private folders (private access), select Attach folder.
On the next opened page, select a relevant folder from the Private folders drop-down list.
To complete the action, select Attach folder.
Repeat the steps if the users should be linked to multiple folders.
.png?inst-v=c246fb15-1530-4ba8-b650-c220381b36ae)
Attaching a folder
As a result:
The attached folder will be listed under Private folders (private access).
The cameras that are added to this folder will be automatically linked to the user. To view the details about the linked cameras, select the View icon of the selected private folder.
Next, synchronize the introduced changes with the video surveillance platform.
You should perform synchronization in cases, when a folder was initially associated with a user, and only then was a camera linked to a folder.
If a camera was initially linked to a private folder and synchronized, and only then was the folder associated with the user, changes will automatically synchronize with the video surveillance platform.
To perform synchronization, call out the context menu at the top-right of the page and select Sync.
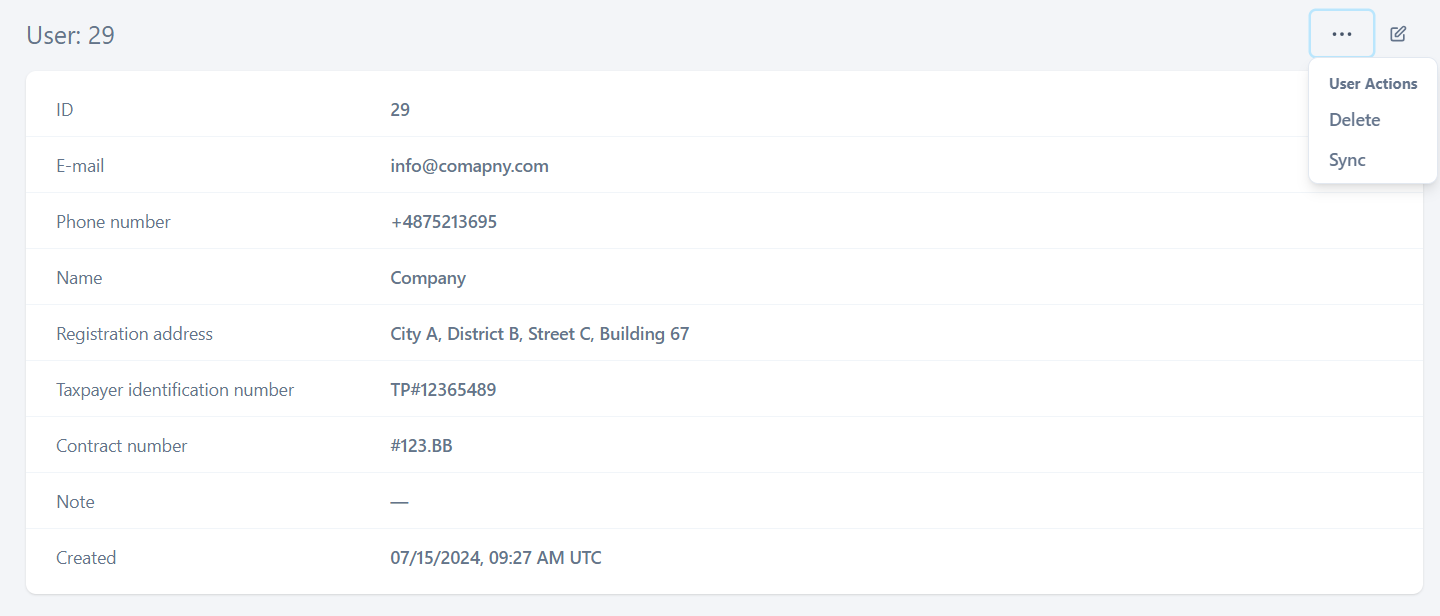
Synchronization with the video surveillance platform
Once sync is competed, the user gets access to all private cameras on the video surveillance platform that are attached to the folder.
To detach a folder, follow the steps:
In the B2B user card, navigate to the Private folders (private access) section.
Select the checkboxes of relevant folders to detach.
From the Actions drop-down, select Detach folder.
.png?inst-v=c246fb15-1530-4ba8-b650-c220381b36ae)
Detaching a folder
Confirm the action.
Synchronize the introduced changes with the video surveillance platform.
Link with addresses
To link a B2B user and a camera that is attached to and address, follow the steps:
Navigate through the Users section > B2B Users. Select a relevant user to access their card. For this, select the ID for this user or select the View (eye) icon.
On the opened page, under Linked addresses (public access), select Attach address.
On the next opened page, start typing an address and then select a relevant address from the drop-down list.
Select a relevant address and Attach address.
Repeat the steps if the users should be linked to multiple folders.
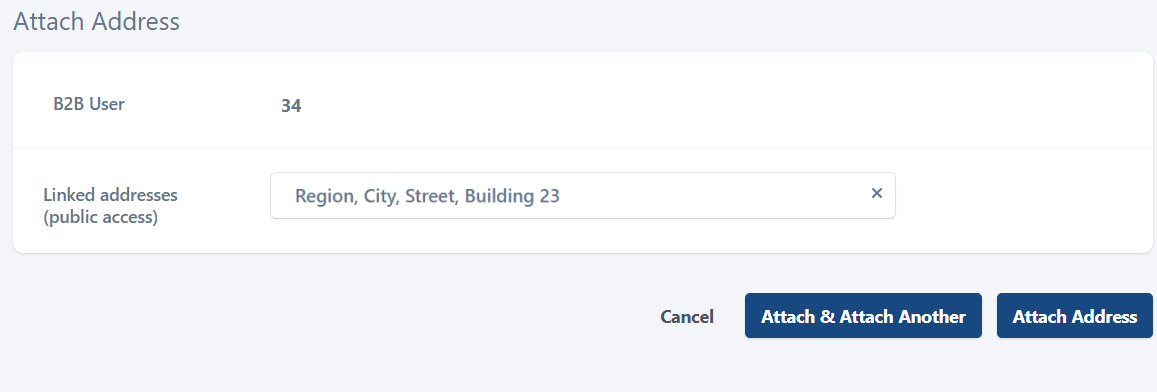
Attaching an address
As a result:
An attached address will be listed in the Linked addresses (public access) section for this user.
The cameras that are attached to this address will also be linked to the current user.
Next, synchronize the introduced changes with the video surveillance platform.
You should perform synchronization in cases, when an address was initially associated with a user, and only then was a camera linked to the address.
If a camera was initially linked to an address and synchronized, and only then was the address associated with the user, changes will automatically synchronize with the video surveillance platform.
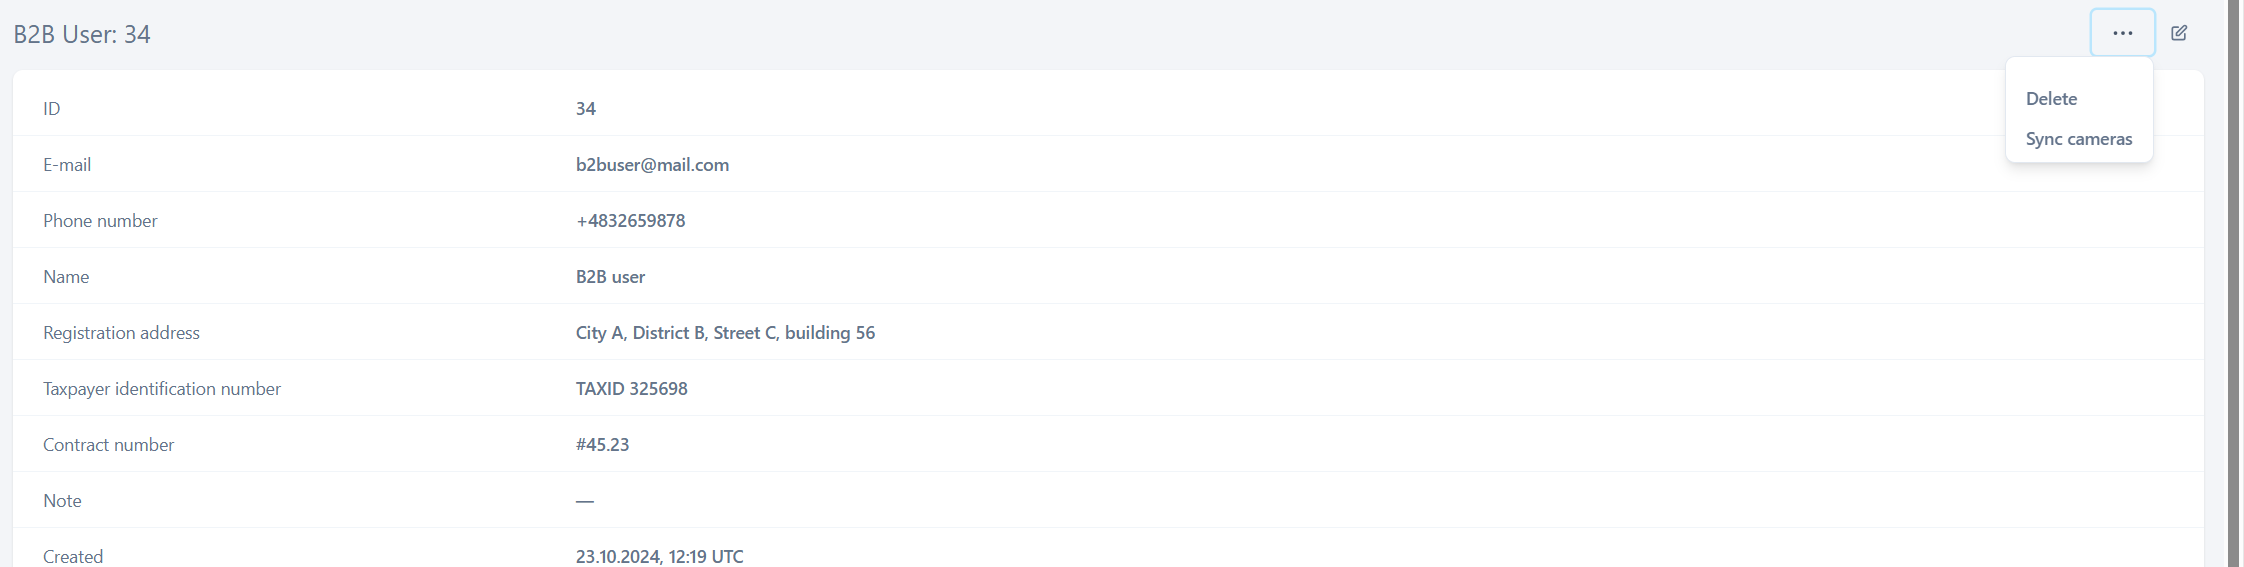
To perform synchronization, call out the context menu at the top-right of the page and select Sync cameras.
Initiating the sync process
Once sync is competed, the user gets access to all cameras on the video surveillance platform that are attached to this address.
To detach an address, follow the steps:
In the B2B user card, navigate to the Linked addresses (public access) section.
Select the checkboxes of relevant addresses to detach.
From the Actions drop-down, select Detach.
Confirm the action.
.png?inst-v=c246fb15-1530-4ba8-b650-c220381b36ae)
Detaching an address