Video streams
On the Video Streams tab, you can configure low and high-quality video streams or view the parameters of the streams.
You can perform the following actions with regard to a stream:
Add and delete a stream.
Restart a stream.
Enable and disable a stream.
Transfer a stream to another media server.
Enable and disable audio for the stream.
View the stream parameters.
Navigate to the parameters page of the media server to which the stream is distributed.
Video streams can be added in three ways:
Manually, when the user manually adds a camera.
Manually, when the camera is automatically added in the system.
Automatically, when the camera is automatically added in the system.
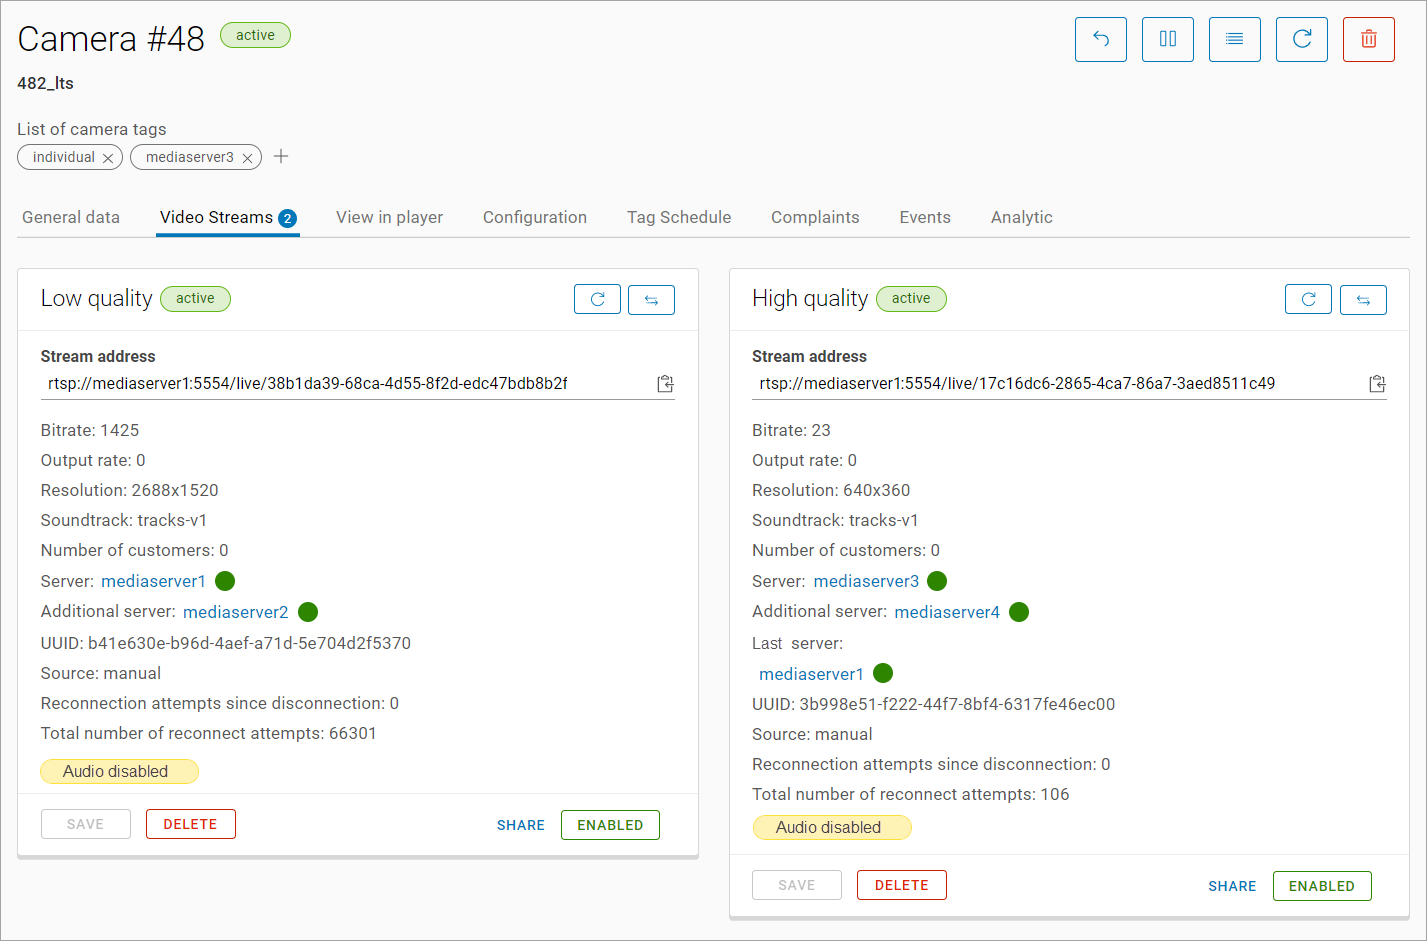
The Video Streams tab
You can track the following details of a stream:
The video stream status:
Empty – when no link to the stream is added.
Initialization.
Active.
Inactive.
You can track the following additional characteristics for the cameras with error steams: Incorrect, Problematic, Disabled. Selecting this characteristic navigates you to the Incorrect cameras section. The characteristic is displayed when the Incorrect cameras function is enabled in the media server settings on the General data tab (see the View and edit a media server documentation section).
The Restart button. Selecting this button, you will restart the stream.
The Transfer stream button. Selecting this button, you will transfer the stream to another media server (see the details below).
The Stream address input field. You can get the address of a low and high-quality streams in the camera management web interface, refer to the documentation of the camera manufacturer.
Bitrate indicates the stream bitrate.
Output rate indicates the current bitrate value delivered to users.
Resolution indicates the image resolution.
Number of customers. Refers to the current count, which was updated when the media server was recently queried.
Server. Refers to the main media server to which the stream is distributed. Selecting the name of the server, will navigate you to the card with the details of the media server.
Additional server. Refers to the additional media server reserved for the stream backup in case the main media server fails. Selecting the name of the server, will navigate you to the card with the details of the media server.
UUID. Refers to the stream UUID.
Source. Refers to the way the stream was added: manual or auto.
Reconnection attempts since disconnection. Refers to the number of reconnection attempts since the connection was lost.
Total number of reconnect attempts. Refers to the total number of reconnection attempts.
Has audio track. Refers to the audio recording for cameras with this feature.
The Save button to save changes when updates are introduced.
The Delete button.
You can delete streams that were manually added to the camera.
The Enabled button. Refers to the enabled stream. You can select this button to disable the stream.
The Share button. Select this button to generate a link and share it with external users to view the camera video (see the details below).
Transfer a stream
To transfer a stream to another media server, select the Transfer stream button.

Transfer of a stream
Consequently, the system initiates an automatic search for relevant media servers. The search process takes into account the following factors:
If the stream is reserved on an additional media server, and the media server group is specified in the camera settings, the system performs a search for two media servers within the clusters of the group. These servers are the main server and the additional server. If no group is specified in the camera settings, but the camera IP address belongs to a subnet of one of the groups, the system performs a search for media servers within the clusters of the group. If no group is specified in the camera settings, and the camera IP address does not belong to any of the subnets of the groups, the system performs a search for media servers within the clusters outside the group.
If the stream is not reserved, the system performs a search for the main media server among the non-clustered media servers. When the search is completed, you can select a cluster with two media servers to reserve the stream on an additional media server.
During the search process, the media server is subjected to a series of checks to ensure optimal performance and functionality. These checks include:
The distribution must be enabled on the media server.
The number of streams being processed by the media server should not surpass the predefined limit.
The bitrate of the media being streamed should not exceed the set limit to ensure smooth streaming.
The group assigned to the media server should correspond with the group assigned to the camera.
The storage used by the media server should not exceed 80% of its total capacity. This is to prevent potential issues related to storage overflow.
The search result will be displayed to you, as on the image below.
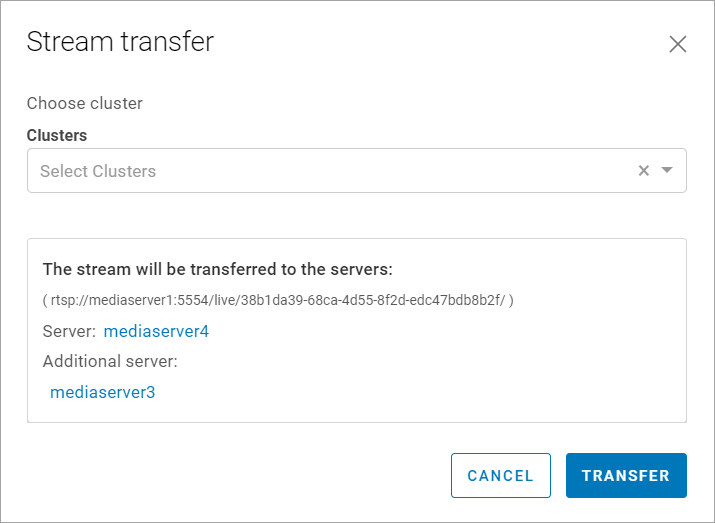
The results of the search
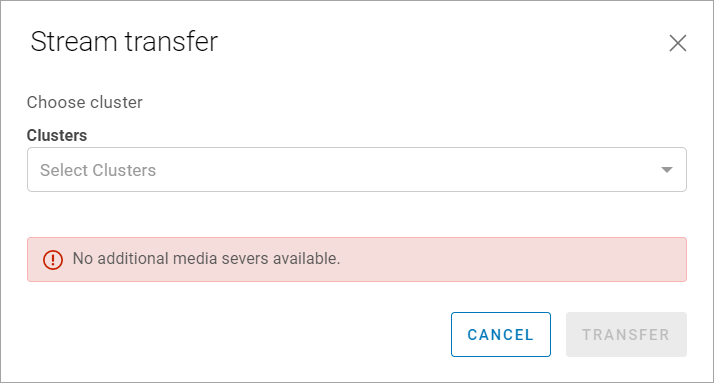
An additional media server is not found
Once the automatic search concludes, you can manually choose a cluster from the list of all clusters. In this scenario, a search operation is carried out within the chosen cluster for two media servers – primary and secondary.
When the cluster of media servers meets all the search requirements, you can track the names of these media servers on the form.
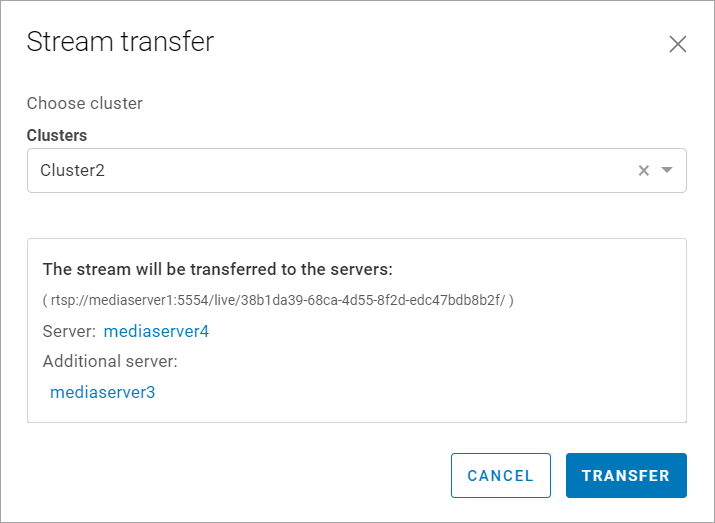
Manual selection of a cluster to transfer a stream
Confirm the stream transfer action by selecting Transfer.
The Transfer stream button becomes unavailable for the subsequent one hour after the transfer.
When transferring a video stream, the archive remains on the original media server. However, the archive indexes are transferred to the new media server.
If archive recording is not enabled, the archive indexes won’t be transferred.
To transfer the indexes, enable the archive recording.
To fix this issue, select the Reload indexes button. This will provide the update of the archive indexes.
The stream activation toggle
The Storing streams (stream activation) toggle is available for cameras that were added automatically or added automatically, including the manual stream activation.

The stream activation toggle
When the camera was automatically added, the toggle is set to automatic stream activation – auto. In this case, you can’t edit the stream address. To enable editing of the stream address, set the toggle to manual. As a result, the stream address can be manually edited.
You can switch to manual mode before the camera gets its IP address via the DHCP server.
When manual mode is selected, the IP address is saved and the auto-provisioning process is stopped.
When you return the toggle from manual to auto, the auto-provisioning process is resumed.
Share
With this function, you can provide access to external unregistered users so they can view camera video. You can generate both permanent and temporary links.
Select Share to open a form and configure the links settings:
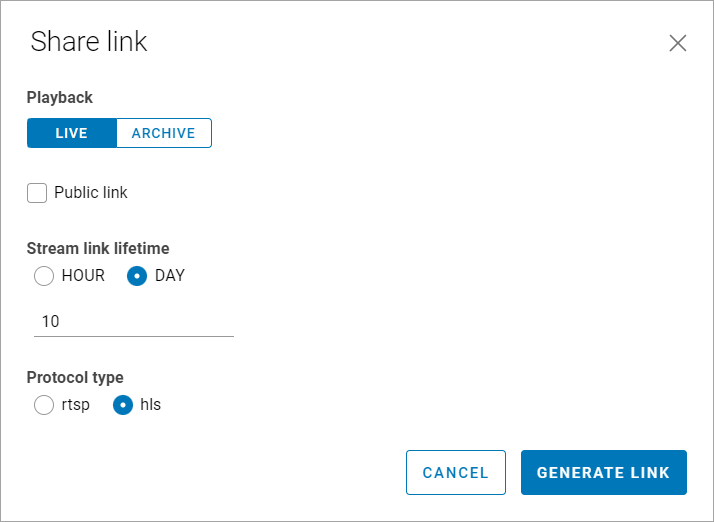
The link generation settings
Choose one of the Playback options:
LIVE. Enable users to view real-time video without access to the archive.
ARCHIVE. Enable users to access the archive starting from the specified date and time. Users will be able to view the archive during the subsequent 24 hours from the specified time.
Archive mode is only available for high-quality streams.
When the Public link setting is enabled, the link becomes available to users without time limit.
When the Public link setting is enabled, access to the camera is granted without a token. To provide external access to the camera, ensure the External access setting is enabled on the General data tab of the camera.
If the Public link setting isn’t enabled, specify a period during which the link is available for users. Depending on the selected button, specify the duration in hours or days. The maximum period is 30 days.
Choose the protocol type:
rtsp – to view the RTSP stream.
hls – to view the HLS stream.
Select Generate link to generate the link. Copy it to share with external users.
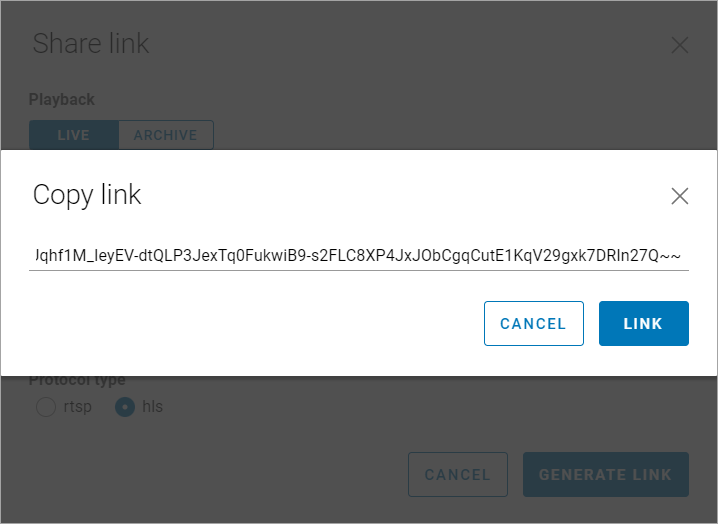
The generated link
