Intercom list
In the Intercom list section, you can add, edit, and delete intercoms.
Available management options:
Add and delete intercoms.
View the list of deleted intercoms.
Access the intercom card to view and edit settings.
Search and filter.
The distribution of intercoms into branches is done in the Intercom tree view section.
The Intercom list section features the following tabs: Added and Deleted. The Added tab lists the added intercoms. The Deleted tab lists the deleted intercoms. Here, you can select the deleted intercom to view its settings details. Deleted intercoms are kept in the list within 30 days from deletion.
The Added tab lists the added intercoms.

The Added tab
The table allows for sorting of intercoms:
By name
By intercom address
By entrance type
By device type
By creation date
By update date
You can search for intercoms:
By name
By address
By UUID
Intercom filtering options are provided:
By entrance (primary, additional, or any)
By vendors
By status
By intercom creation date range
To add an intercom, select Add Intercom. The process of adding an intercom is described in the Add an Intercom documentation section.
To view and edit the intercom settings, select a relevant row. This will redirect you to the intercom card.
Edit a branch and address
You can perform management actions over the added intercom. To access the action menu of the selected intercom, select the vertical ellipses button (⋮) :
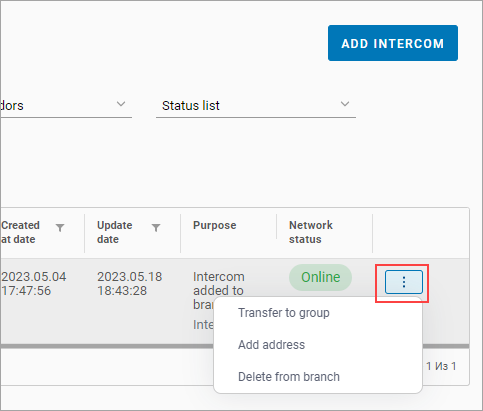
Management actions
The following actions are available:
Move device to a branch. This option is displayed if the intercom is already added to a branch. The action is used to move the intercom to another branch. The intercom tree is managed in the Intercom tree view section.
Add address. Specify the intercom address.
Remove from branch. Remove the intercom from the current branch.