Video streams
On the Video Streams tab, you can configure low and high-quality video streams or view the parameters of the streams.
You can perform the following actions with regard to a stream:
Add and delete a stream.
Restart a stream.
Enable and disable a stream.
Enable and disable audio for the stream.
View the stream parameters.
Navigate to the parameters page of the media server to which the stream is distributed.
Video streams can be added in three ways:
Manually, when the user manually adds a camera.
Manually, when the camera is automatically added in the system.
Automatically, when the camera is automatically added in the system.
.png?inst-v=b63742cc-00c9-4c22-96cb-e64d375db7d7)
The Video Streams tab
You can track the following details for a stream:
The stream name indicator – Low quality, High quality.
The video stream status:
Empty – when no link to the stream is added.
Initialization.
Active.
Inactive.
You can track the following additional characteristics for the cameras with error steams: Incorrect, Problematic, Disabled. Selecting this characteristic navigates you to the Incorrect cameras section. The characteristic is displayed when the Incorrect cameras function is enabled in the media server settings on the General data tab (see the View and edit a media server documentation section).
The Restart button. Selecting this button, you will restart the stream.
The Share button. Select this button to generate a link and share it with external users to view the camera video (see the details below).
The Archive settings button. Selecting this button, will navigate you to the Archive tab to manage the camera archive settings.
Each stream has a clear indication of the archive recording: either Archive recording or Without archive recording.
The Stream address input field. You can get the address of a low and high-quality streams in the camera management web interface, refer to the documentation of the camera manufacturer.
Bitrate indicates the stream bitrate.
Output rate indicates the current bitrate value delivered to users.
Resolution indicates the image resolution.
Number of customers. Refers to the current count, which was updated when the media server was recently queried.
Server. Refers to the main media server to which the stream is distributed. Selecting the name of the server, will navigate you to the card with the details of the media server.
Additional server. Refers to the additional media server reserved for the stream backup in case the main media server fails. Selecting the name of the server, will navigate you to the card with the details of the media server.
UUID. Refers to the stream UUID.
Source. Refers to the way the stream was added: manual or auto.
Reconnection attempts since disconnection. Refers to the number of reconnection attempts since the connection was lost.
Total number of reconnect attempts. Refers to the total number of reconnection attempts.
Has audio track. Refers to the audio recording for cameras with this feature.
The Save button to save changes when updates are introduced.
The Delete button.
You can delete streams that were manually added to the camera.
The Enabled button. Refers to the enabled stream. You can select this button to disable the stream.
The stream activation toggle
The Storing streams (stream activation) toggle is available for cameras that were added automatically or added automatically, including the manual stream activation.
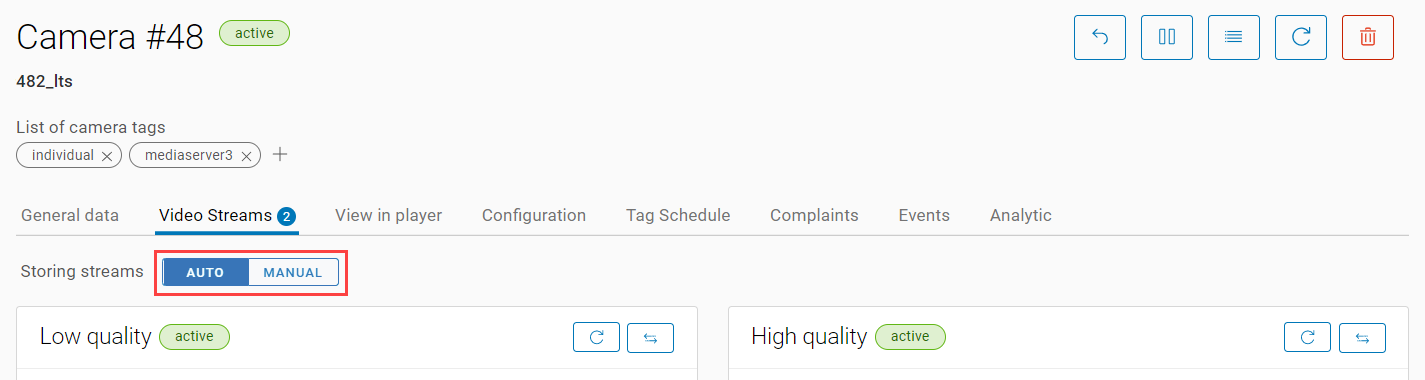
The stream activation toggle
When the camera was automatically added, the toggle is set to automatic stream activation – auto. In this case, you can’t edit the stream address. To enable editing of the stream address, set the toggle to manual. As a result, the stream address can be manually edited.
You can switch to manual mode before the camera gets its IP address via the DHCP server.
When manual mode is selected, the IP address is saved and the auto-provisioning process is stopped.
When you return the toggle from manual to auto, the auto-provisioning process is resumed.
Share
This function provides external, unregistered users with access to view camera footage. A separate link is generated for each camera stream.
To generate a link, follow the steps:
Select a stream to generate a link you would like to share.
Select the Share icon to open a form and configure the links settings:
The Archive option is available for the HD stream only.
Choose one of the Playback options:
LIVE. Enable users to view real-time video without access to the archive.
ARCHIVE. Enable users to access the archive. When setting up a link to the archive, you must specify the date and time from which the archive is available. The archive link is accessible for 24 hours from the specified date.
Specify the link validity period in hours or days.
Choose the protocol type:
rtsp – to view the RTSP stream.
hls – to view the HLS stream.
To complete the link generation, select Generate link.
Copy the generated link and share it with external users.
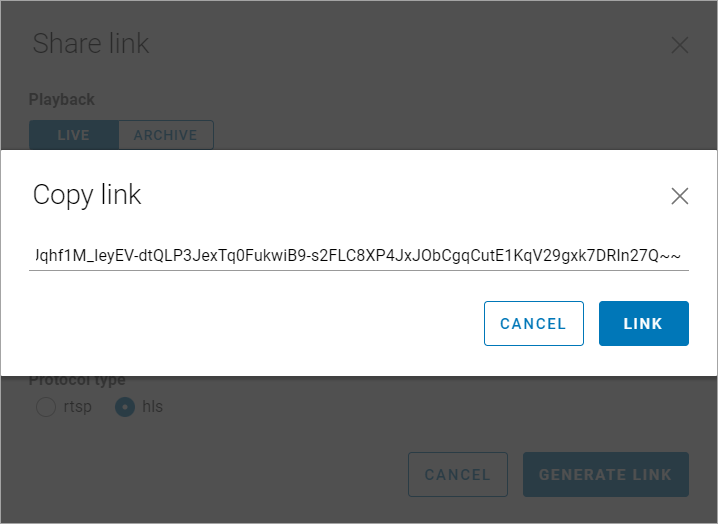
The generated link