Viewing cameras in a layout
On this page:
When viewing cameras in a layout, two modes are available:
Live stream mode
Archive viewing mode
The set of functions available depends on the mode.
You can open the layout in full screen mode. To do this, click the button in the upper right corner of the layout.

Button to switch to full screen mode
As a result, only the current layout will be displayed on the screen.
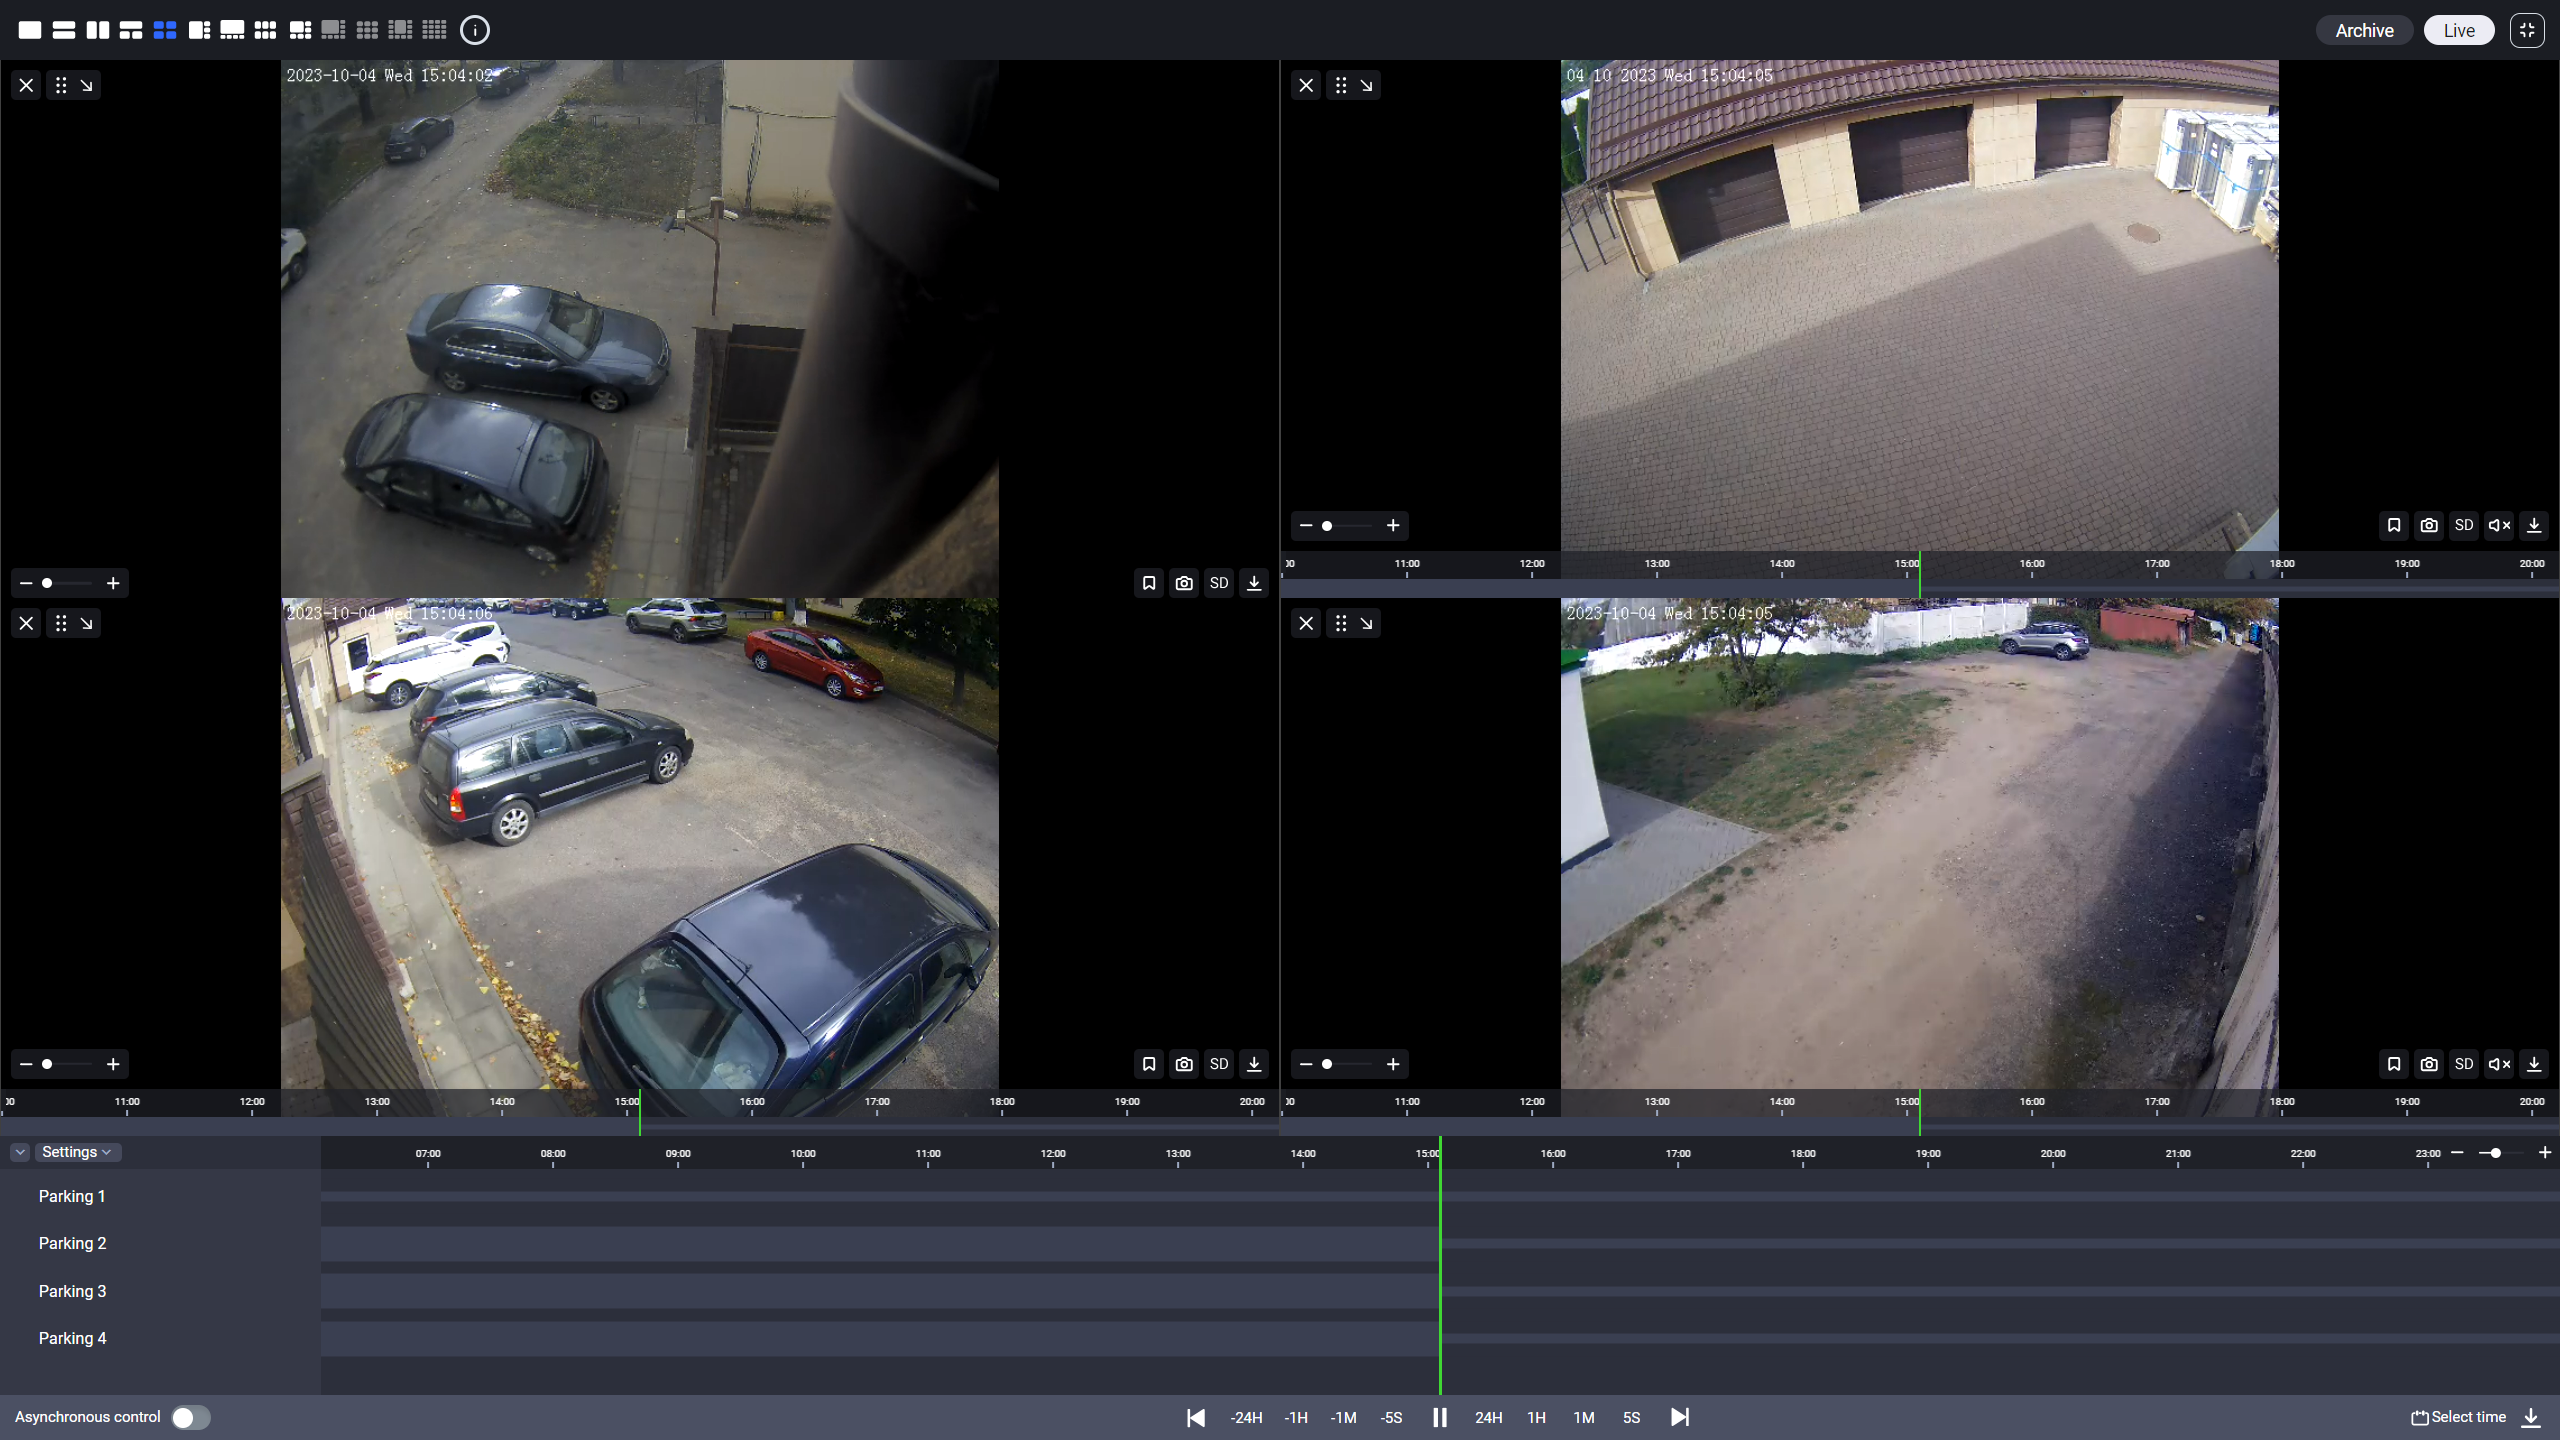
Full screen mode
To exit full screen mode, press the button again or press the Esc key.
Live stream mode
In Live stream mode, users have access to the following functions:
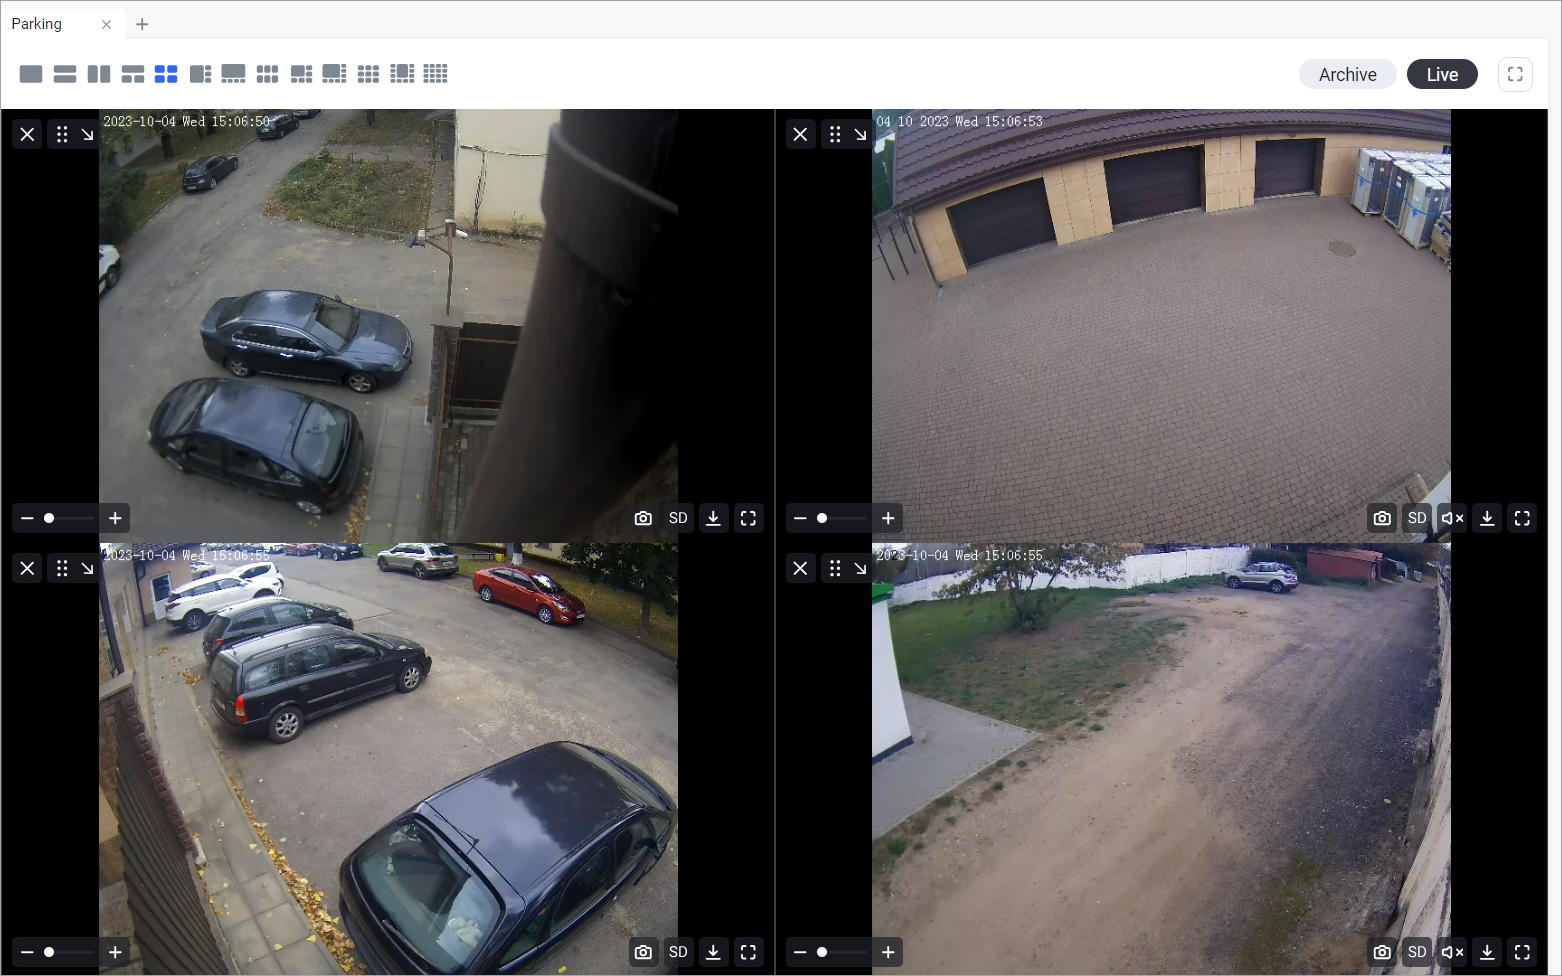
Viewing cameras in live stream mode
Displaying the camera name. Click on the camera name to hide/show it
Digital zoom in/out of the image. Move the slider right/left to increase/decrease the image size, respectively
Saving a screenshot as a PNG file
Changing the video stream quality
For cameras with PTZ functionality, controlling the lens direction and optical zoom
For cameras with audio recording support, enabling/disabling audio
Downloading archives (description provided in the «Viewing video in the player» section)
Viewing images in full-screen mode
To switch to archive viewing mode, click on the «Archive» button.
Archive viewing is available only for layouts that include up to six cameras. When viewing other layouts in live stream mode, the «Archive» button will be disabled.
Archive viewing mode
In archive viewing mode, the following features are available:
Time management for viewing, both for each camera separately and for all cameras simultaneously
Viewing analytics events
Viewing user-defined labels
Downloading archives from multiple cameras simultaneously
The layout view in archive viewing mode:
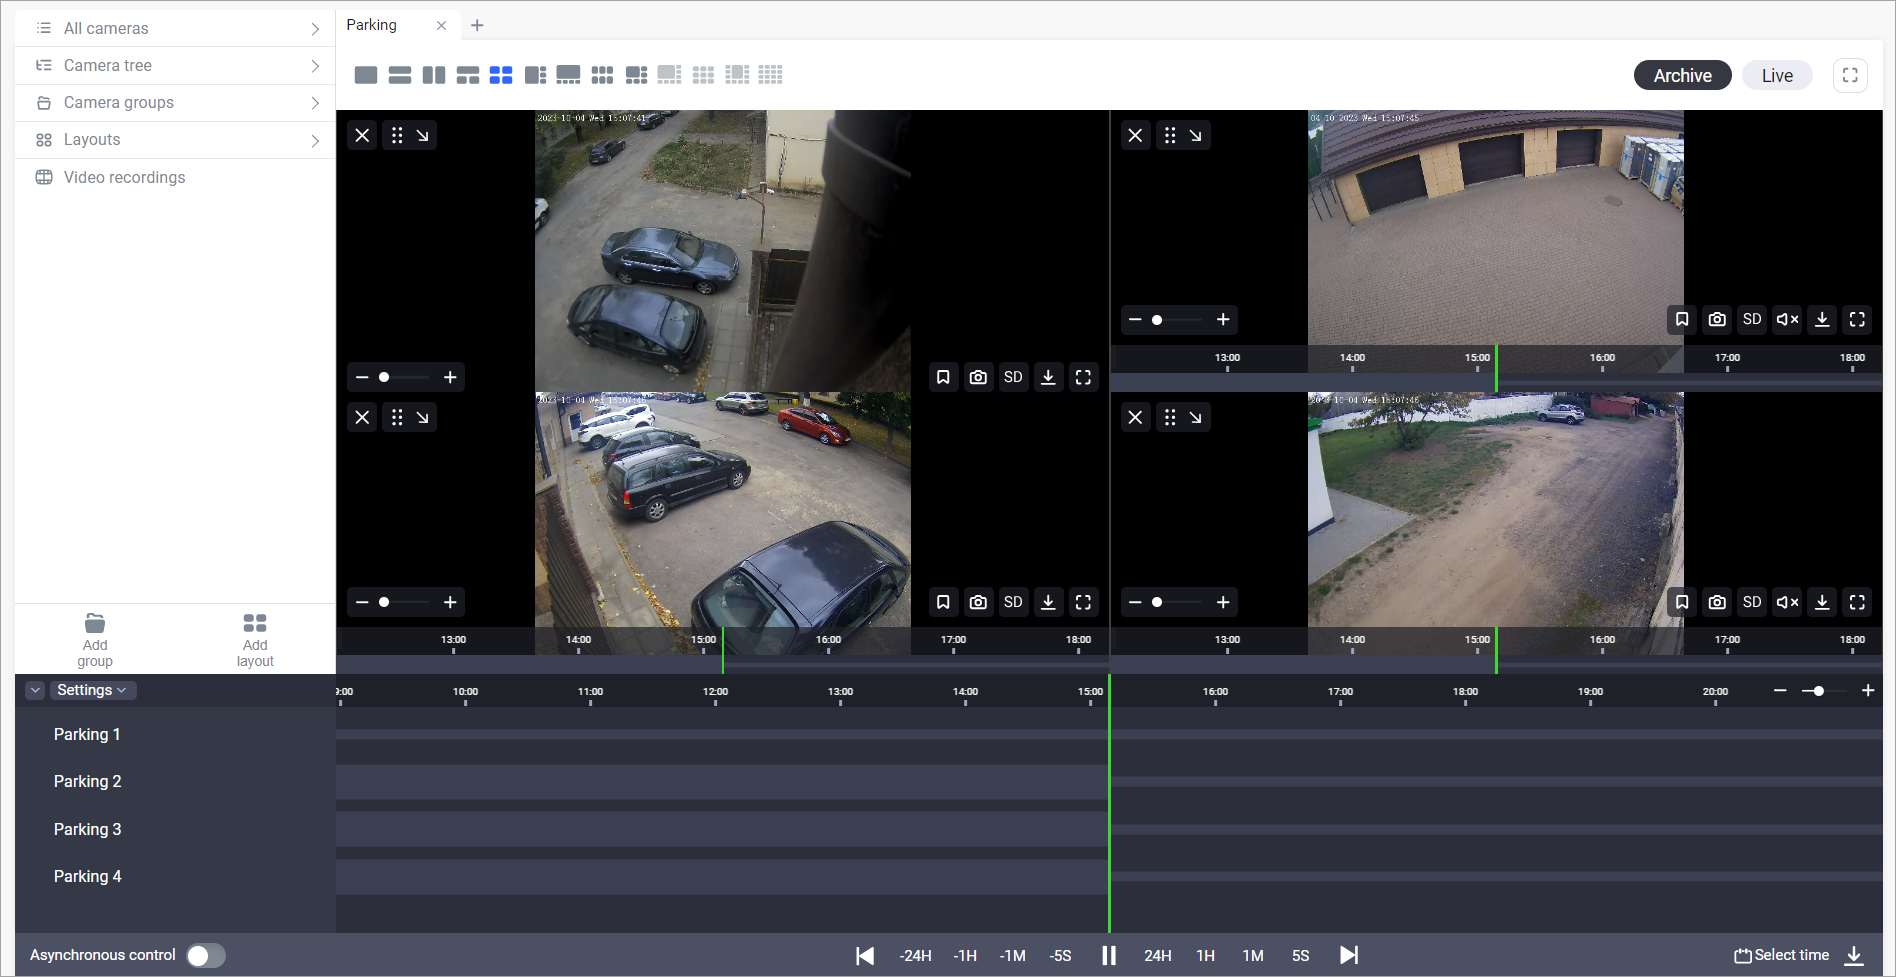
Viewing cameras in archive mode
Managing viewing time
The timelines of each camera are displayed at the bottom of the workspace. Their movement depends on the «Asynchronous control» switch.
If asynchronous control is enabled, you can move each camera's timeline independently of the timelines of other cameras, allowing you to set the date and time for each camera separately.

Asynchronous control enabled
In addition, each timeline displays:
Divisions of the time axis. The granularity of the scale is adjustable using the slider on the right.
Date and time
If asynchronous control is disabled, all timelines move simultaneously. Consequently, the same date and time for archive viewing are set for all cameras.

Asynchronous control disabled
This displays only the overall timeline and the overall date and time of the viewing.
Timelines are also displayed on the image from each camera. Their movement is independent of the asynchronous control switch.
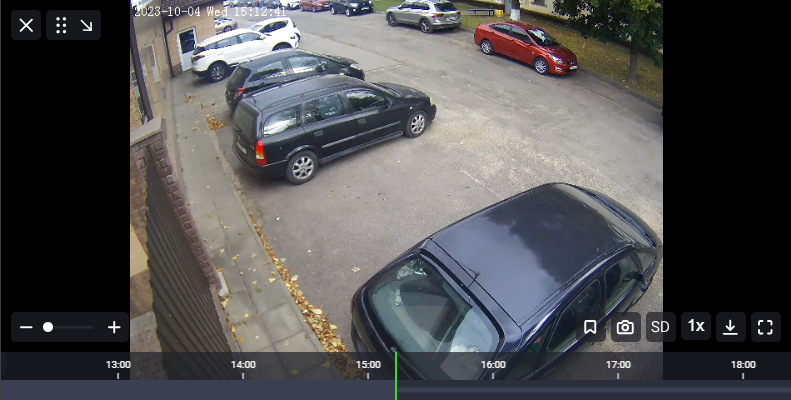
Timeline on the image
Analitycs event viewing
The system provides the display of analytics events on the timeline.
You can enable event display for all selected cameras simultaneously or for each camera individually.
To enable simultaneous event display for all cameras, follow these steps:
Click «Settings»
Select «Events»
Check the events you want to display
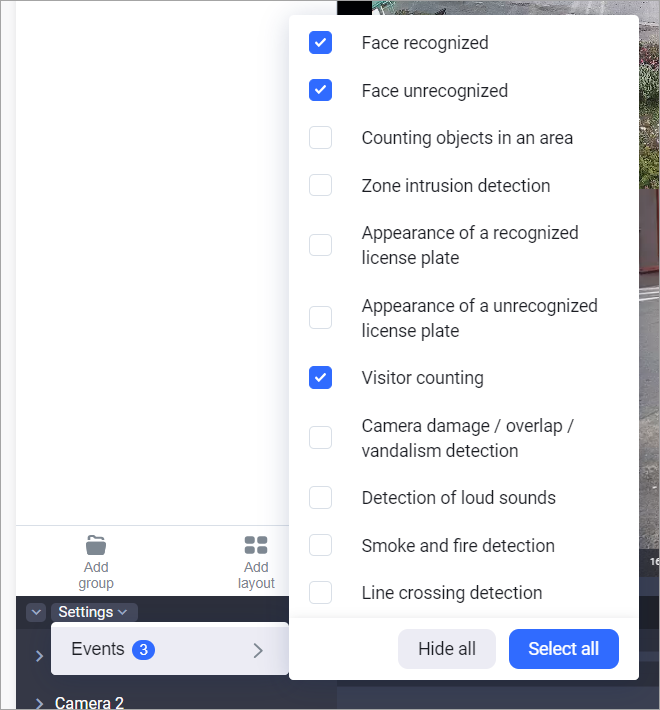
Selecting analytics events for all cameras
Events will be displayed on the timeline immediately after their selection.
To enable event display for a specific camera, follow these steps:
Hover over the camera name and click the control button
Select «Events»
Check the events you want to display
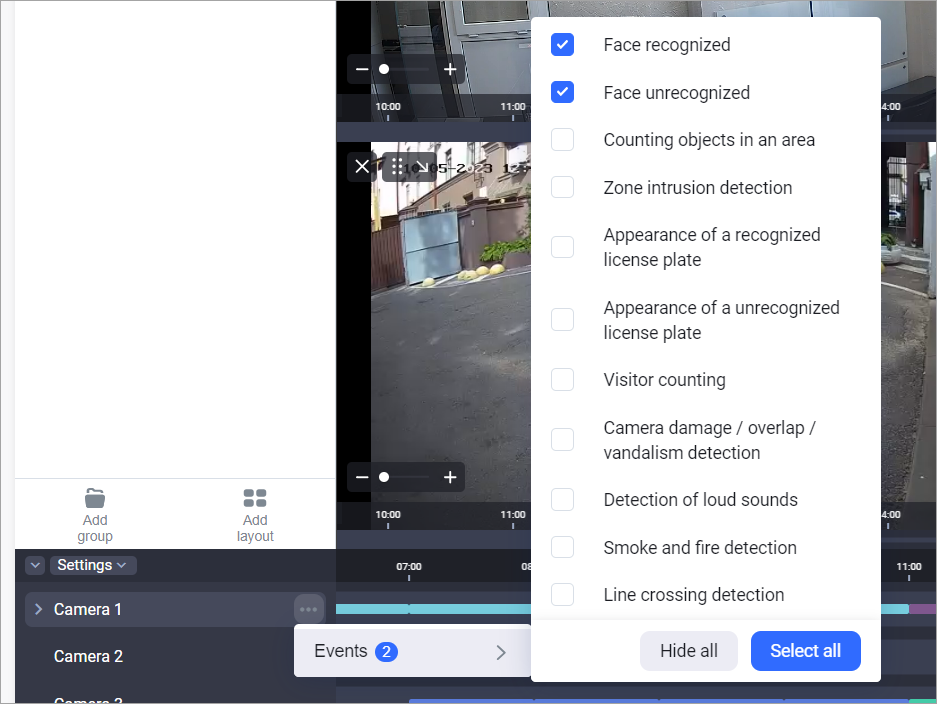
Selecting analytics events for one camera
Events will be displayed on the timeline immediately after they are selected. At the same time, events differ in color depending on the analytic types.

Displaying events on the timeline
In cases where a large number of events on the timeline makes it difficult to view them, detailed viewing is available. To do this, click the «˅» symbol in front of the camera name. As a result, each type of event will be displayed on a separate timeline.

Detailed display of events
View and add custom events
The system allows for adding custom events and displaying them on the camera timeline.
Custom events can only be set in archive viewing mode.
Custom events are set for each camera separately.
To set a custom event, follow these steps:
On the camera image, click on the button for managing user events:
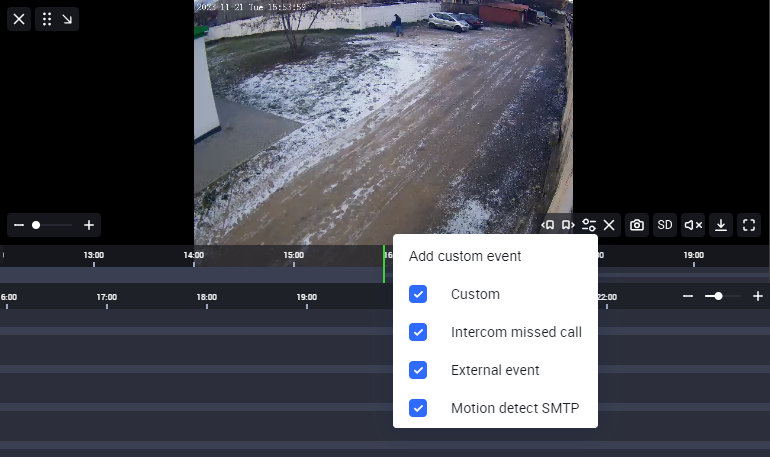
Click on the custom events button and select «Add custom event»

Adding a new custom event
As a result, the form for adding a custom event will be displayed.
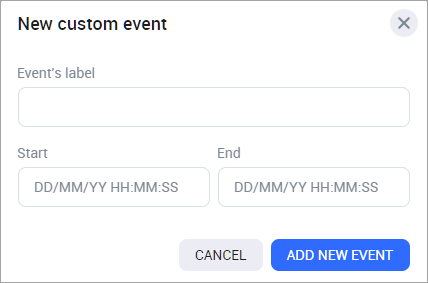
Add custom event form
Enter the event name and time period
Click «Add new event»
The custom event label only appears in the camera timeline.
Hovering over an event displays information about the custom event.
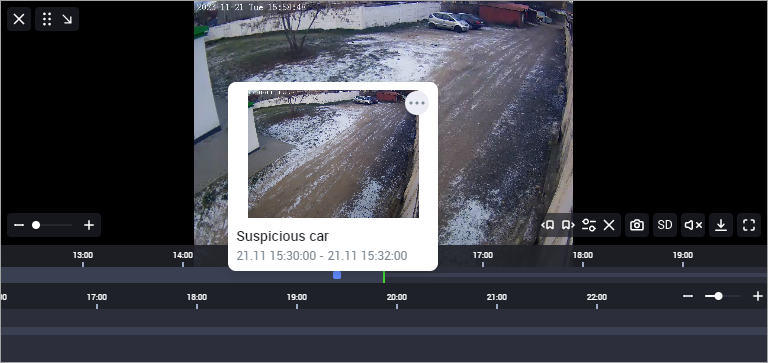
Displaying events on the camera timeline
To move between events, use the «Previous Event» and «Next Event» buttons.
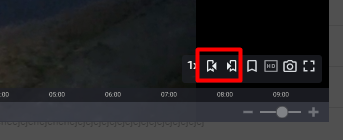
Switching between events
Editing a custom event
To edit a custom event, hover over the event in the camera timeline. Click on the context menu button and select «Edit».
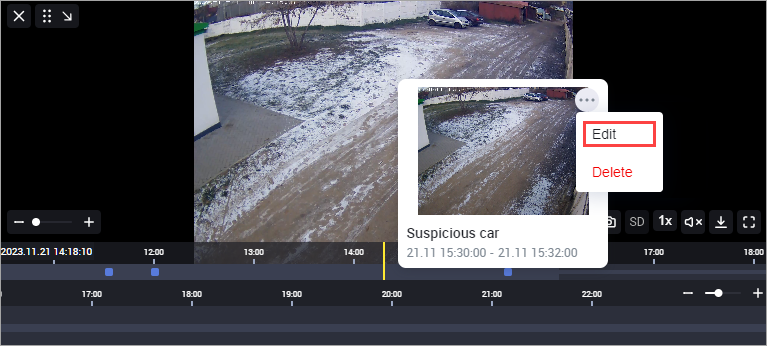
Editing a custom event
As a result, the custom event editing form will be displayed. On it you can change:
Custom event name
Event start and end timestamps
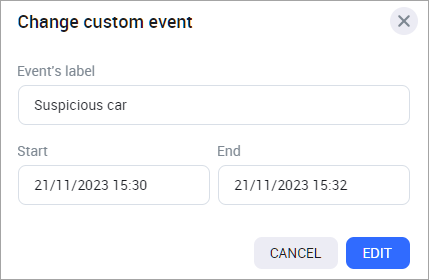
Custom event edit form
After making changes, click «Edit».
Deleting a custom event
To delete a custom event, hover over the event in the camera timeline. Click on the context menu button and select «Delete».
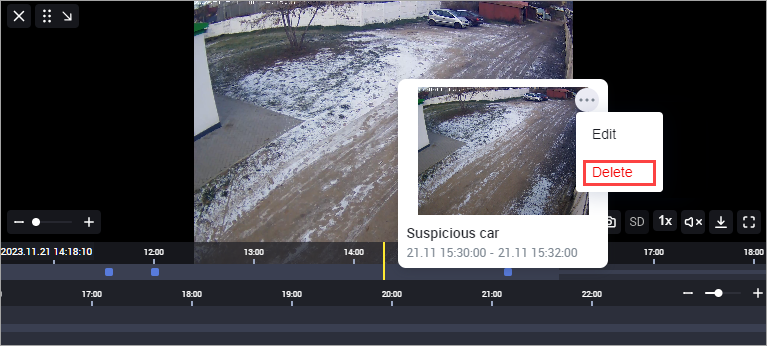
Deleting a custom event
Confirm deletion.
