Camera provisioning steps
The camera provisioning steps are as follows:
Creation of a network device: receiving data from the customer billing system, reserving an IP address.
Creation of a camera profile: retrieving data from the customer billing system.
Manage RTSP streams: add streams to the platform and set them up streams on the Mediaserver.
Apply the overall configuration settings – proceed to add the specific camera configuration.
Alongside each stage, we've outlined the expected outcome upon completion. To delve deeper into the specifics of any stage, select the corresponding button.
The Network devices section
Under Network devices, you can find the following network device data that is received from the customer billing system:
A network device serial number.
A network device MAC address.
A network device IP address.

The network device data
In order to release the IP address reservation, select the Remove Reservation button.
If a stage fails to complete successfully, you can manually reserve an IP address. To do so, select Reserve.

Network device data
Information about the network device can also be found on the General data tab.
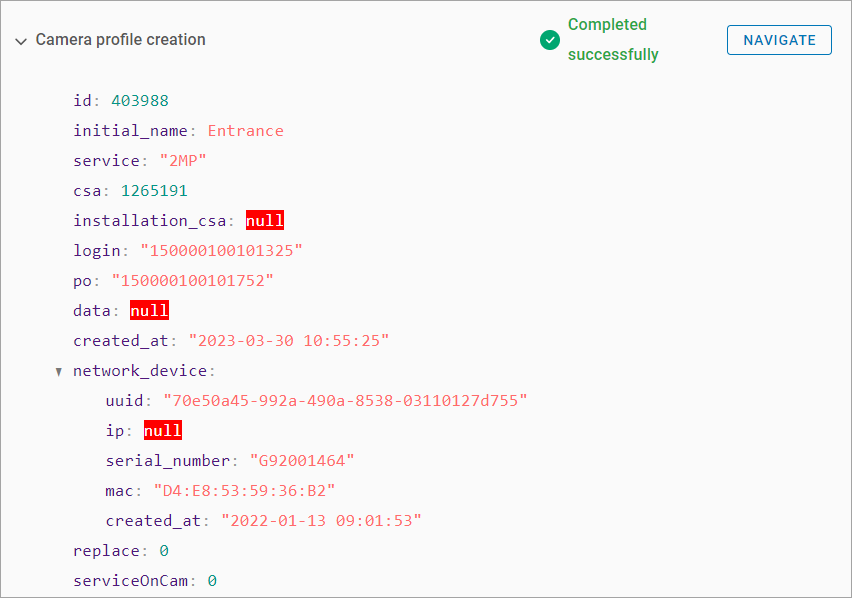
The Camera profile creation section
Under Camera profile creation section, you can find the camera profile details. This details can also be found on the General data tab.

The camera profile
Manage RTSP streams
Under RTSP streams, you can find the following information:
A high-quality stream address.
The server address to add a high-quality stream.
A low-quality stream address.
The server address to add a low-quality stream.
If the automatic process fails, the Get button becomes available. This button allows you to manually retrieve the stream addresses for each stream.
.png?inst-v=1d934989-adc9-47d4-b93e-1c2e7354ae81)
The Get button
If the stream wasn’t added to the server, the Add to server button becomes available. This button allows you to try connecting to the server again and adding the stream.
.png?inst-v=1d934989-adc9-47d4-b93e-1c2e7354ae81)
The Add to server button
The Configurations section
Under Configurations, you can find the following information about the camera:
A device manufacturer.
A device model.

Applying the configuration
