Private folders
To create a private folder, navigate to the card of the last address element. Under Linked devices: Cameras (private folders), select the Create button.
.png?inst-v=c246fb15-1530-4ba8-b650-c220381b36ae)
The Create button
Complete the Folder name field and select Create.
.png?inst-v=c246fb15-1530-4ba8-b650-c220381b36ae)
Creating a folder
Once the folder is created, you are automatically redirected to the folder card.
The card of a private folder
The private folder group information in the blocks.
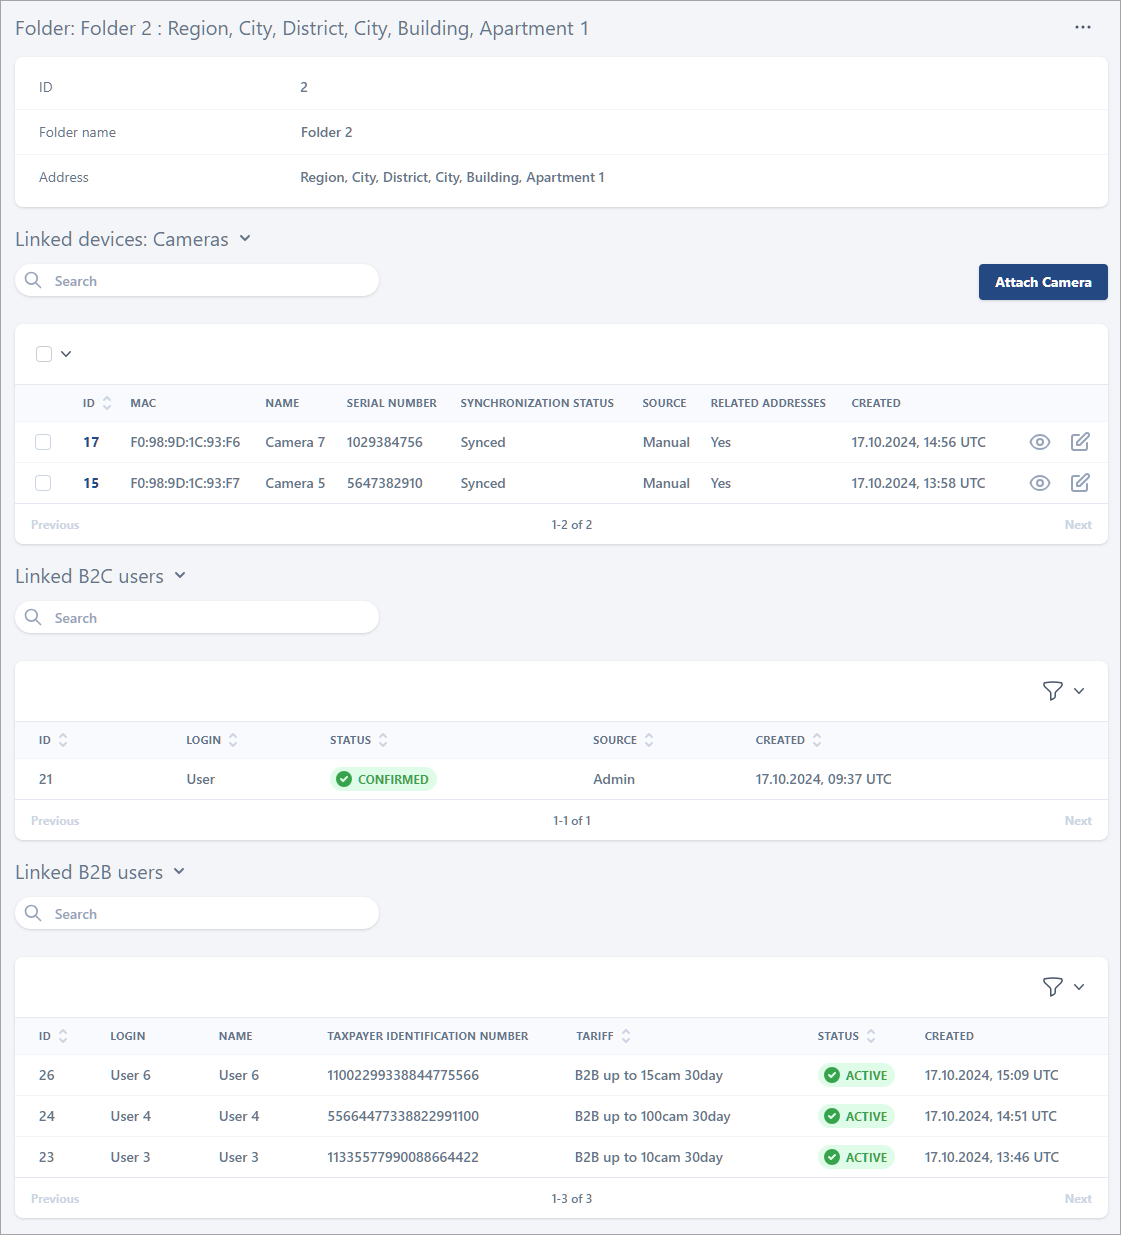
The private folder card
The section with general details lists the following:
ID. The folder ID is automatically generated for the created private folder.
Folder name. The folder name is given during the folder creation. You can edit the name.
Address. The address the current folder is linked to.
The Linked devices: Cameras section lists the cameras linked to the current private folder. You can add and delete cameras from here. The detailed description of the section is provided below.
The Linked B2C users section lists the B2C users linked to the current private folder to be able to access cameras. You can only view the list. To link a B2C user with this folder, navigate to a B2C user card.
The Linked B2B users section lists the B2B users linked to the current private folder to be able to access cameras. You can only view the list. To link a B2B user to a private folder, navigate to a B2B user card.
To attach a camera to a private folder:
In the relevant folder, select Attach camera in the Linked devices: Cameras section.
.png?inst-v=c246fb15-1530-4ba8-b650-c220381b36ae)
Attaching a camera
In the opened panel, choose a camera from the drop-down list. The listed cameras are available because they aren’t attached to any private folder and address. Select a camera and Attach camera.
As a result, the selected camera is attached to the private folder.
You can attach a camera to a specific address in the Devices > Cameras section, when viewing a camera card.
If the camera is synchronized with the Administrator client of the video surveillance platform (VMS), linking the camera to the private folder will be automatically synced with the platform as well. Otherwise, navigate to the camera card and perform synchronization.
To add more cameras, repeat these steps.
To detach cameras from a private folder:
Select the checkboxes of relevant cameras.
From the drop-down Actions menu, select Detach cameras.
Delete a private folder
To delete a private folder from within an opened private folder:
At the top-right of the opened private folder, select the horizontal ellipses icon (…) to call out the context menu.
From the menu, select Delete folder and confirm the action.
You can delete a folder if it doesn’t contain cameras.
You can also delete a private folder when in the address card.
To delete a private folder from the address card:
In the Linked devices: Cameras (private folders) section of the address card, select the checkboxes of relevant folders.
From the Actions drop-down menu, select the Delete folder action.
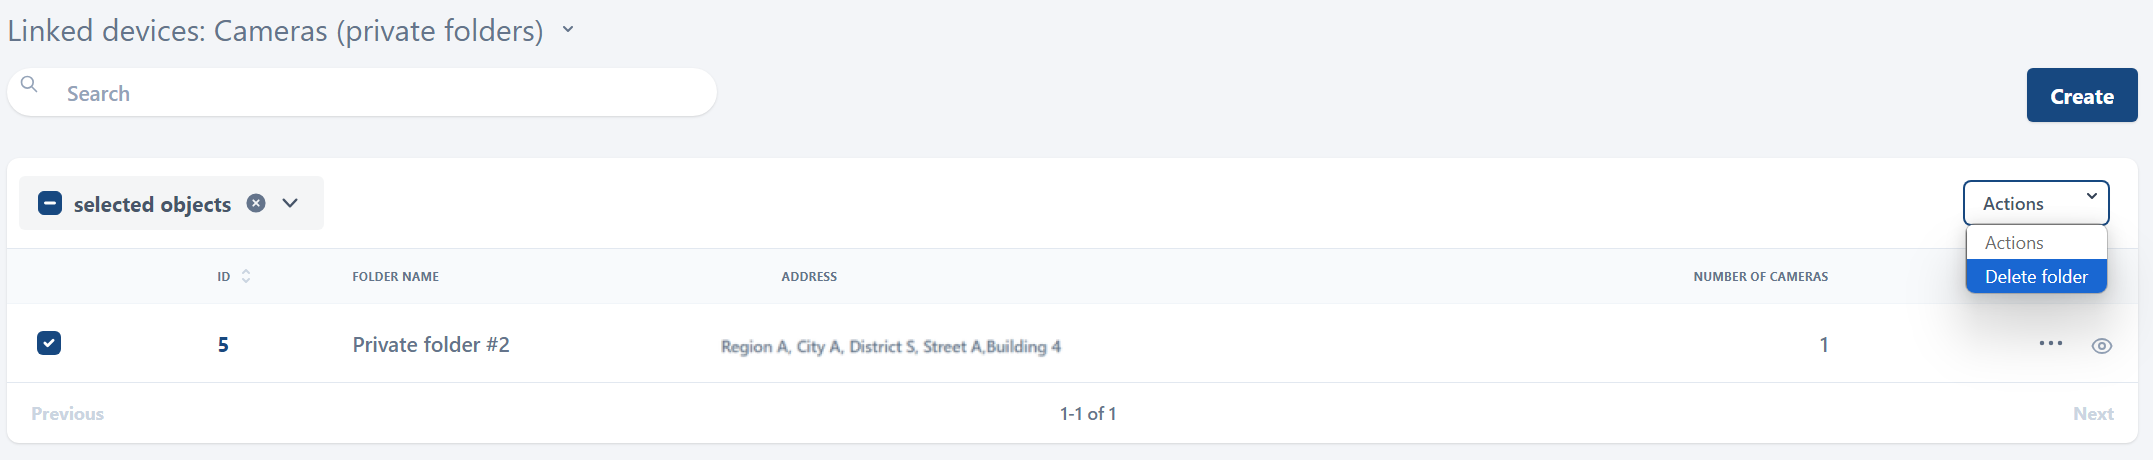
Deleting a folder