General timeline. Archive/DVR
The general timeline controls are as follows:
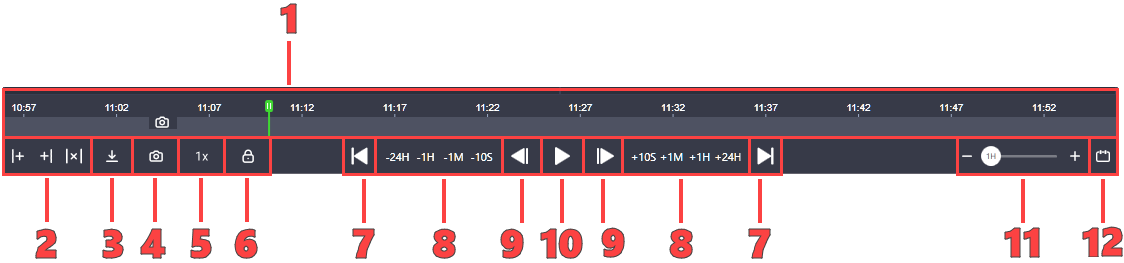
The general timeline controls
1 – The general timeline of the layout cameras.
2 – The buttons to define the start and end of the archive segment to download. The crossed icon is Reset the selection.
3 – The Save selected video button to download the archive segment.
4 – The button to take the screenshot of the layout.
5 – The button to adjust the playback speed.
6 – The general timeline lock (the On/off main timeline button).
7 – The buttons to navigate to the beginning and end of the archive.
8 – The buttons rewind or fast-forward by a set interval.
9 – The timeline start and end buttons that provide direct access to the beginning and end of the general timeline.
10 – The stop/start playback button.
11 – The slider to zoom in or out on the timeline. Implies changing the level of detail shown.
12 – The calendar to select the date and time to view archived recordings.
The following is a detailed description of each control.
1. The general timeline
The general timeline enables you to simultaneously control over the viewing time of all cameras on the current layout. The slider indicates the current playback moment.
Hovering over the timeline displays a preview of the archived video at the selected point, along with its specific date and time.
To watch video from a specific time, simply left-click that point on the general timeline.
To drag the timeline, select and drag it horizontally using the right mouse button.
To adjust the timeline detail, use one of the options:
Hover over the relevant section and hold CTRL while scrolling the mouse wheel. This allows you to zoom in and out for the necessary level of detail.
Use the slider (#11) to zoom in or out on the timeline. Implies changing the level of detail shown.
2 and 3. Define the start and end of the archive segment to download. Download the archive segment
The archive export feature on the general timeline allows you to download a specific video segment of archived video, either for all cameras on the layout or for a specific camera.
120 minutes is the maximum duration that can be downloaded at a time.
To download an archived segment, follow the steps:
Define the start and end of the archive segment to download in one of the following options:
Use the Save selected video button (#3).
From within the general timeline of the layout.
Option #1: select the Save selected video button (#3) on the general timeline
Option #2: from within the general timeline of the layout
On the general timeline, left-click the relevant time point to set it as the start of the segment to download. Next, select the Start of fragment to save button (#2). As a result, the green slider will move to this point on the general timeline as well as on the individual timelines of all unlocked cameras on the layout.
.png?inst-v=b63742cc-00c9-4c22-96cb-e64d375db7d7)
Selecting the segment duration
Next, select the end time for the segment to download. For this, on the general timeline, left-click the relevant time point to set it as the end of the segment to download. Next, select the End of fragment to save button (#2). As a result, the green slider will move to this point on the general timeline as well as on the individual timelines of all unlocked cameras on the layout.
.png?inst-v=b63742cc-00c9-4c22-96cb-e64d375db7d7)
The defined segment
To reset the segment duration, use the crossed icon – the Reset button.
To download the selected segment, choose the Save selected video button.
If you block the main timeline (the On/off main timeline button), this will disable the buttons ![]() to specify the archive segment range. The exception is the case, when an individual camera cell is active (highlighted green). In such a case, the buttons remain active for this selected cell, and you can download an archive segment of the selected camera.
to specify the archive segment range. The exception is the case, when an individual camera cell is active (highlighted green). In such a case, the buttons remain active for this selected cell, and you can download an archive segment of the selected camera.
However, when the main timeline is active and there is a selected camera on the layout, the set archive range will be applied to all the cameras on the layout.
Once the previous step is complete, the Export archive form opens to complete.
In this form, you can edit the cameras from which the archive segment will be downloaded. It is also possible to make changes to the date and time of the archive segment.
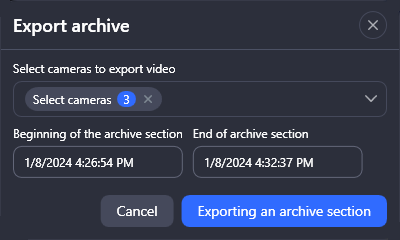
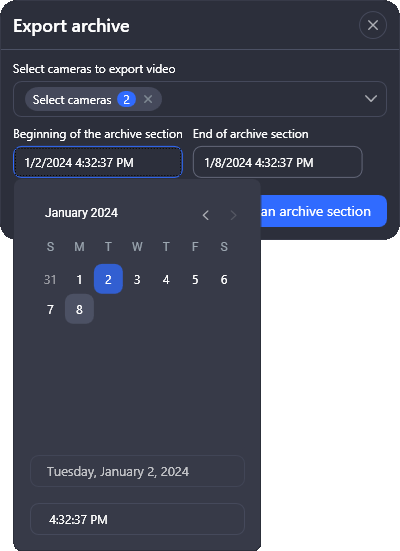
The date and time is adjusted via the calendar.
To complete the export, select Export an archive section.
If you specified a path for saving exported files in the Settings section, the file will be automatically saved to the selected directory. If the path isn’t specified, a directory selection window will be displayed each time the file is uploaded.
As a result, a notification about the start of the file generation process will appear on the screen:
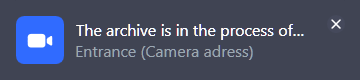
Once the process is complete, the notification will be displayed. To access the downloaded file in the folder, select Show in folder.
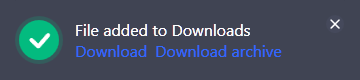
The generated files are also available for download in the Downloads section.
4. Take a layout screenshot
With Screenshot of the layout button, you can take a screenshot of a layout that includes images from all cameras of the current layout.
You can select a default folder to archive files. This folder path is set in the Settings section. If the default folder isn’t set, a window with the folder selection will be displayed each time you save a screenshot.
When you select the icon, a window with the screenshot saving options is displayed.
.png?inst-v=b63742cc-00c9-4c22-96cb-e64d375db7d7)
Select the Add metadata to screenshot checkbox to add data to the screenshot. The following data will be added to each screenshot when the image is saved:
The date and time when the screenshot was saved.
The title of the camera.
The address of the camera.
You can also make a screenshot of the layout as a single screenshot. For this, the Take a screenshot of the layout in one image setting should be checked. If the checkbox remains empty, the screenshot of each camera in this layout will be individually saved.
Save the image by selecting a button:
Copy screenshot saves a screenshot to the clipboard (applicable to the general image).
Save screenshots saves image(s) into PNG files.
5. Playback speed
Allows you to adjust the playback speed on all unlocked cameras.
The following playback speed options are available: 0.5х, 1x (the default standard speed), and 2x.
6. The main timeline lock
If you block the main timeline (the On/off main timeline button), this will disable the possibility to drag the timeline. However, you can still use the Paly/Stop buttons, rewind, and other.
If you block the main timeline (the On/off main timeline button), this will disable the buttons to specify the archive segment range. The exception is the case, when an individual camera cell is active (highlighted green). In such a case, the buttons remain active for this selected cell, and you can download an archive segment of the selected camera. However, when the main timeline is active and there is a selected camera on the layout, the set archive range will be applied to all the cameras on the layout.
7. The buttons to navigate to the beginning and end of the archive.
To navigate to the start or end time of the archive recording across all unlocked cameras, select the corresponding button.
8. The buttons rewind or fast-forward by a set interval.
Use the relevant rewind buttons to rewind or fast-forward the video recording by a set interval.
9. The timeline start and end buttons
The timeline start and end buttons that provide direct access to the beginning and end of the general timeline.
10. The stop/start playback button
To stop or start video playback, select the corresponding buttons in the player.
The system continues to record to the archive even if playback is stopped.
11. The slider to zoom in or out on the timeline
The slider to zoom in or out on the timeline. Implies changing the level of detail shown.
With the slider, you can change the time intervals on the general timeline, as well as on the timelines of all unlocked cameras.
The timeline offers the following total time span views: 1 hour, 4 hours, 6 hours, 12 hours, and 24 hours, representing the total time span visible. For example:
1 hour – from 8:00 AM to 9:00 AM.
4 hours – from 6:00 AM to 10:00 AM.
6 hours – from 10:00 AM to 4:00 AM.
12 hours– from 6:00 AM to 18:00 PM.
24 hours – from 10:00 AM one day to 10:00 AM the following day.
12. Select the date and time
The calendar is used to select the date and time to view archived recordings from all cameras on the layout.
Select the Calendar icon to initiate date and time selection.
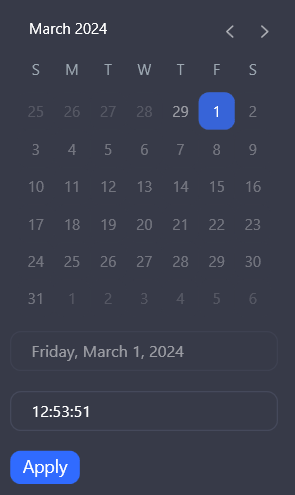
Select a relevant date and time, then Apply.
The calendar only shows dates with archive footage from at least one camera.
Consequently, the chosen date and time for archive viewing will be applied to all unlocked cameras in the current layout.