Map
This Map section empowers video surveillance administrators with a consolidated set of tools for comprehensive camera management and administration on the interactive map. Beyond providing an overview of cameras on a geographic map, administrators can now seamlessly add new cameras, remove unwanted ones, and modify their coordinates directly within the Map section.
The main capabilities of the map are as follows:
Add a camera to the map.
Overview of cameras on a geographic map.
Zoom in and out on the map.
Filter cameras by status.
Watch video from a camera.
Place camera Live feed on the map.
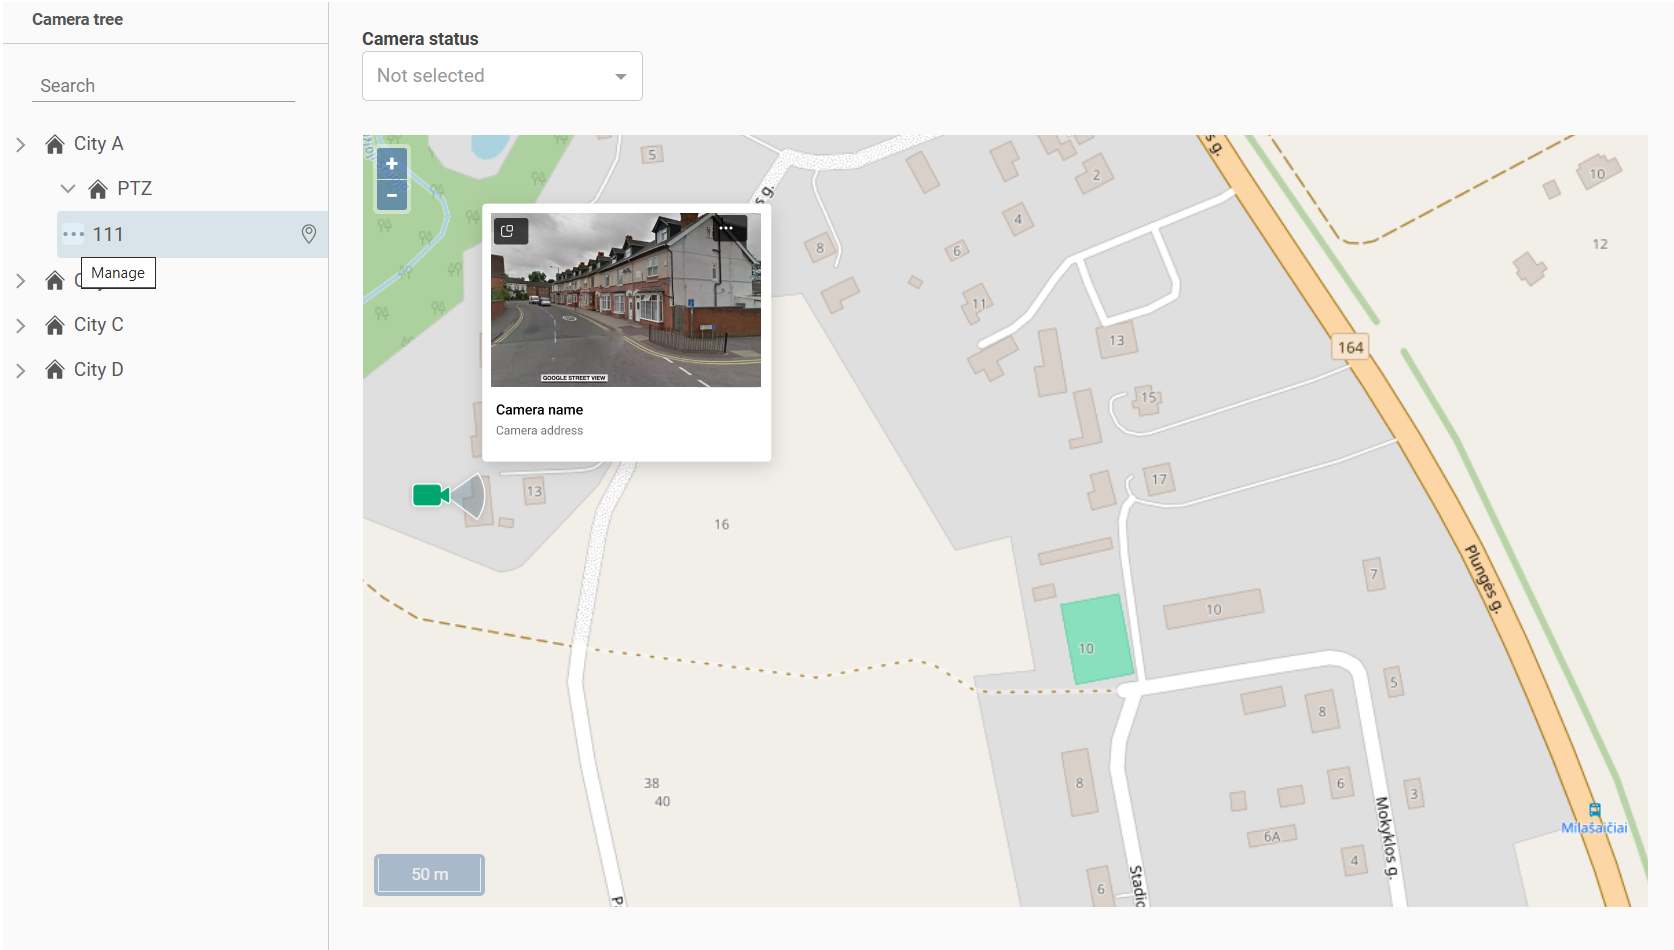
Cameras in the same or nearby locations are clustered into groups. The group icon indicates the camera count within a cluster. Selecting the icon presents a detailed list of cameras within that specific cluster. Selecting a camera name opens the camera preview window.
The mapped camera
To navigate to the camera settings, follow the steps:
Call out the preview window of the camera.
Select the horizontal ellipses icon (…)to call out the context menu of the camera.
Select Camera settings.
As a result, you’ll navigate to the camera settings, namely the General data tab.
Zoom in and out on the map
You can zoom in and out on the map in one of the following ways:
The zoom buttons (+/–) at the lower right.
Scroll the mouse wheel.
Use the touchpad
To move the map, left-click the mouse and drag the map.
Filter cameras
Select a relevant filter from the Camera status drop-down filter:
Active
Inactive
Partially active
Initializing
Not configured
As a result, only cameras with the selected cameras will be displayed on the map.
Camera tree
The Camera tree provides administrators with a convenient and quick way to access the list of cameras, significantly simplifying the process of searching for and integrating cameras into the map. With the color-coding system, each camera is displayed in the tree in a color that corresponds to its current status, allowing administrators to easily spot cameras that require immediate attention.
Cameras located on the map are identified with a geolocation icon in the camera tree. Selecting a camera name in the tree centers the map view on that camera's location.
.png?inst-v=b63742cc-00c9-4c22-96cb-e64d375db7d7)
The geolocation icon
From within the camera tree, you can perform the following actions:
Add a camera to the map.
Reposition a camera on the map.
Delete a camera from the map.
The camera tree offers a search feature for both camera names and tree element names. The search begins automatically after you input minimum three characters.
Place a camera live feed on the map
You can place on the map camera feed in Live mode. For this, select the relevant icon in the camera preview window. Live feed from multiple cameras can be displayed on the map at a time.
.png?inst-v=b63742cc-00c9-4c22-96cb-e64d375db7d7)
The icon to place a camera live feed
The maximum number of camera feed in Live mode is 16.
.png?inst-v=b63742cc-00c9-4c22-96cb-e64d375db7d7)
Simultaneous view of several feeds
To close an individual live feed, select the Close icon (Х) of the selected camera open window. To close all open feeds, select Close all at the right top.
When you navigate from the map to other pages, the camera windows will be closed.
Add a camera to the map
You can add a camera to the map in one of the following ways:
From within the camera card on the General data tab.
From within the Map section.
The map displays the cameras added by users.
Admins can automate camera mapping by enabling the Setting up automatic adding of cameras to the map feature under Access Rights Settings. Next, cameras added to the platform for the first time via autoprovisioning and with specified geographic coordinates will automatically appear on the map.
To add a camera, follow the steps:
From within the Camera tree, select a camera that isn’t mapped.
Drag a camera to the map. As a result, a form to complete camera coordinates will open at the bottom right.
.png?inst-v=b63742cc-00c9-4c22-96cb-e64d375db7d7)
Complete the form
If required, drag a camera to a different location on the map or enter different geographic coordinates.
Set a camera rotation angle.
To complete the action, select Add.
When the camera is mapped, the Update camera location by admin event is created. This event log can be tracked from the camera card on the User actions tab.
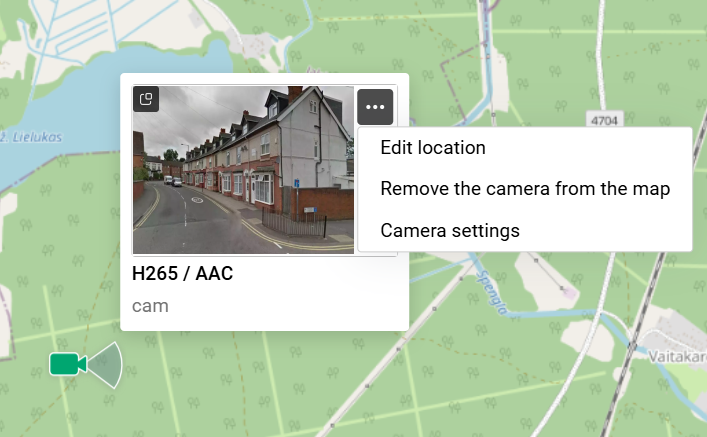
Reposition a camera on the map
To reposition a camera on the map, follow the steps:
Call out the preview window of the camera on the map and select the context menu icon (…).
From the opened menu, select Edit location. This action is available for cameras that are added to the map.
Reposition the camera
As a result, a form to edit the coordinates will open at the bottom right. If required, drag a camera to a different location on the map or enter different geographic coordinates.
Set a camera rotation angle.
To complete the action, select Add.
Remove a camera from the map
To remove a camera from the map, follow the steps:
Call out the preview window of the camera on the map and select the context menu icon (…).
Select Remove the camera from the map.
Confirm selection.
Once the camera is deleted, the Update camera location by admin event is created. This event log can be tracked from the camera card on the User actions tab.