Personal data constructor
In the Personal data constructor section, the administrator of can view the parameters that are available to a User Portal user when completing their personal data on step 2 (Personal data) of the data verification process. These parameters include: the first and last name of the user, the documents to identify the user.
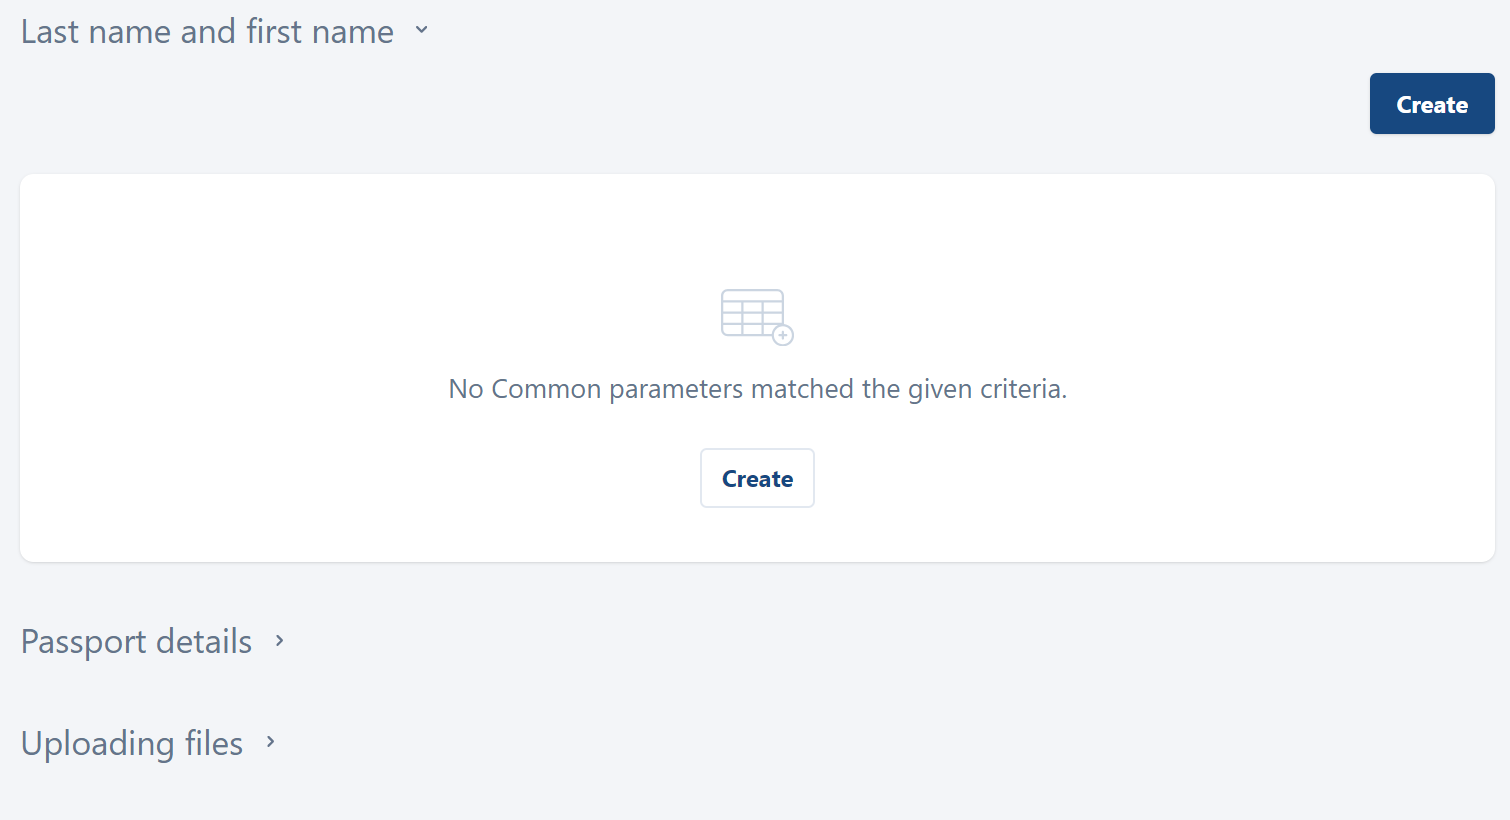
By default, the Personal data constructor section is empty.
The Personal data constructor section
In the Personal data constructor section, the following blocks of information are displayed:
Last name and first name. This block is used to add the fields in which users will specify their last and first name.
Passport details. This block is used to add the fields in which users will specify their last and first name.
Uploading files. This block is used to add the fields in which the users will upload files.
This section can be edited only if there are no B2C users added, regardless of their detail verification status, and no B2B users present.
Last name and first name
To create a field, select the Create button. This opens the following page.
Creating a field
You can’t edit the parameters on this page.
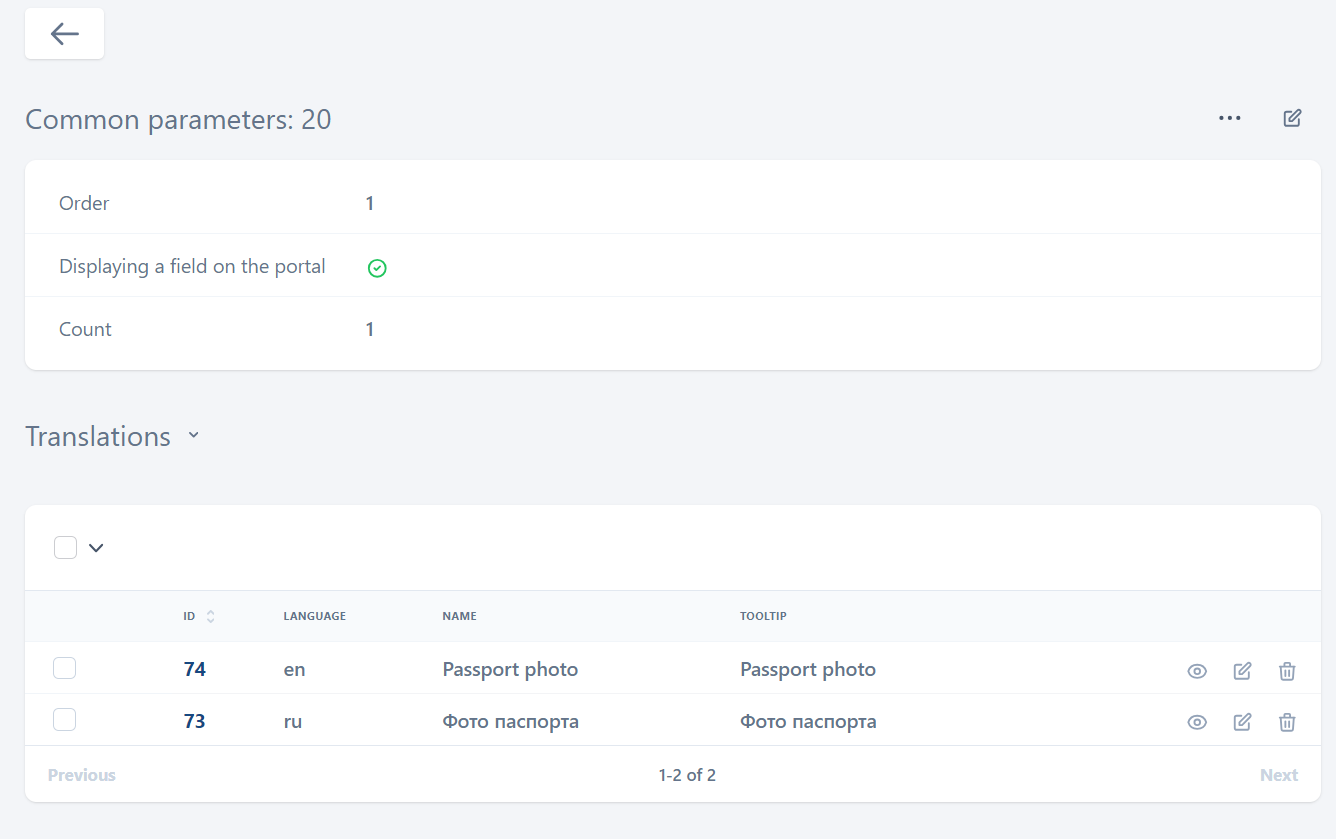
Select Create to navigate to the page, where you edit translations. This opens the following page, as on the image below:
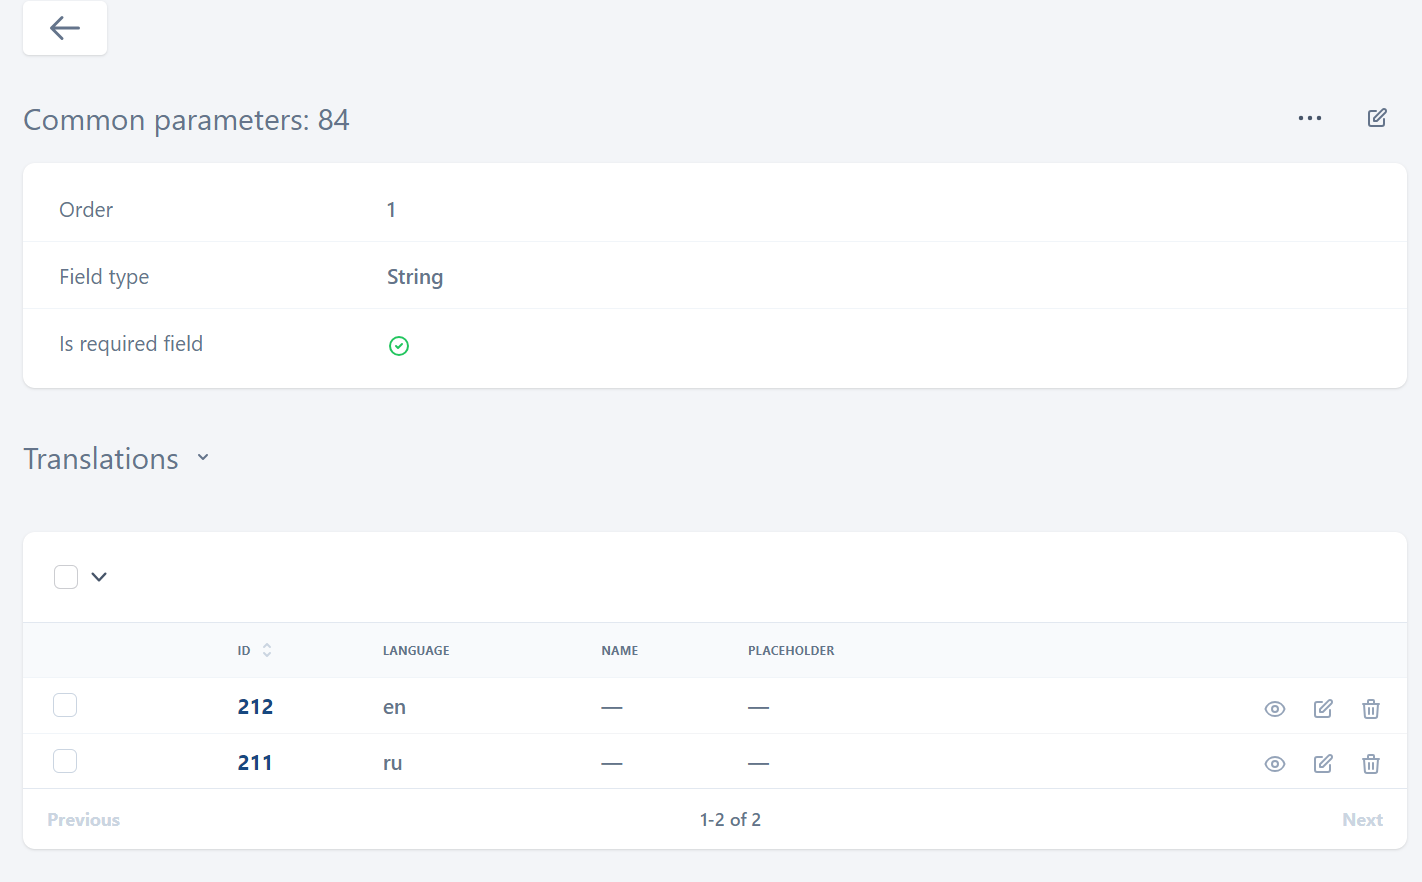
The page with the parameters
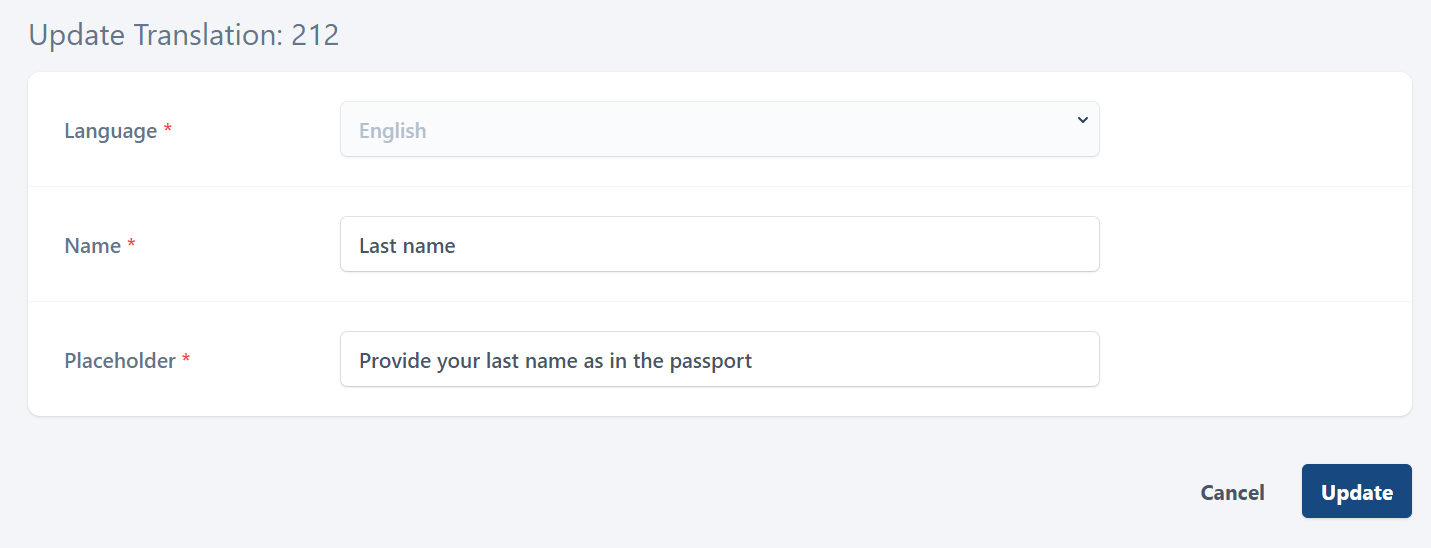
In the Translations section, provide translation for each language that is available on the User Portal. For this, select the Edit icon for a relevant language. This opens the following page, as on the image below:
Complete the fields
Complete the fields:
Name. Give a name to the filed.
Placeholder. Provide the tooltip that will be displayed to users in the input field.
To save the introduced changes, select Update.
Repeat the steps to create as many fields as required. For example, the list of created fields.
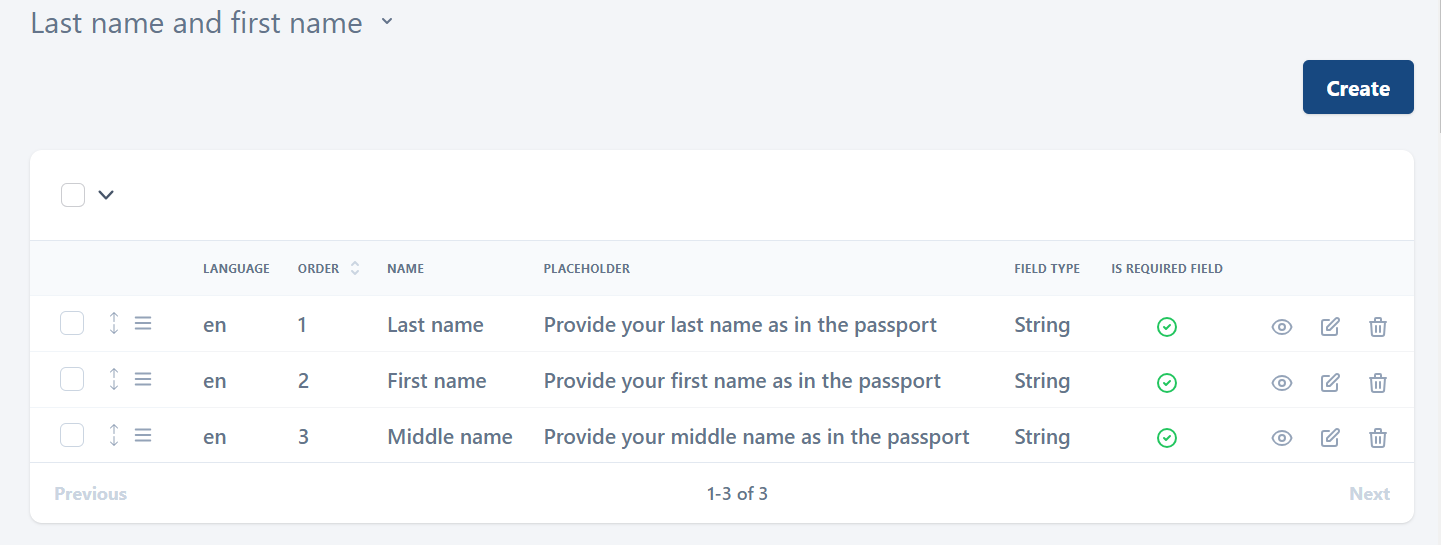
The list of created fields
Every element is allocated an order number that mirrors its hierarchical position. Should any element be removed, or its sequence altered, the system will adjust the order numbers to reflect these changes. Below, is the example of the fields that user completes on step 2 (Personal data) on the User Portal.
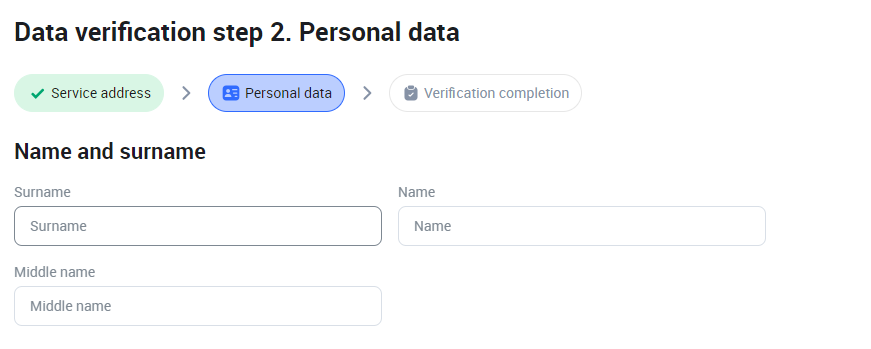
The added fields
Passport details
On the User Portal, users can conveniently find fields to input their passport information and other pertinent document details in the same section where they enter their last and first name.
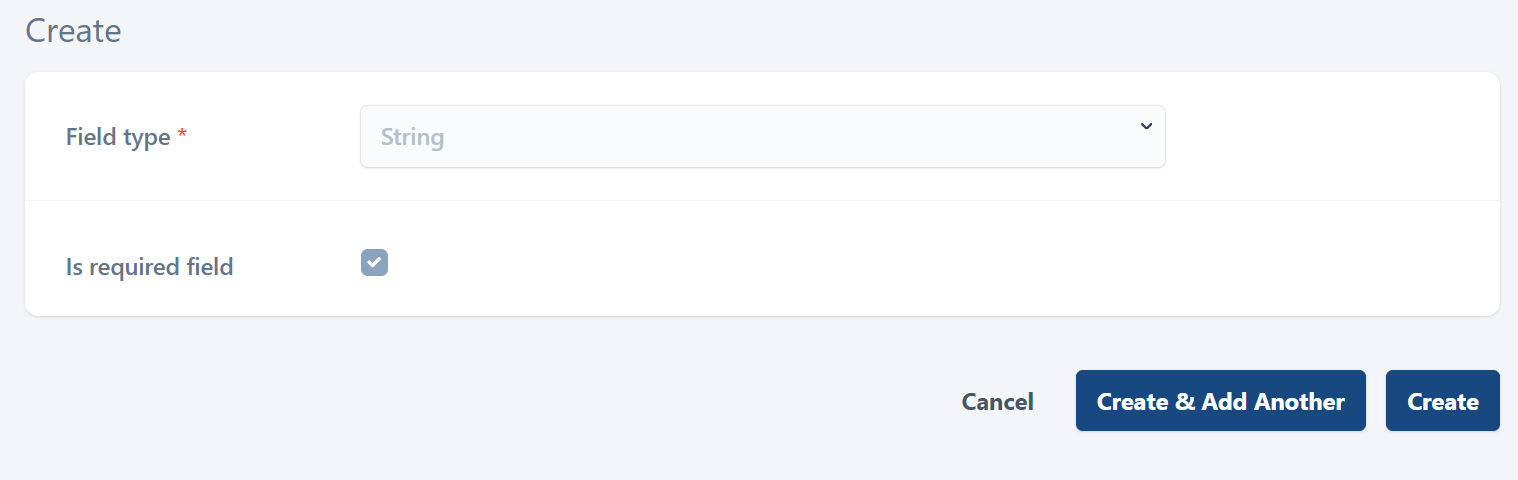
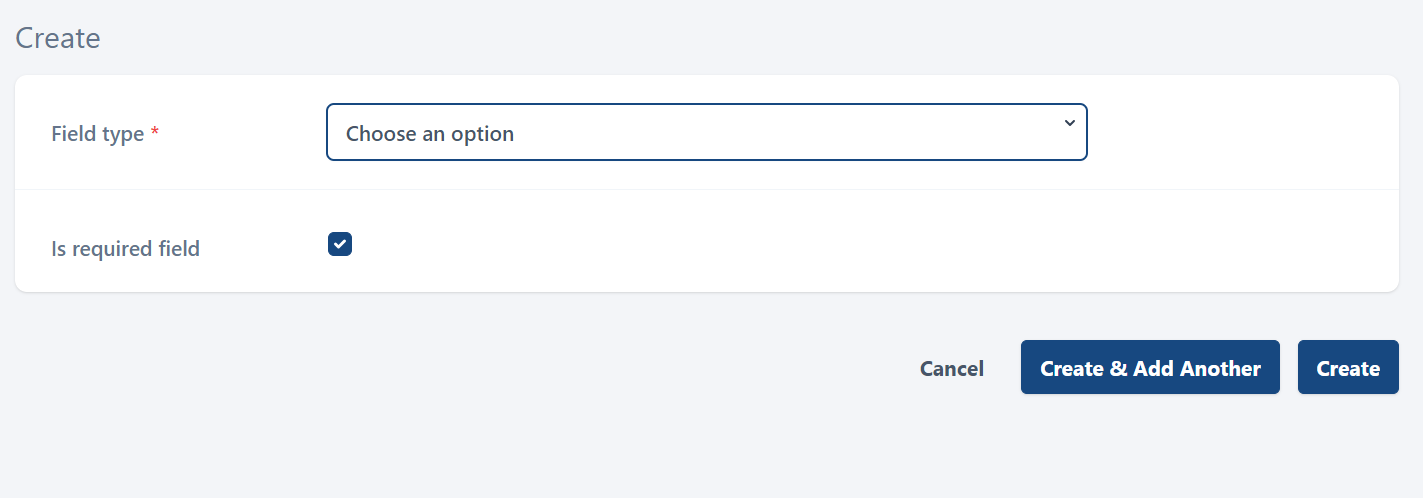
To create a field, select Create. This opens the following page:
Creating a field
Complete the fields:
Field type. Select either String (text field) or Date.
Is required field. Define if the field is required for the user to complete.
Next, select Create. This will navigate you to edit translations. In the Translations section, provide translation for each language that is available on the User Portal. For this, select the Edit icon for a relevant language.
Below, is the example of the added fields.
.png?inst-v=c246fb15-1530-4ba8-b650-c220381b36ae)
The added passport details fields
Below, is the example of the passport details fields that the user completes on step 2 (Personal data) on the User Portal.
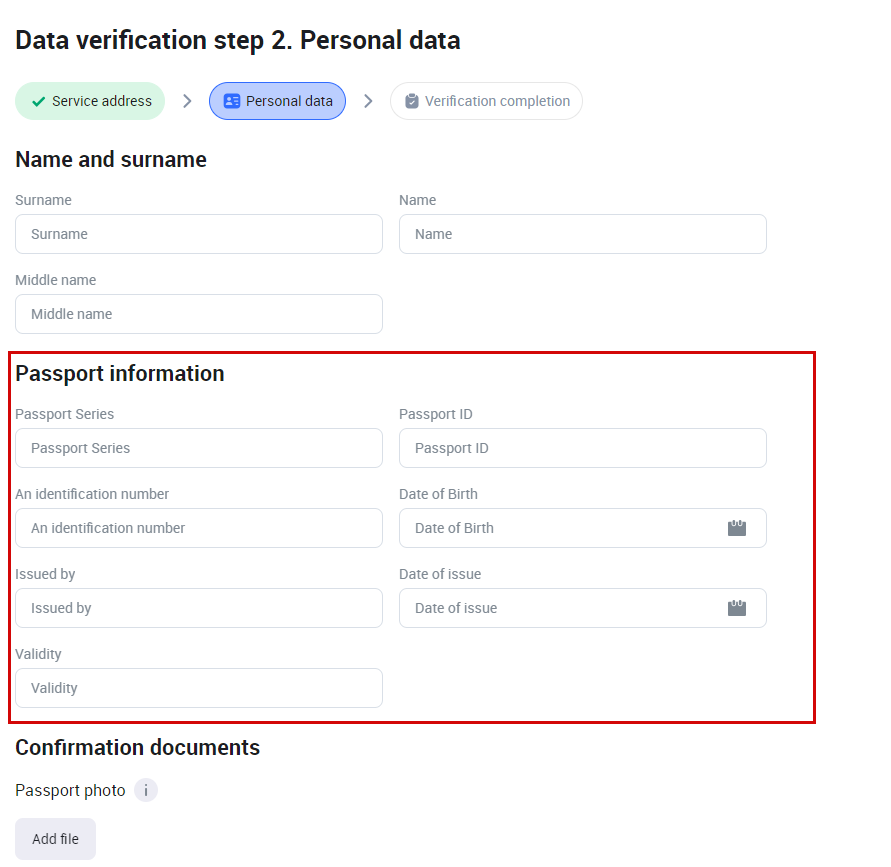
The passport details fields
Uploading files
The fields to upload files are available to a user when completing their personal data on step 2 (Personal data) of the data verification process on the User Portal. The purpose of the field is to upload images of a passport or other types of the identification documents.
Select Create to create a field. This opens the following page:
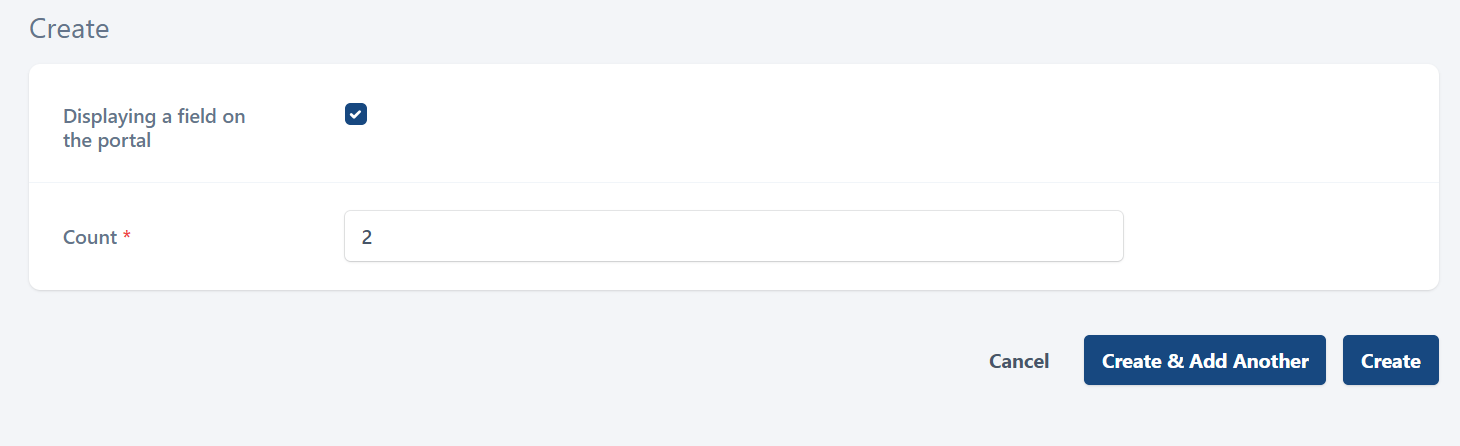
Creating a field
To allow users to upload files while completing their personal data on step 2 (Personal data) of the data verification process, select the checkbox of the Displaying a field on the portal. This action will enable the file upload field for users during this stage.
In the Count field, input the relevant number to set the limit of attachable files for this field.
Next, select Create. This will navigate you to edit translations. In the Translations section, provide translation for each language that is available on the User Portal. For this, select the Edit icon for a relevant language.
Creating a field
Below, is the example of the fields to upload files that the user completes on step 2 (Personal data) on the User Portal.
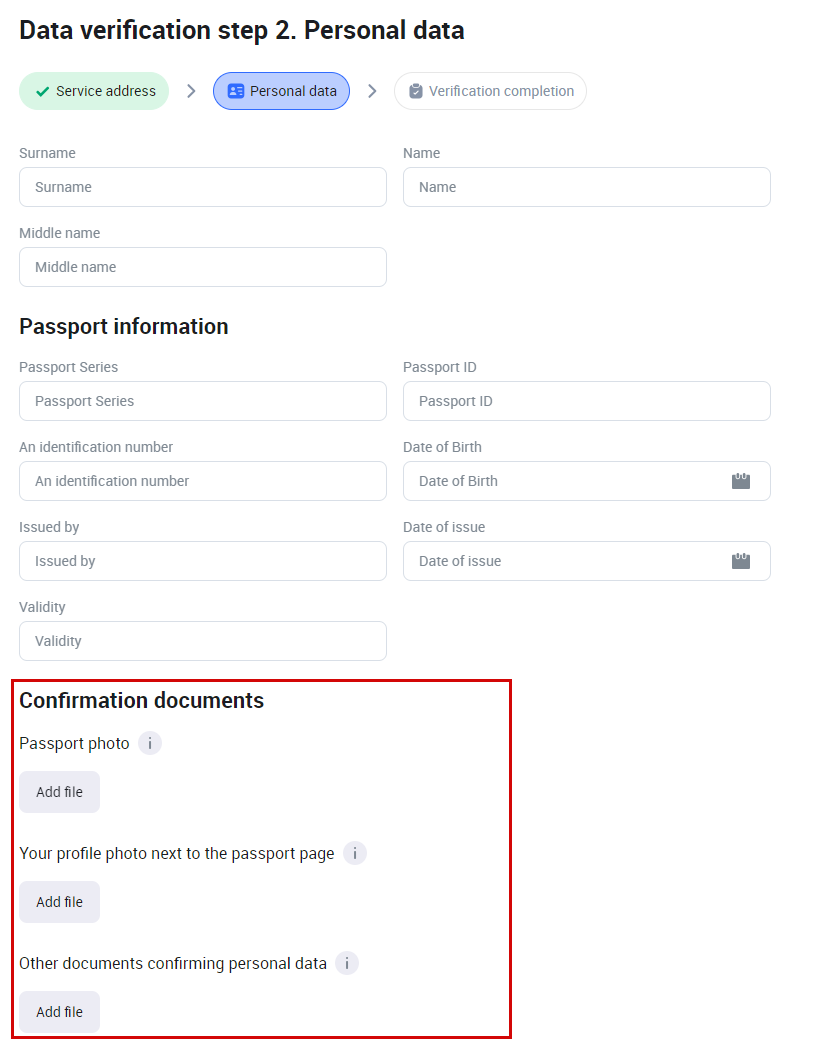
The fields to upload files
In the administrator interface, the uploaded files are displayed when viewing the user details.