Photos to open (Android, iOS)
The Photos to open tab lists all uploaded images for the intercom face recognition system that are used to allow access to the premises. You can view existing photos, upload new ones, as well as modify or delete previously added images.
The Photos to open tab is available to the mobile app user in the following cases:
If the administrator selected the Open the door using facial recognition option among other options to unlock the door.
If the administrator enabled the option to open the door using facial recognition for this specific user. The setting is managed by the administrator in their interface on the Apartments tab of the selected intercom.
View the added photos
The Photos to open tab lists all added images for the intercom face recognition system that are used to allow access to the premises.
Each photo features the following details:
Для каждого фото отображается следующая информация:
A photo thumbnail.
A photo name.
The context menu item (⋮) to call out the edit or delete actions.
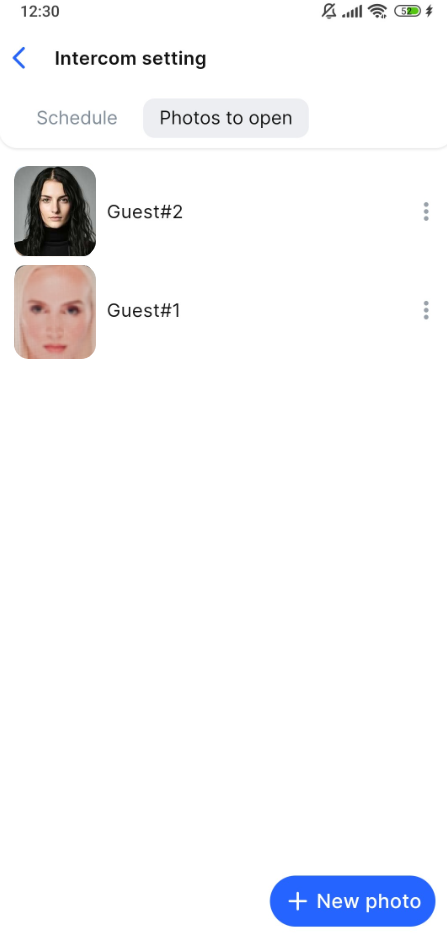
The added photos
Add a photo
When you upload a photo for the first time to the app, ensure you select the I agree to personal data processing checkbox to accept our personal data processing terms
Each intercom has a maximum photo upload limit of 20 images regardless of how many users are connected to this intercom.
To add a photo, follow the steps:
On the Photos to open tab, select New photo.
On the opened Add photo tab, perform the actions:
Enter a photo name that is up to 255 characters.
To upload a photo, tap Upload photo.
Photo requirements:
You can upload only one photo at a time.
An image format:
JPG
JPEG
BMP
PNG
A maximum photo size is up to 3 MB.
Minimal resolution – height is at least 150 pixels and width is at least 150 pixels.
Once you tap Upload photo, select an option to upload a photo:

Selecting an upload option
A photo from a phone camera
To upload a photo from your phone camera, ensure you granted permission for the app to take pictures and record video.
To upload a photo from your device camera, follow the steps:
Selecting the Photo from phone camera option launches the camera on your device. Capture a photo.
On the opened Edit photo tab, edit a photo if required. You can also scale and rotate 90° an image.
To save the photo, tap the icon at the top right. To cancel editing and uploading of the photo, select the icon at the top left.

Editing a photo
Once you select to save the photo, you are automatically navigated to the Add photo tab. Here, tap Add photo to complete uploading of the photo.
A photo from an intercom camera
To add a photo from an intercom camera, follow the steps:
Selecting the Photo from intercom camera option launches the intercom camera in Live mode. Capture a photo.
On the opened Intercom screenshot tab, tap Take screenshot.
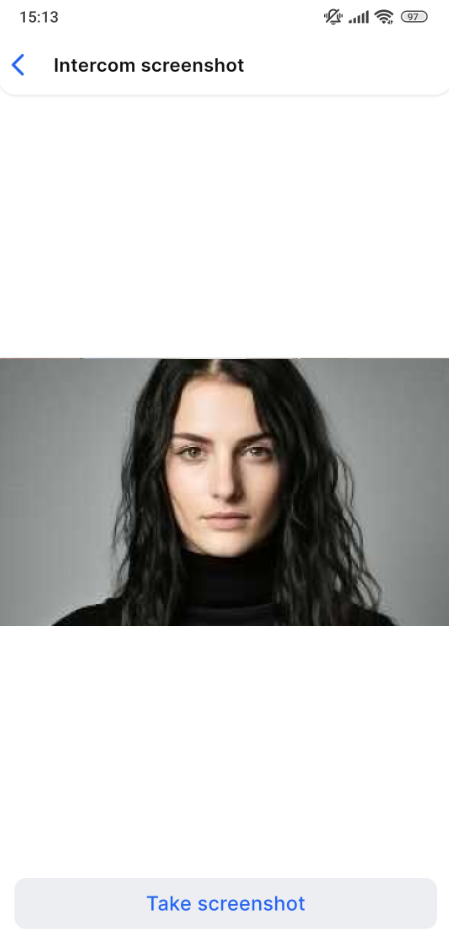
Take a screenshot
On the opened Edit photo tab, edit a photo if required. You can also scale and rotate 90° an image.
To save the photo, tap the icon at the top right. To cancel editing and uploading of the photo, select the icon at the top left.
To save the photo, tap the icon at the top right. To cancel editing and uploading of the photo, select the icon at the top left.
A photo from a phone gallery camera
To add a photo from the device gallery, ensure you granted permission for the app to access your device gallery.
To add a photo from the device gallery, follow the steps:
Selecting the Photo from phone gallery option launches the device gallery. Select a photo and save your choice.
On the opened Edit photo tab, edit a photo if required. You can also scale and rotate 90° an image.
To save the photo, tap the icon at the top right. To cancel editing and uploading of the photo, select the icon at the top left.
To save the photo, tap the icon at the top right. To cancel editing and uploading of the photo, select the icon at the top left.
Edit a photo
You can edit a photo by following these steps:
On the Photos to open tab, tap the context menu icon (⋮) of the selected photo.
From the opened menu, select Edit photo.
On the opened Edit photo tab, perform the actions:
Edit a photo name. You can enter up to 255 characters.
To replace a photo, tap Edit photo. From the opened menu, select the option to replace a photo: from the phone camera, phone gallery, or from the intercom camera.
Tap Save changes. To cancel the action, tap the icon at the top left to return to the previous page.
Replaced resources are retained for the next 30 days to preserve the integrity of analytics events (Face recognition), in which these resources were used
Delete a photo
You can delete one photo at a time. For this, follow the steps:
On the Photos to open tab, tap the context menu icon (⋮) of the selected photo.
On the opened tab, select Delete photo.
In the confirmation dialogue, confirm by tapping Delete. To cancel the action, tap Cancel.