«Face recognition» analytics type. Viewing and editing
Viewing the analytics case with the «Face recognition» analytics type
When viewing an analytics case with the «Face recognition» analytics type, you can choose between table and tile display modes. The tile display mode is set as the default.
In the table mode, additional possible matches for the recognized object are displayed. In the tile mode, only the match with the highest confidence percentage is shown.
Both the tile and table display modes allow you to set the number of items displayed per page (15, 25, 50, and 100).
To switch display modes, click the corresponding button.

Switching display modes
Table display mode
In the table mode, the following columns are displayed:
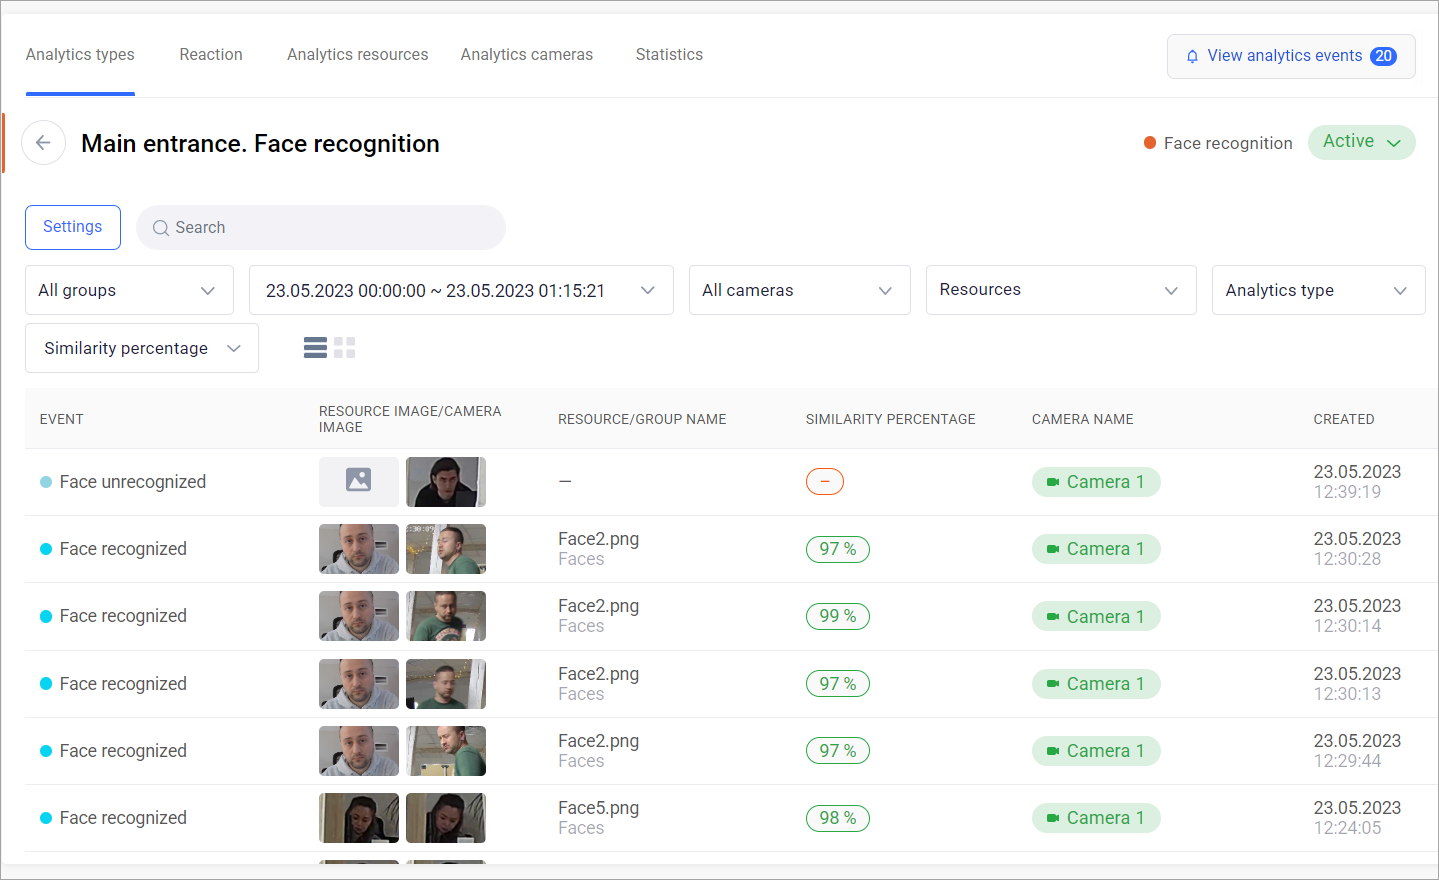
Table display mode
Event. Displays one of the following values:
Face recognized
Face unrecognized
If a face is identified but there is a similarity with other reference resources during recognition, a «Expand» button is displayed next to the row to view all comparison options. The result with the highest confidence percentage is shown as the first row in the list.

Results of face recognition with similarity to various reference resources
Resource image / camera image. Two images are displayed: the reference image and the image obtained from the camera. Click on either image to enlarge it
Resource / group name. The name of the resource that serves as the reference image and the name of the group in which the resource is located
Similarity percentage. The percentage of confidence in recognizing the reference and obtained images
Camera name. The name of the camera that captured the event. Clicking on the name displays a video player for viewing the archive at the time of the event
Created. The date and time of the event
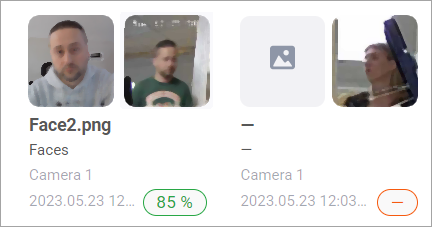
Tile display mode
In the tile display mode, each event contains the following information:
Tile display mode
Two images: the reference image and the image obtained from the camera. Click on either image to enlarge it
Resource name: the name of the resource that serves as the reference image, and the name of the group in which the resource is located
Camera name: the name of the camera that captured the event. Clicking on the name displays a video player for viewing the archive at the time of the event
Date and time of the event
Similarity percentage in recognizing the reference and obtained images
Filters
A set of filters is available:

Filters
Groups: displays only events in which the selected resource groups were used for face recognition.
Period: displays only events that occurred within the specified period.
Cameras: displays only events captured by the selected cameras.
Resources: displays only events for comparison with the selected resources.
To enlarge an image for detailed viewing, click on the image. Both the camera image and the analytics resource image will be displayed.
The table data can be sorted by groups, event types and dates, cameras, resources, and confidence percentage. Additionally, you can perform searches.
The «Similarity percentage» filter is used when there are multiple possible matches for the recognized object. You can fill in only one filter field (with a value not exceeding 100%) to set the lower or upper limit for filtering.
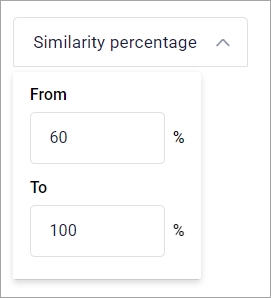
Filter by similarity percentage
By clicking on the camera name in any display mode, you can access the camera archive.
Editing the case:
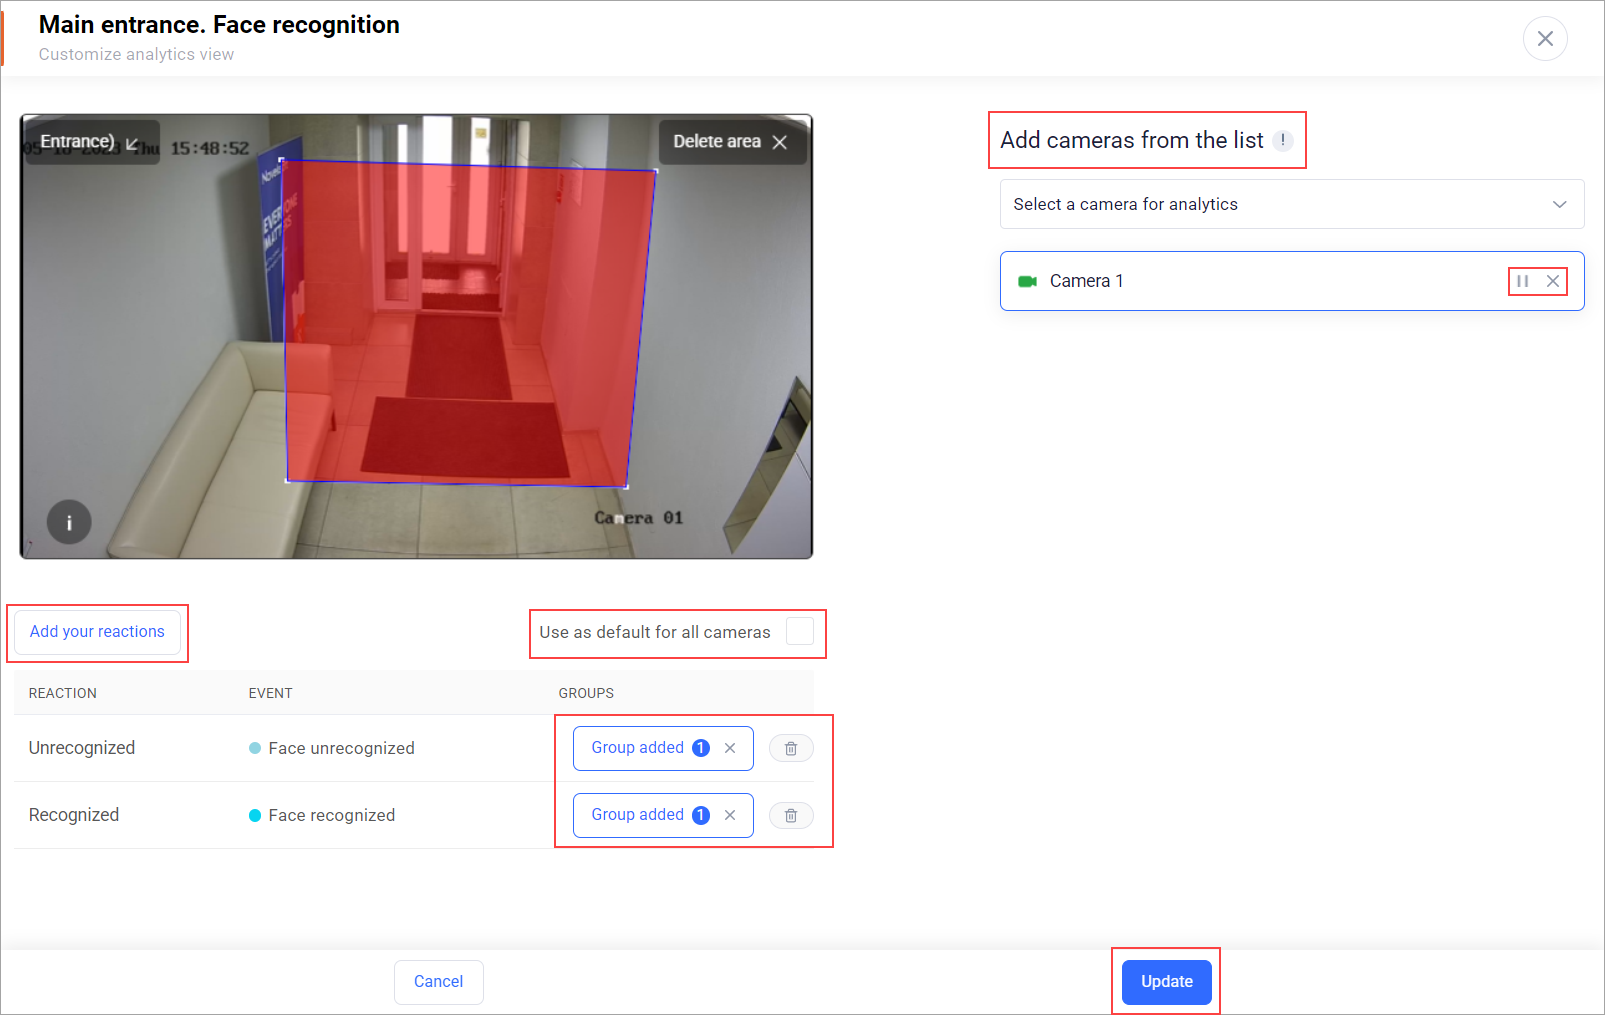
To edit the case, click the «Settings» button on the analytics case viewing page
To add one or multiple cameras, select them from the list
To remove one or multiple cameras, click the «Delete» button next to the camera name
To pause the analytics on a camera, click the «Pause» button next to the camera name
Edit the camera settings by clicking on the name of one of the selected cameras
If necessary, add created reactions by clicking the «Add your reactions» button
Modify the resource groups from the previously added list by clicking the «Add group» or «Group added» button. You can delete an added group by clicking the corresponding delete icon
If necessary, edit reactions by clicking on the reaction name
Edit the area for face recognition. Click the «Delete area» button, draw lines for the area using the left mouse button, and connect the lines with the right mouse button (the area will be colored red)
Check the «Use as default for all cameras» checkbox to apply the settings of this camera to all selected cameras
Click «Update» to save the changes
Editing the case with the «Face recognition» analytics type