Created by the administrator via the User Portal Manager
To create a B2C user from the User Portal Manager, navigate to the Users > B2C users. Here, select Create.
On the opened page, complete the form:
Complete the fields under the User credentials and Create sections.
.png?inst-v=c246fb15-1530-4ba8-b650-c220381b36ae)
The form to complete
In the User credentials section, all the fields are required:
Login – specify a login for the user.
Password – create a safe password for a B2C user.
Password confirmation – confirm the password.
The password must comply with the following criteria:
Contains minimum 8 characters.
Includes both the upper and lowercase characters.
Must contain at least one non-letter character. Non-letter characters include numbers, punctuation marks, and special characters.
Credentials that are specified in the Login and Password fields will be used by the B2C user for authorization on the video surveillance platform
In the Create section, specify the B2C contact details. Optionally, leave a comment.
To complete creation of a B2C user, select the Create button. The newly created B2C user will be added to the list of B2C users in the User Portal Manager and in Administrator client of the video surveillance platform with the Blocked status. The user will be unblocked once a tariff plan is added and activated.
Next, link the user to private folders to enable access to cameras. You also need to add and activate a tariff plan for this user.
Edit details of a B2C user
To edit details of a B2C user, use one of the following options:
In the list of B2C users, select the Edit icon
 in the line of a relevant user.
From the B2C user card, select the Edit icon
at the top right.
As a result, you navigate to the page where you can edit details of this B2C user. Here, you can edit the following:
A password
Contact details
A registration address
Note.
To save the introduced changes, select Update.
A B2C user card
To navigate to a B2C user card, select the ID number of the View icon for a relevant user.
The user card groups information in several sections.
B2C User
In the B2C User section, you can find the details specified when the user was created.
To edit the details, select the Edit icon at the top right.
User credentials
In the User credentials section, you can find the user login. It can’t be edited. The login is given when a user is created.

The User credentials section
Private folders (private access)
In this section, you link a user to private folders. These private folders contain cameras with private access.
This option is available in the following cases:
Addresses are added in the system.
Addresses include private folders.
Cameras are linked to private folders.
For details on how to create private folders and link cameras to them, see the Private folders documentation section.
You can link cameras to folders in the camera card from the Private folders section.
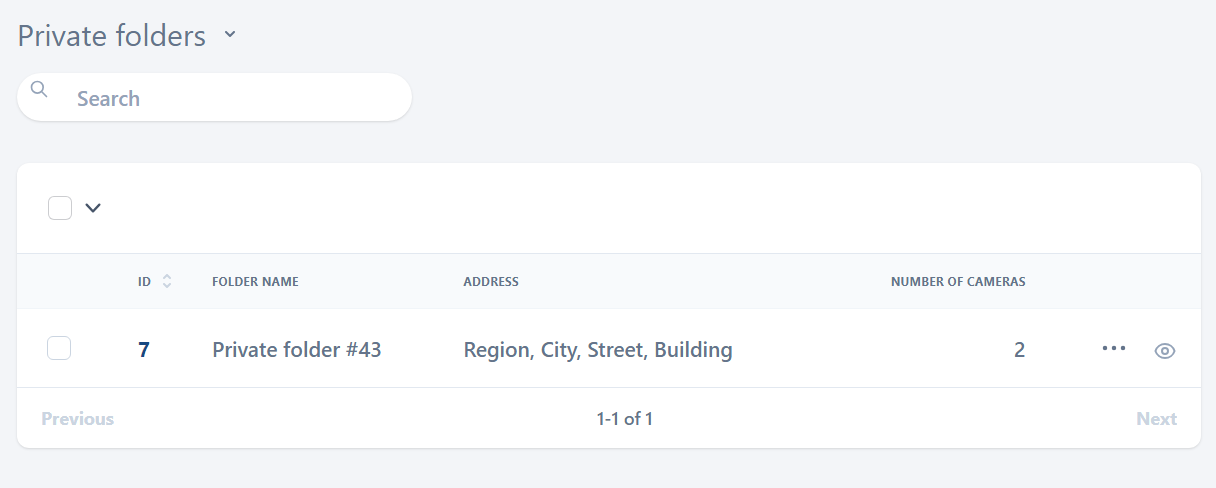
The Private folders section
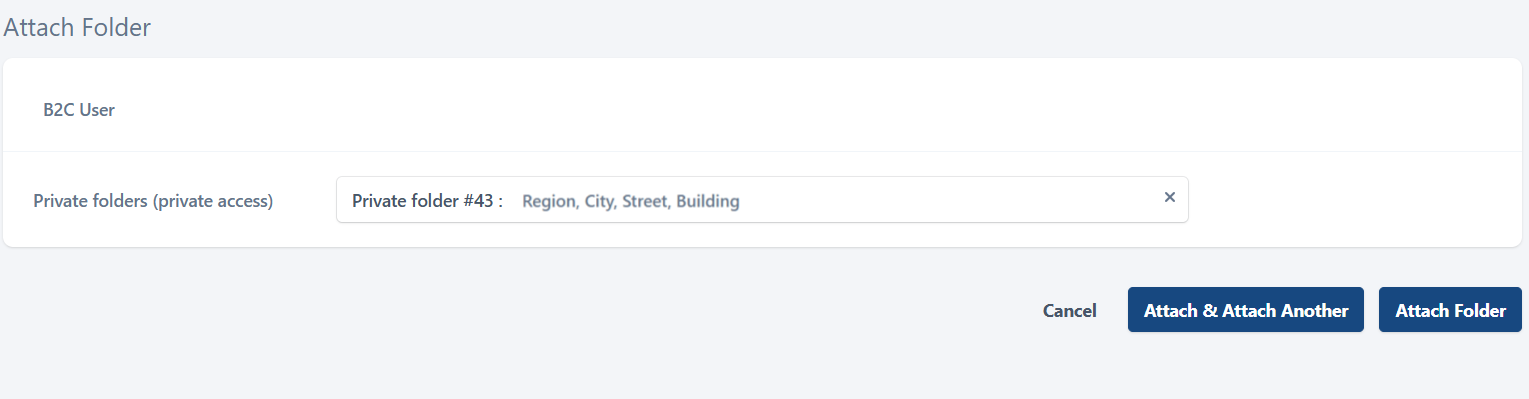
To attach a user to a private folder, select Attach folder.
On the opened page, start typing a folder name to search for it.
The list of folders contains only the folders that the current user isn’t associated with.
Select a relevant folder and choose Attach folder.
If a camera was initially linked to a private folder and synchronized, and only then was the user associated with the folder, changes will automatically synchronize with the video surveillance platform.
If a user is initially linked to a folder, and only then cameras are added to the folder, you should perform synchronization. For this, from the user card, select the ellipses (…) icon at the top right and choose Sync cameras. Once sync is completed, the user gets access to all cameras with private access that will be added to this folder.
To detach a user from folders, follow the steps:
Select the checkboxes of the folders to detach from the current user.
From the Actions drop-down menu, select Detach folder.
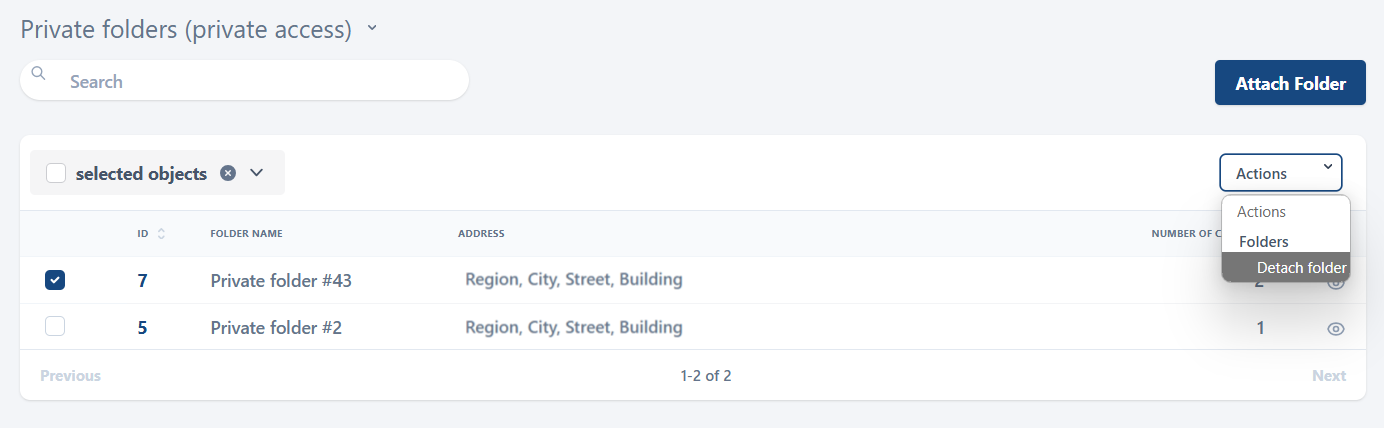
Detach a folder
Confirm the action.
Tariff plan
In the Tariff plan section, you can track the tariff plan that is linked to this user. The process for adding and activating a tariff plan for a B2C user is identical as for B2B users. For details, see the Attach and activate a tariff plan for a B2B user documentation section.
Analytics
The Analytics section becomes available once a tariff plan is added and activated. Here, you can specify a number of licences for each level that the user can apply in the video surveillance platform when creating analytics cases.
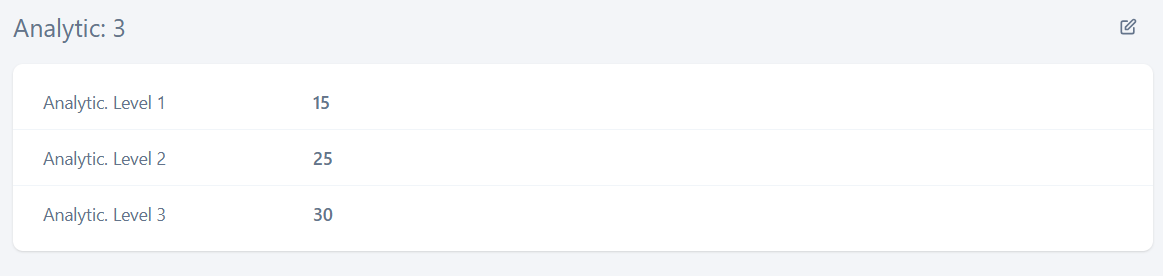
The Analytics section
You can’t edit the number of licences for the tariff plan with the Only live status. However, previously allocated licences remain visible on this page, the B2C user can’t create analytics cases.