User events
On the User events tab, you can find the events that were manually marked by the user on the timeline. The user can set these marks are set on the timeline in archive mode while viewing the camera in the user web interface and in the mobile application.
.png?inst-v=1d934989-adc9-47d4-b93e-1c2e7354ae81)
The User events tab
The User events tab features the following details about the listed events:
An event type.
A mark name.
A camera name.
A camera address.
A date and time when an event occurred.
Add a user mark
You can set marks only in archive mode.
You can set marks individually for each camera.
To set a mark, follow these steps:
Navigate to the archive of a relevant camera.
On the camera image, select the Custom marks icon to manage marks, as on the image below.
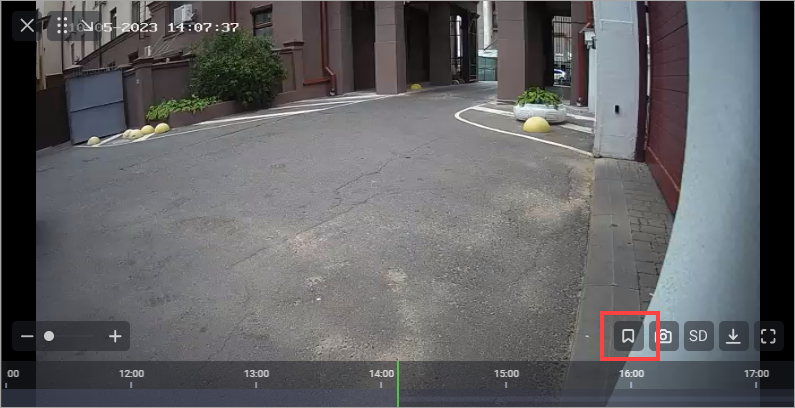
The icon to manage marks
From the opened options, select the icon to set marks and Add mark.
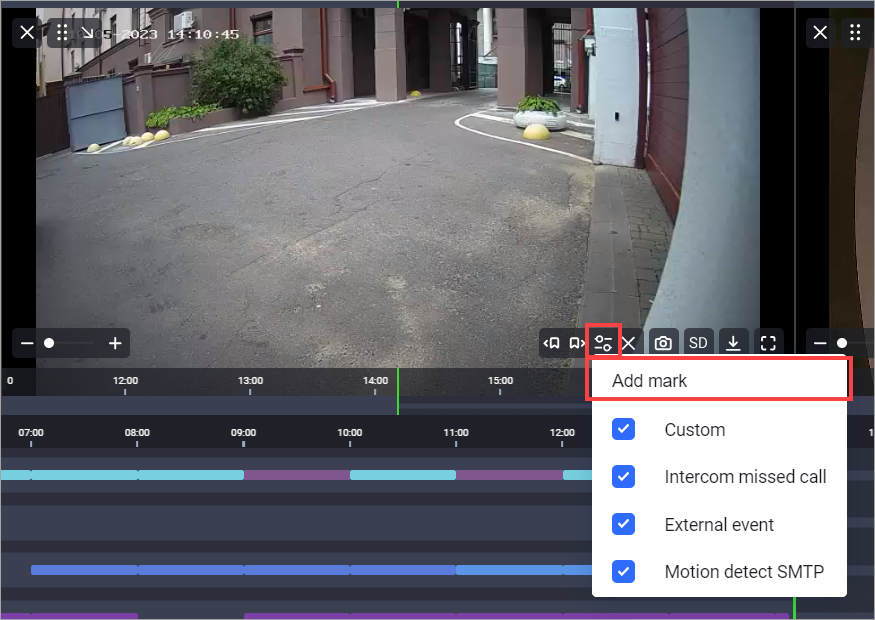
Adding a new mark
Complete the opened form to add a mark
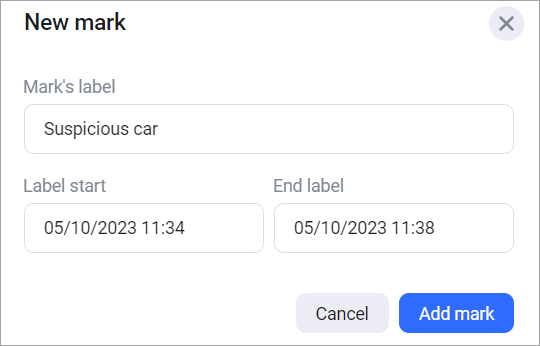
Complete the opened form
Enter the name (label) of the mark and specify the time period.
Select Add mark to complete the action.
Created marks are displayed on the timeline.
To navigate between marks, use the Previous mark and Next mark buttons.
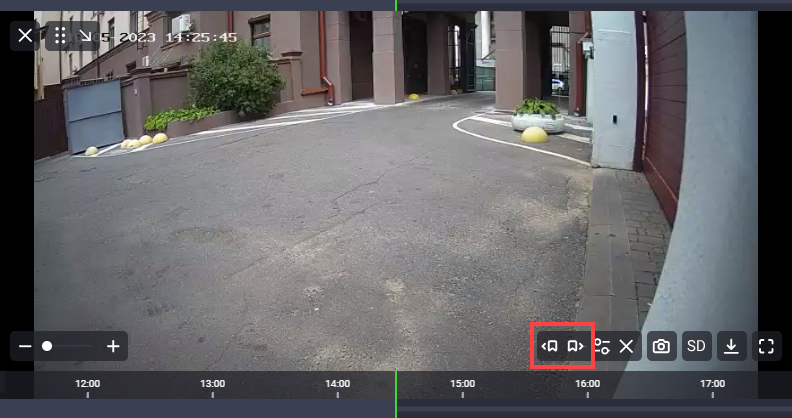
The navigation buttons
View an event
To view the archive at the moment of an event, open the list of User events and select the name of a relevant camera. This will lead to playback of the archive directly to the time of the event.
Open in the layout
There is an option to simultaneously view multiple events. To do this, select the checkboxes of multiple events in the User events list and choose Open in layouts.
You can select up to six events.
.png?inst-v=1d934989-adc9-47d4-b93e-1c2e7354ae81)
Selecting events to open in layouts
As the result, the selected cameras will open in archive mode at the moment of the selected events.
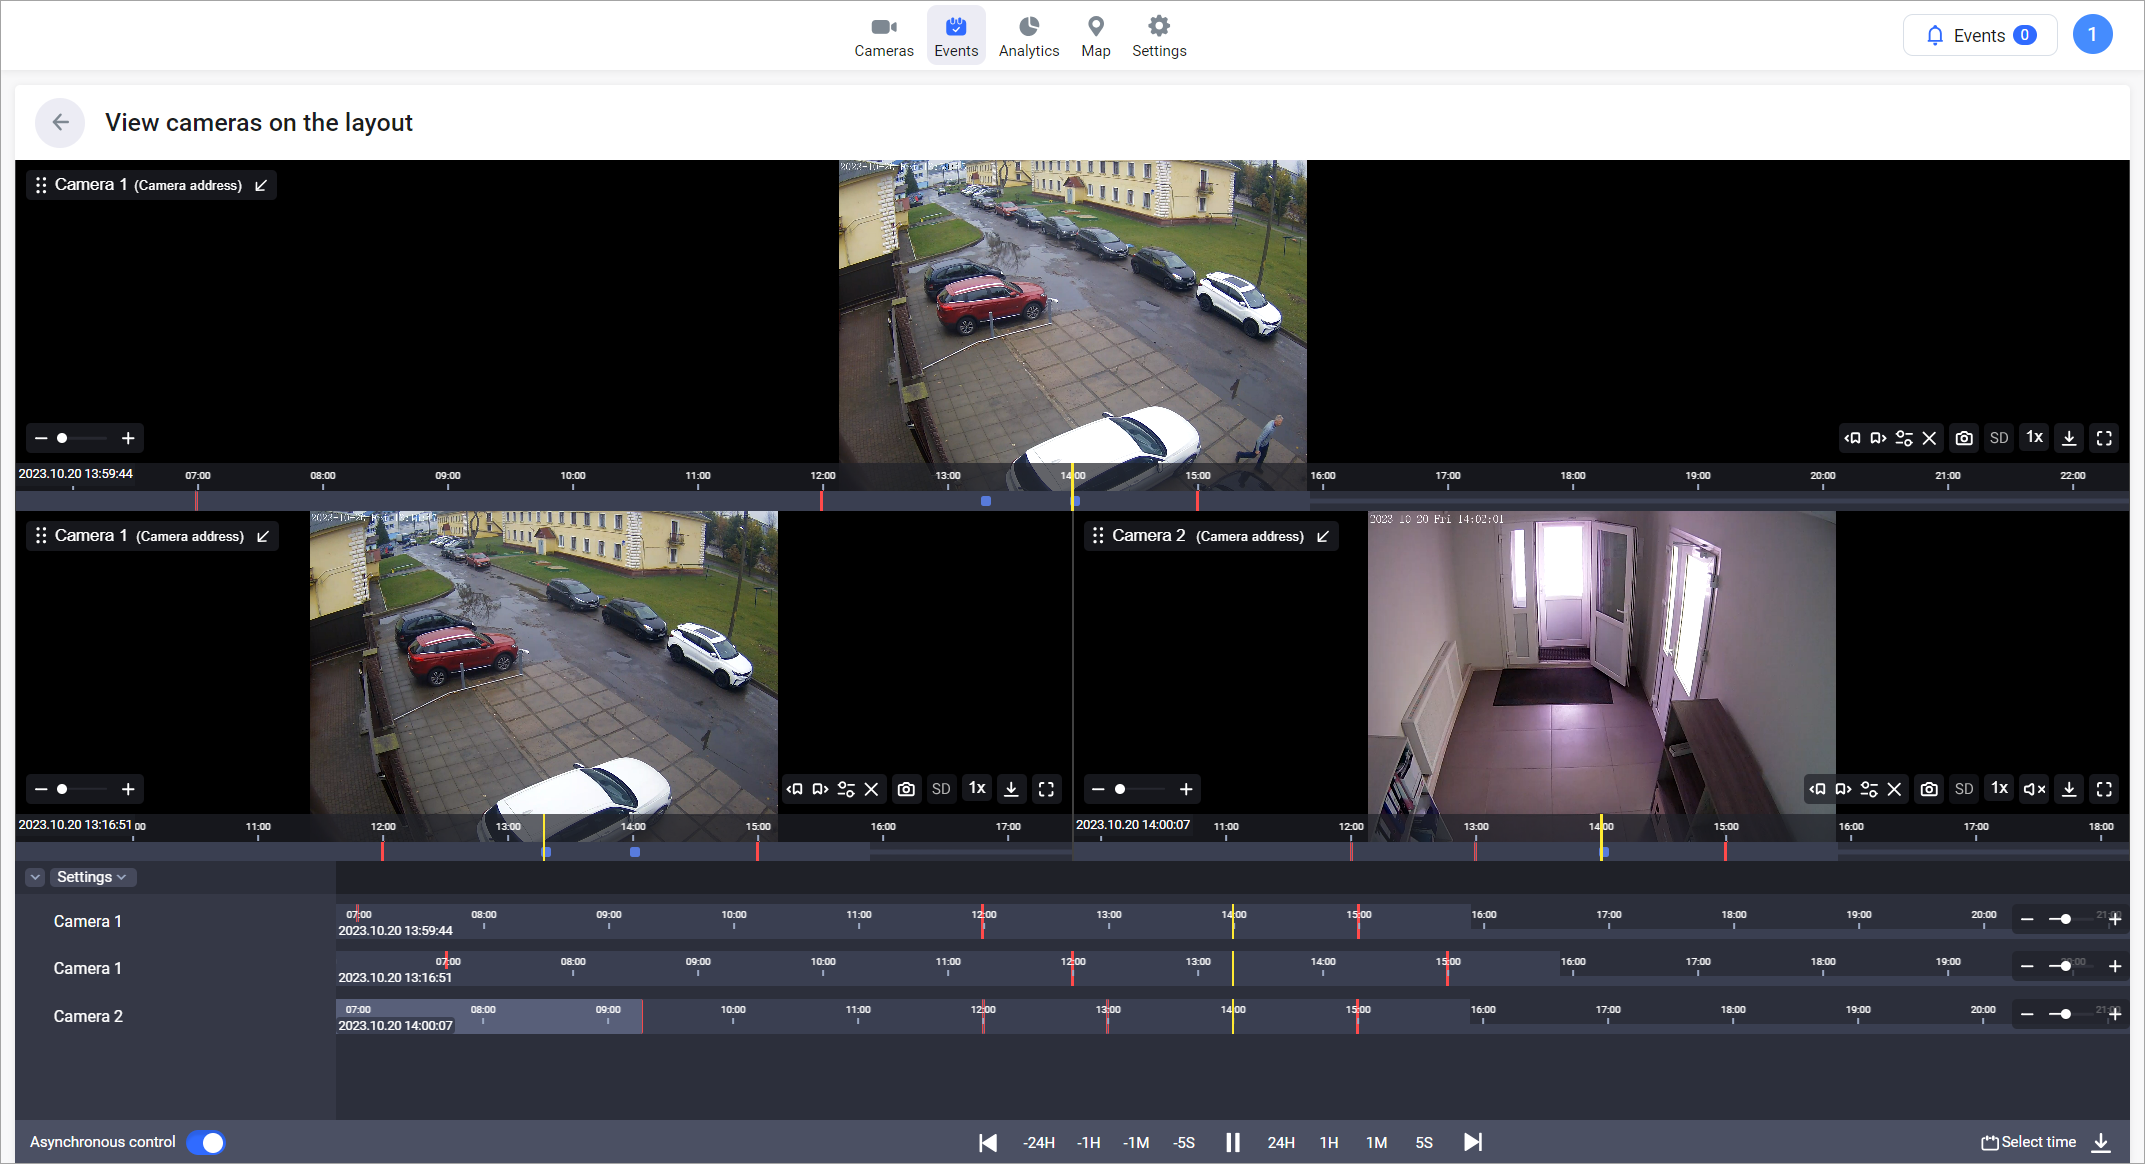
Viewing selected events in the layout
Delete a custom mark
To delete a custom mark, select the delete icon and confirm the action.
.png?inst-v=1d934989-adc9-47d4-b93e-1c2e7354ae81)
The Delete icon