Custom Tree view
The custom Tree view represents a list of all the cameras that are organized in branches/locations that are manually created by the administrator.
.png?inst-v=b63742cc-00c9-4c22-96cb-e64d375db7d7)
The custom tree view
The following actions are available for the administrator in this tree view:
View the list of available cameras.
Search for cameras.
Add a camera.
Transfer a camera to other branches/locations.
View and manage camera settings.
Add a branch (location).
The camera is indicated with a special icon (as on the image below) when the Intercom's camera setting is enabled on the General data tab of the camera details.
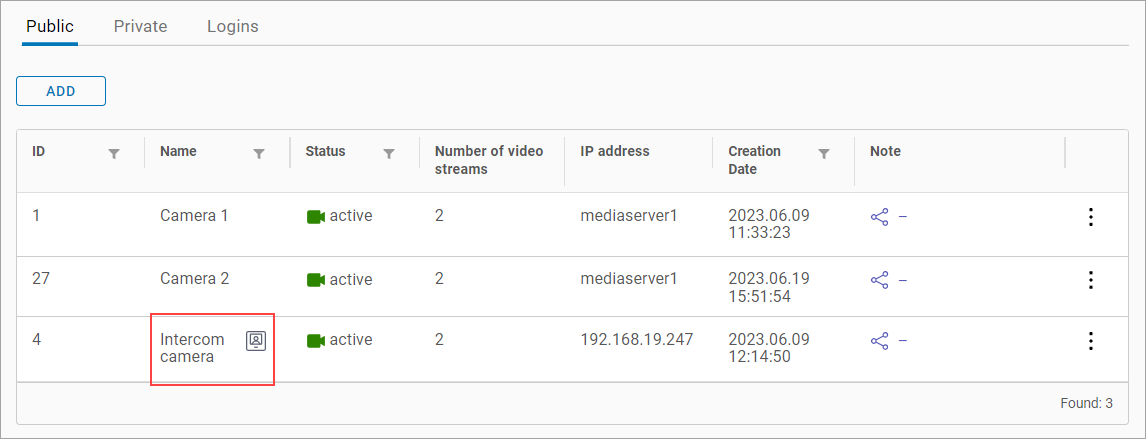
An intercom camera
Cameras with multi-address associations are identified with a special icon (as on the image below). Administrator can add additional addresses on the General tab of the camera. For details, see the General data tab documentation section.
.png?inst-v=b63742cc-00c9-4c22-96cb-e64d375db7d7)
The icon to identify camera’s multi-address associations
Add a branch
You can add a root branch and branches of the second and subsequent levels. A Root branch is a top-level branch.
To create a new root branch:
Select Add at the left-top or Add root branch, as on the image below.
.png?inst-v=b63742cc-00c9-4c22-96cb-e64d375db7d7)
Add a root branch
On the opened form, enter the branch name and select Add.
To add a branch of the second and subsequent levels:
When a camera is added to a branch, you can’t add a lower-level branch to this branch.
Select a branch to add another branch to.
Call out the context menu by selecting the vertical ellipses icon (as on the image) and select Add branch.
.png?inst-v=b63742cc-00c9-4c22-96cb-e64d375db7d7)
Add a branch
On the opened panel, enter a new branch name and Add.
Transfer a camera to another branch
Provided that you have the necessary permissions, you can transfer cameras from one tree branch to another. Details are in the section below.
The list of cameras
The cameras are structured according to a hierarchical addressing system. This is helpful when navigating through the camera tree. The numerical identifier specifies a number of cameras associated with the specific city/street/house.
To view cameras in a specific location, find the address in the tree and select the number. As a result, all cameras of the selected location will be displayed in the table.
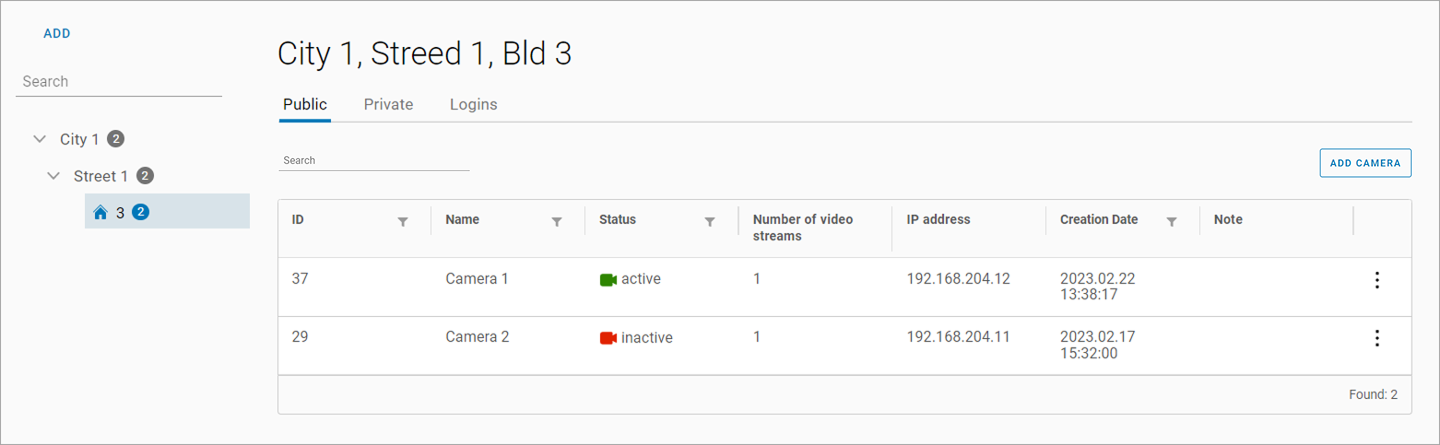
Camera tree view with address distribution
The table includes a set of tabs. The number and name of tabs are configured in the customer billing system. The default table contains at least two tabs:
Tab No.1 includes groups of cameras. It’s possible to add multiple tabs to group cameras according to certain properties, such as access restrictions, user type, and more.
Tab No.2 includes a list of user logins who have access to cameras.
In the current showcase, the interface with the Public, Private, and Logins tabs is used.
The Private folder includes the cameras with private access only.
.png?inst-v=b63742cc-00c9-4c22-96cb-e64d375db7d7)
A Private folder
In the Private folder, the administrator can add groups. These groups allow for streamlined video management, enabling administrators to: view, rename, delete, add and remove cameras, and initiate camera viewing. This feature provides a robust method for organizing video surveillance and enforcing access restrictions to private zones.
To add a group to the Private folder, select Add group and enter a group name.
The group name must be unique within the location.
To view a camera within the group, select the name of a relevant group. This will list the cameras of this group.
.png?inst-v=b63742cc-00c9-4c22-96cb-e64d375db7d7)
Cameras in the group
In the Note column for each camera displays the following options it has enabled:
The camera is configured to receive events from the camera via the ONVIF protocol.
Analytics is configured by the user on the camera.
The camera features audio. Audio is enabled on the camera.
To delete a group, select the Delete icon.
You can delete a group that doesn’t contain any cameras.
Search
To initiate a camera search in the Search field, input a minimum of three characters. The search criteria include:
A camera name
An IP address
A camera UUID
The search is performed automatically as you enter characters. Consequently, only the cameras that match your search will be visible in the camera tree and table.
To return to the default view of the table, perform one of the following actions:
Clear the Search field.
Select the Х icon in the Search field.
Select the Clear filter and show all cameras button.
Transfer a camera to another branch
Provided that you have the necessary permissions, you can transfer cameras from one tree branch to another.
Select vertical ellipses icon (⋮) to call out the Transfer to another branch option for the camera that you want to transfer.
On the opened page:
Specify the folder with the relevant access to cameras – Public or Private.
When Public is selected, specify the branch where to transfer a camera.
When Private is selected, specify the branch where to transfer a camera as well as the camera group.
.png?inst-v=b63742cc-00c9-4c22-96cb-e64d375db7d7)
Transfer of a camera
To complete transfer, select Confirm.
Camera transfer behaviour between Public folders of different branches:
When a camera with an additional address is transferred, only the main address changes. The additional address remains unchanged.
For users created via the billing system of a customer, camera relocation affects access differently:
Access linked to the main address is lost.
Access linked to the additional address is kept.
For users created by the administrator, camera relocation doesn't affect access to this camera, regardless of the linked address – main or additional. The camera's location within the user's camera tree is updated with the new main address.
Users with access limited to Public folders will lose access to any camera moved to a Private folder.
Add a camera
The way you add a camera depends on the selected folder – Public or Private.
The Public folder
To add a camera to a Public folder of a selected location, call out the context menu by selecting the vertical ellipses icon and select Add camera. On the opened Create camera panel, complete the camera details. You can find a detailed description in the Add a camera documentation section. As a result, the camera will be added to the selected group with the prefilled address.
The Private folder
To add a camera to a Private folder, follow the steps:
In the Tree view, select a relevant address.
Navigate to the Private folder.
Open a relevant group.
Select Add camera.
This navigates you to the camera details page, where you complete the camera set up. For details on how to complete the details for a camera, see the View, add, and edit camera details documentation section.