Layouts. Layout groups. Create, manage, and search
Layouts provide a convenient way to monitor multiple cameras simultaneously.
You can customize your viewing experience by grouping and favoriting camera layouts. Enjoy versatile viewing options, including separate monitors and full-screen mode.
Each layout contains a set of templates with a different number of cameras – from 1 to 49 and allows for simultaneous access to the selected cameras.
In Archive, the number of cameras on the layout depends on the following settings. When the Show all archive layout templates settings is selected, the maximum number of cameras is 16; when the setting isn’t enabled – up to 6.
By default, layouts are sorted by a creation date, starting from the latest.
Add a layout and select cameras
You can add a new layout both in the Live and Archive/DVR sections.
The Main layout can’t be deleted or edited.

The Main layout
Ensure you save changes when createing a layout before you navigate to another template.
Once a new layout is created, we recommend to resfresh the Layouts section.
You can create layouts in one of the following ways.
Option #1
To start creating a new layout, you one of the following options:
On the layouts top panel, next to the main layout or any existing open layouts, select the following tab with a plus sign '+' (Create layout).
At the bootm left, select New layout.
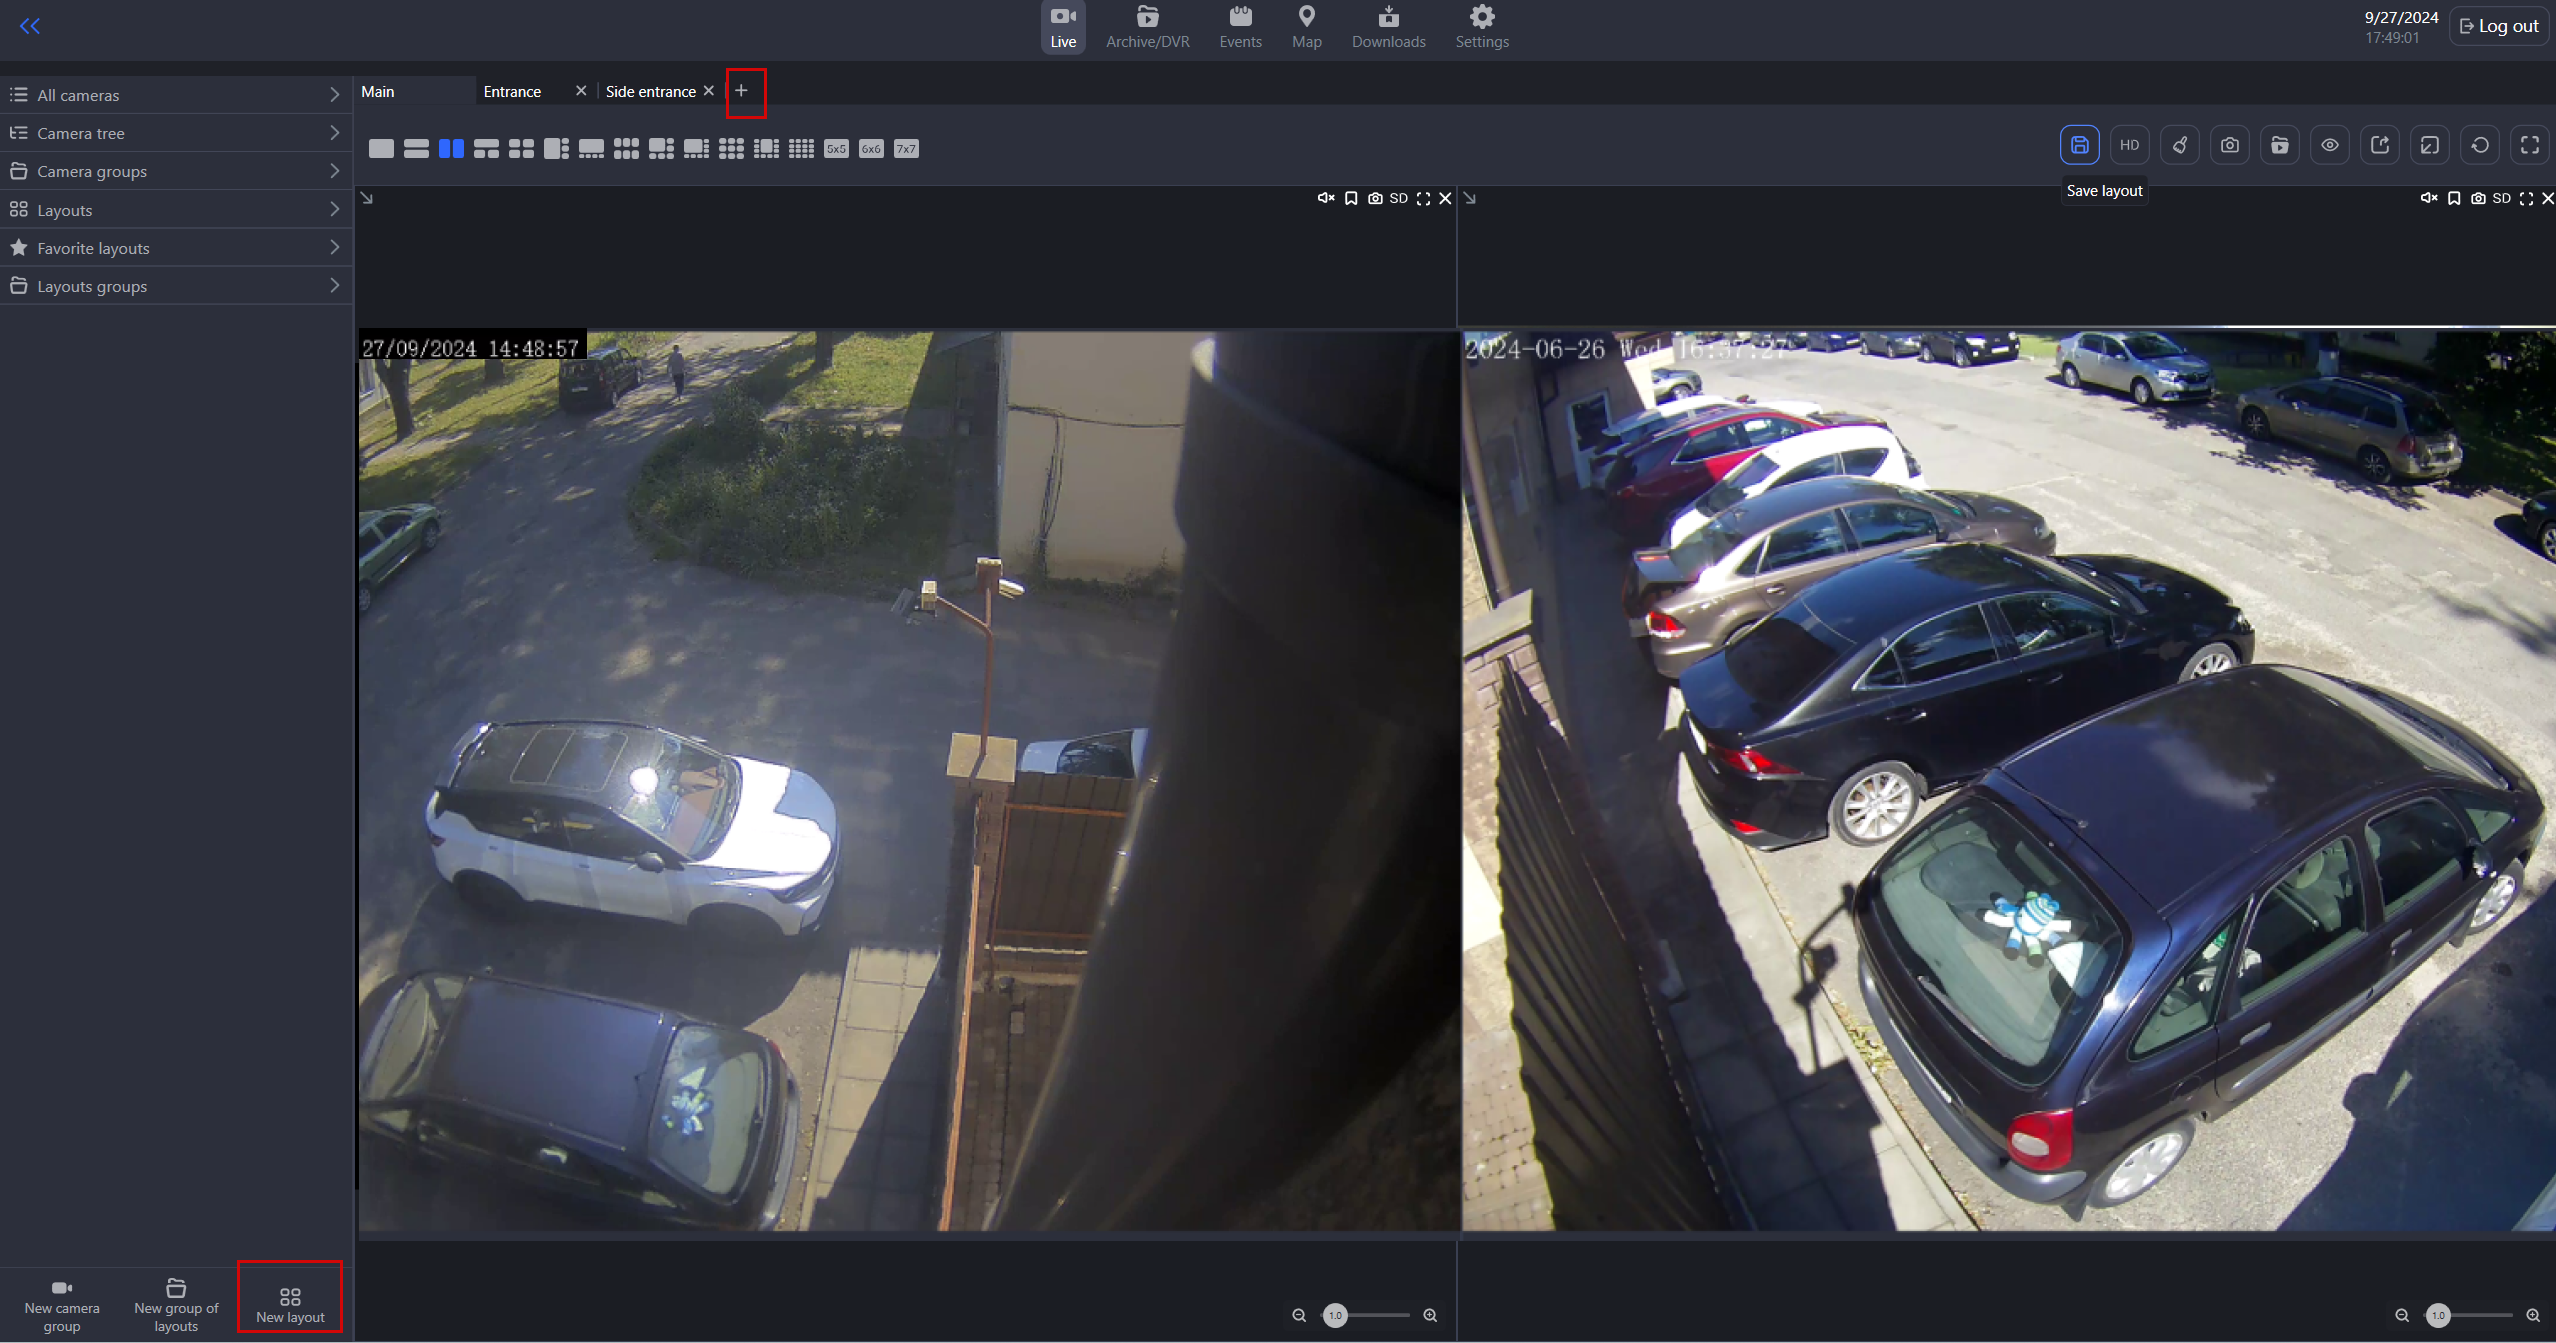
Creating a layout
In opened form, enter a unique name of the layout.
.png?inst-v=1d934989-adc9-47d4-b93e-1c2e7354ae81)
Complete the form
To complete the action, select the Save layout button.
The cretaed layout will automatically open containing a template for one camera. Next, you can add a camera or change a template from the available templates. If you change a template, save the laout by selecting the Save layout button.
.png?inst-v=1d934989-adc9-47d4-b93e-1c2e7354ae81)
The Save layout button
Option #2
In the Live and Archive/DVR sections, you can find the Main layout that can’t be deleted or edited. You can use this layout to create new layouts.
To create a new layout, follow the steps:
On the opened Main layout, select a new template that contains a required number of cells for cameras.
Add cameras to a layout. You also can add cameras later.
To complete the action, select the Save layout button.
.png?inst-v=1d934989-adc9-47d4-b93e-1c2e7354ae81)
Creating a layout
In opened form, enter a unique name for the layout.
Select Add layout.
Option #3
Via the context menu of the Layouts section.
To call out the context menu of the Layouts section, hover over the section name and select the horitontal ellispes icon (…).
From the opened list, select Add layout.

Select Add layout
In opened form, enter a unique name for the layout.
Select Add layout. The cretaed layout will automatically open containing a template for one camera. Next, you can add a camera or change a template from the available templates.
Add cameras to the layout
You can add cameras when creating a layout or to an exisitng layout.
Once cameras are added, save the layout.
You can add cameras to the layout in multiple ways.
On the opened layout
Open the layout, where you would like to add a camera.
Left-click the cell, in which you add a camera. As a result, the cell will be highlited gree. Here, add a camera in one of the following options:
Drag-and-drop a camera from the list of cameras.
Double-click a camera in the list of cameras.
In the highlited cell, choose Select a camera. From the opened drop-down list, select a camera. Complete the action with Add a camera.
Within an opened layout, drag a camera from one cell and drop it to another.
Once cameras are added, save the layout.
Via the context menu of the layout
.png?inst-v=1d934989-adc9-47d4-b93e-1c2e7354ae81)
Add cameras
From the left-side panel, select a layout to add cameras. Near the title, select the Plus icon '+' and Add cameras.
In the opened panel, select relevant cameras. The list specifies the number of cameras that can be added to the layout.
To complete the action, select Add.

Adding cameras
Search for a layout
Search for layouts by name in the Layouts and Favorite layouts sections. Your search results will update as you type
Manage a layout via its context menu
You can manage a layout by selecting a relevant action from the layout context menu.
To call out a context menu, follow the steps:
Hover over the layout name on the left-side panel and right-click.
Hover over the layout name on the left-side panel and right-click the horizontal ellipses icon (…).

The context menu of a layout
The opened context menu lists the following management options:
Open.
Open in new (detached) window.
Open on monitor.
Open full screen.
Rename layout.
Add layout to group.
Add layout to favorites.
Delete layout.
Below, you find a detailed description for each action.
Open a layout
The Open context menu item allows you to open the selected layout in the work area to view the layout cameras.
You can also open a layout by double-clicking the left mouse on the layout name.
Open in new (detached) window
The Open in new window context menu item allows you to open the selected layout in a detached window on a extra monitor (when more than one monitor is connected) or on the main monitor if there are no extra ones.
Layouts are limited to a single open window per layout
After selecting a menu item, the layout will open as a separate window. The sidebar and top menu are hidden. In this case, all player controls and other functions are displayed.
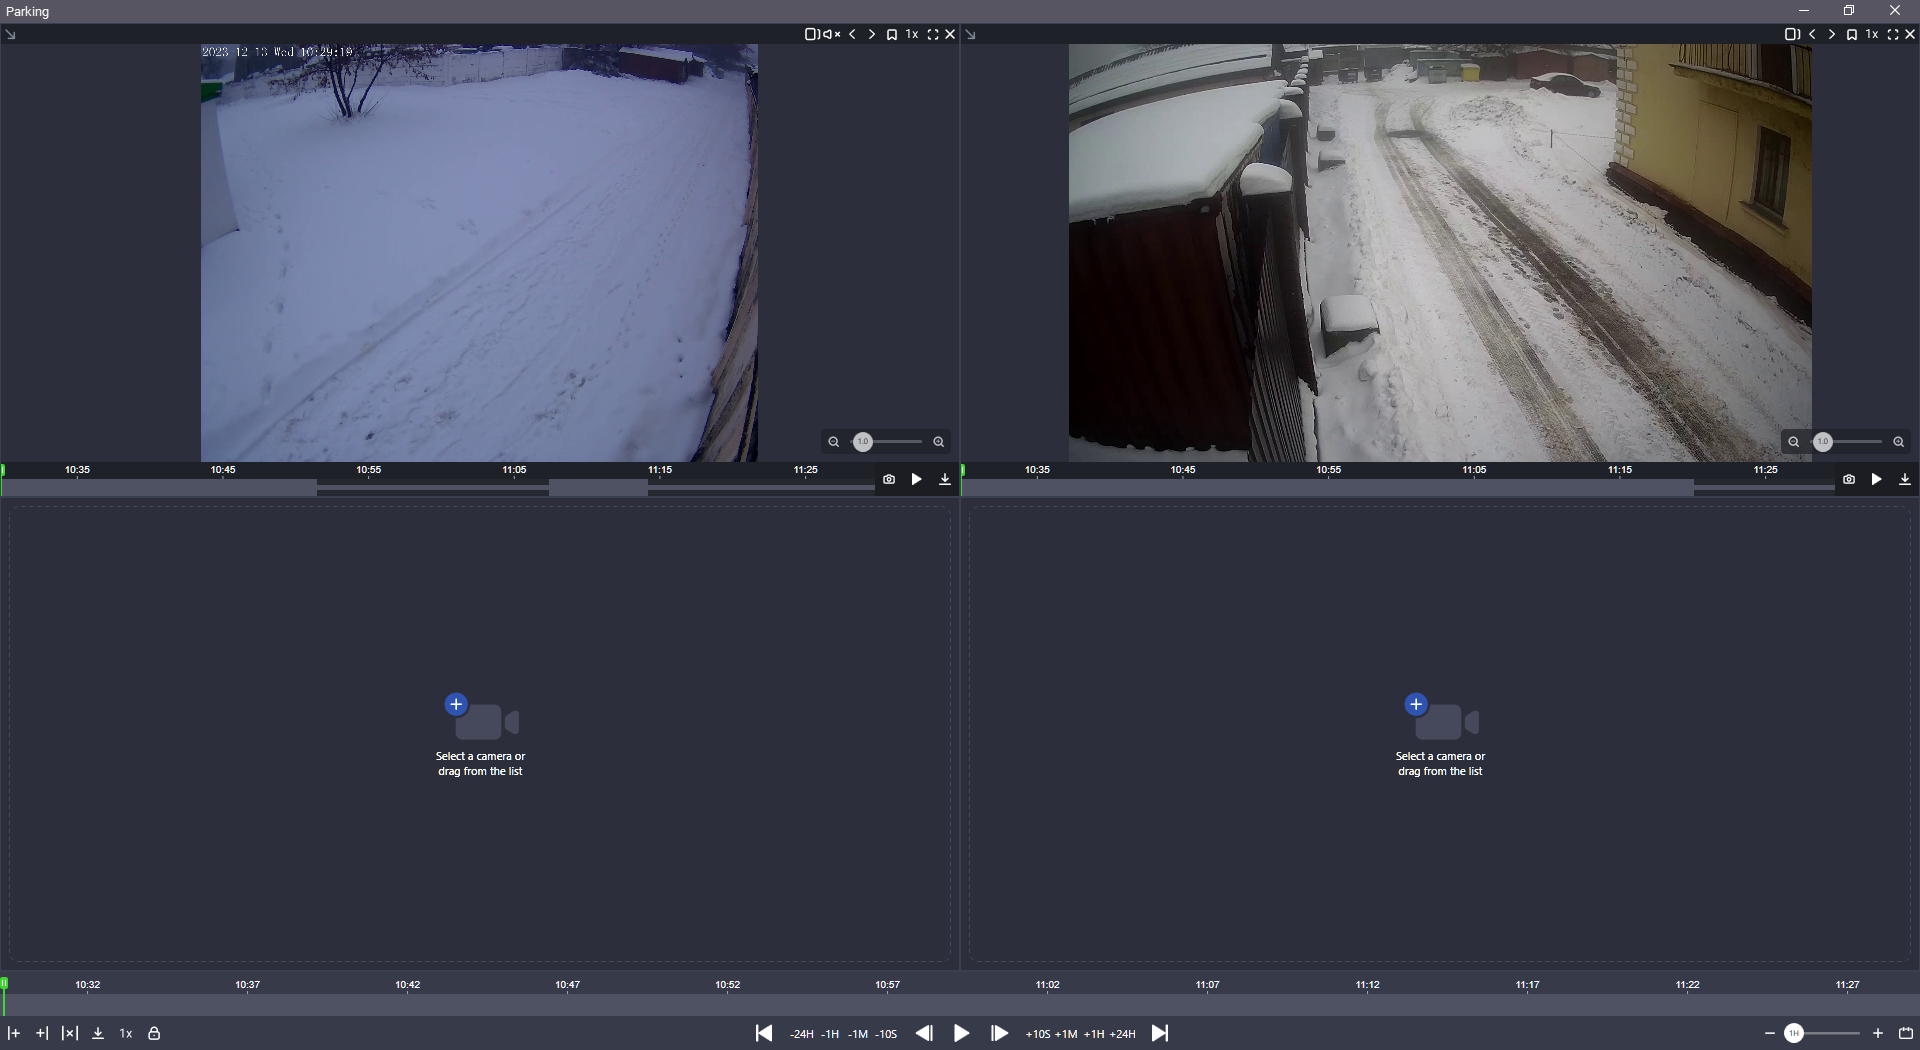
The layout view in a new window
To avoid duplicate layouts, a warning appears when you try to open an opened one.
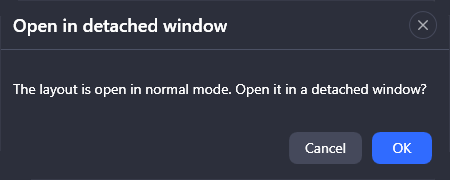
A warning message
Selecting OK, opens the layout in a separate window and closes in the work area. After closing a separate window, the layout is displayed again in the application workspace.
You can also open the current layout in a detached window with the Open layout in a detached window button on the toolbar.

The Open layout in a detached window button
Open a layout on the monitor
Select Open on monitor to open the selected layout in a new window on a separate monitor.
This action opens a list of monitors to select from. Each monitor has a specific system number and a name. From the list, select a monitor and Open layout.
As a result, the layout will be open in a separate window on the selected monitor. The left-side menu and the top bar won’t be available. However, the player management tools remain available.
You can also open a layout on the monitor by selecting the Open layout on monitor icon at the top right of the workspace.

The Open layout on monitor icon
When a layout is opened in a new window, it becomes detached from the workspace. If the window is closed, the layout is reintegrated into the workspace
How to determine the monitor number
On your device, select Start > Settings > System. Next, select the Display section. Below the displays, select Define. As a result, each monitor will display its number.
Open full screen
Select the Open full screen menu item to view the layout video full screen on the current screen. As a result, the workspace opens full screen, the top menu becomes unavailable. However, the player management tools remain available. To exit full screen, select the relevant icon at the top right or F11.
To view the layout video full screen, you can use the Open layout full screen icon from the top toolbar.
.png?inst-v=1d934989-adc9-47d4-b93e-1c2e7354ae81)
The Open layout full screen icon
Rename a layout
You can rename a layout in one of the following ways:
In the context menu of a layout, selec Rename layout. In the opened form, enter e new name of the layout and Rename.
Open the layout. Double Left-cick its tab name. In the opened form, enter e new name of the layout and Rename.
The Main tab can’t be renamed.
If you opened the layout from the Live section into Archive/DVR via the Open layout in archive option, you won’t be able to rebame the layout from within Archive/DVR. In Archive/DVR, this layout opens as a new one.
From within Archive/DVR section, you can rename only the layouts that were open from this section via the context menu of the layout, or were created in this section.
Add a layout to a group
To add a layout to the group, select Add layout to group.
From the opened drop-down list, select the layout group where you would like to add this layout into.
The list contains only groups that have no child groups.
Select a group and Add.
As a result, the layout will be added to the specified group. In this case, the layout will also be displayed under Layouts.
A layout can only be placed only in one group.
Add a layout to favorites
To add a layout to favorites, select the Add layout to favorites menu item. The Favorite layouts section can be used for the convenience of organizing and ensuring quick access to frequently used layouts. This feature is particularly beneficial in video surveillance systems that manage a large number of cameras, as it facilitates swift transitions between various layouts, enhancing monitoring efficiency and response time.
You can use the Remove layout from favorites action for the layouts that are added to favorites.
Delete a layout
Select the Delete layout action menu, to delete the selected layout. In the opened window, confirm the action.
Favorite layouts
Under Favorite layouts, you can find find all the layouts that were added by you to favorites.
When you add a layout to favorites, this moves up this layout in the Layouts section.
You can use the search field of Favorite layouts to find a relevant layout.
Layout groups
Under Layout groups, users can group layouts for more efficient management. They can also create child layout groups.
Under Layout groups, the user can find all the layout groups they created. The Layout groups section can’t be deleted.
Add a layout group
To start creating a layout group, use one of the following options:
To call out the context menu of the Layout group section. For this select the horizontal ellipses icon of the section. From the opened menu, select Add a group of layouts.
At the bottom of the left-side menu, select the New group of layouts button.
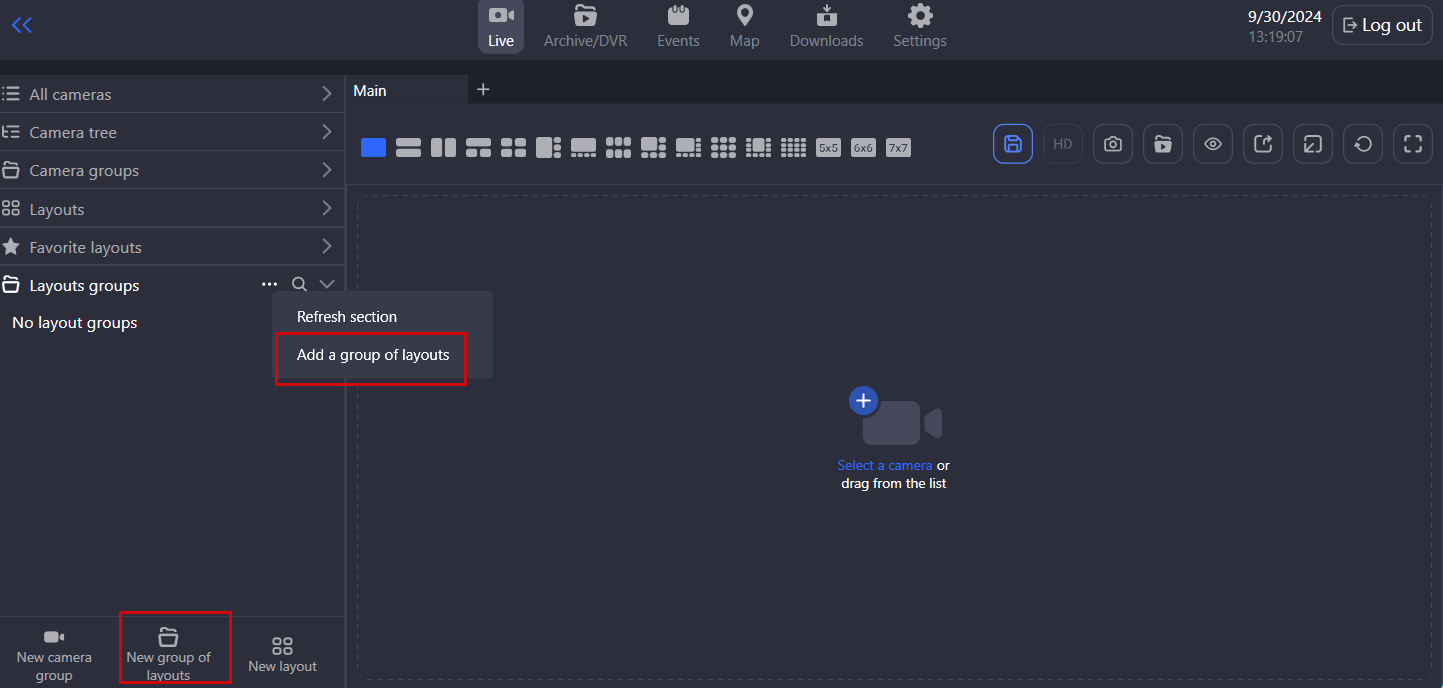
Adding a layout group
Complete the opened form:
Give a unique name to a group.
Add layouts to this group. Select layouts from the drop-down list. You can also add layouts to the group later, when the group is cretaed.
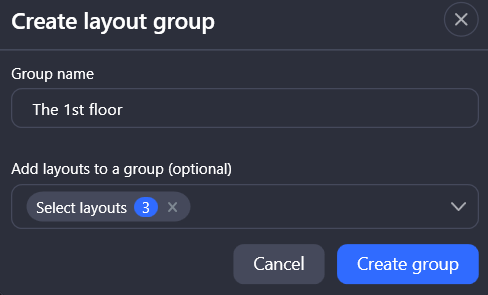
Creating a layout group
Add layouts to a group of layouts
You can add layout to a group of laouts in one of the following ways:
Drag-and-drop a layout to a group.
Via the context menu of a layout. For this, select the Add layout to group action item.
The layout can be assigned to only one group of layouts.
Add a child group
A group of layouts can contain child groups.
Use one of the following options to add a child group:
From the context menu of a group of layouts, select Create group. In the opened window, enter a unique name for a child group and confirm the action.
Drag-and-drop one group to another.
Delete a layout from a group
Use one of the following options to delete a layout from a group:
From the context menu of a layout group, select the Clear group action button. As a result of this action, all layouts within this group will be deleted.
Use the context menu of the layout that is inside the group. Select the Delete a layout from a group. As a result, only this layout will be deleted from the current group.
Layouts that were deketed from groups remain listed in the Layouts section.
