
The Intercom tree section provides tools to organize intercoms into a hierarchical tree, add them to the system, and oversee their management.
The platform allows intercoms to be configured through one of two tree types. Administrators can select whichever structure best fits their requirements:
-
System‑based tree. Created based on the customer’s address system (external system). Branches/locations are generated automatically when corresponding methods are received from the customer’s Billing or CMS systems.
-
Custom tree. Branches are created manually by the administrator (as described below in this documentation section).
In the Intercom tree section, the intercom hierarchy is displayed. When you select a branch, the system shows the list of intercoms associated with the selected address.
Add a branch
The root (top-level) branch
To add a root (top-level) branch, select Add. This will display a form, where you enter a name for a new root branch.
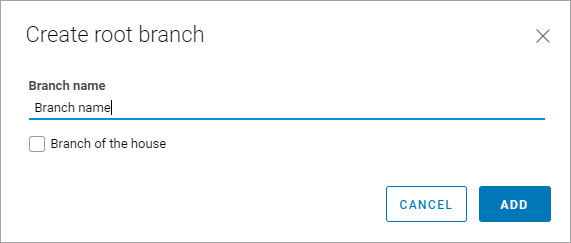
The final location in the branch
To create a final location in the branch, select Branch of the house. When the Branch of the house setting is enabled, the creation of subbranches is unavailable. The intercom tree will display an additional House icon for such a branch. Intercoms can be added to the final location only.
Nested branches
To create nested branches:
To create nested branches:
-
Select the vertical ellipses icon
-
From the opened menu, select Add a branch.
-
Complete the opened form.
-
Repeat the process as many times as needed to create the required number of nested branches.
Rename a branch
To rename the branch, select the vertical ellipses icon
.png?cb=6065cd2085c240ef70a23ef189cae50f)
Branch of the house
The Branch of the house toggle can be managed in edit mode only for non-home branches without sub-elements.
Delete a branch
Branches can be deleted only when they contain neither sub-branches nor intercoms.
To delete a branch, select it to call out context menu
Add an intercom
Intercoms are integrated into the system either manually or automatically. The method used is determined by the intercom vendor. For details, refer to the Add an intercom. Integration documentation section.
Manual entry is available in the branch assigned as the Branch of the house.
To add an intercom manually, select the branch where you want it and select Add intercom. You can also use the branch context menu: hover over the branch, open the menu, and choose Add intercom.
Intercoms in the House branch
The house branch features the list of added intercoms.
Intercom list supports sorting:
-
By name
-
By entrance type
-
By vendor
-
By creation date
-
By update date
Search for intercoms:
-
By name
-
By address
-
By UUID
Intercom list supports filtering:
-
By entrance type (primary, additional, or any)
-
By vendors
-
By status
-
By intercom creation period
To view and edit intercom settings, select a relevant row. This will redirect you to the intercom card.
Transfer an intercom to a different branch
You can transfer an intercom to a different branch.
Intercoms can be transferred to the House branch only.
To transfer an intercom to a different branch, select the vertical ellipses button (⋮) next to the relevant intercom. From the menu, select Transfer to branch. On the panel that opens, select the branch to transfer an intercom to and Move to branch.