«License plate recognition» analytics type
The «License plate recognition» analytics type is designed for detecting and recognizing license plates that have been added to the analytics resource group.
It is recommended to view the list of countries whose license plates are recognized by VMS algorithms.
The «License plate recognition» analytics type has the following possible analytics events:
Appearance of a recognized license plate: the image of a vehicle's license plate obtained from the video stream matches a specific alphanumeric combination of a reference license plate
Appearance of an unrecognized license plate: the image of a vehicle's license plate obtained from the video stream does not match any alphanumeric combination of a reference license plate
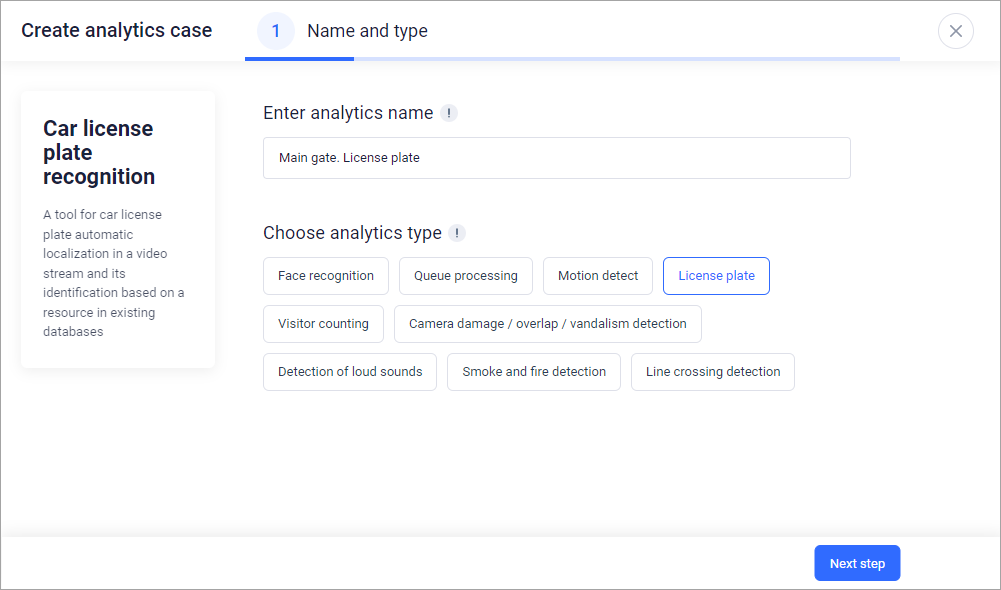
Step 1: «Name and analytics type»
Enter the name of the analytics case
Select the «License plate» analytics type from the list
Click «Next» to proceed to Step 2
Step 1: «Name and analytics type»
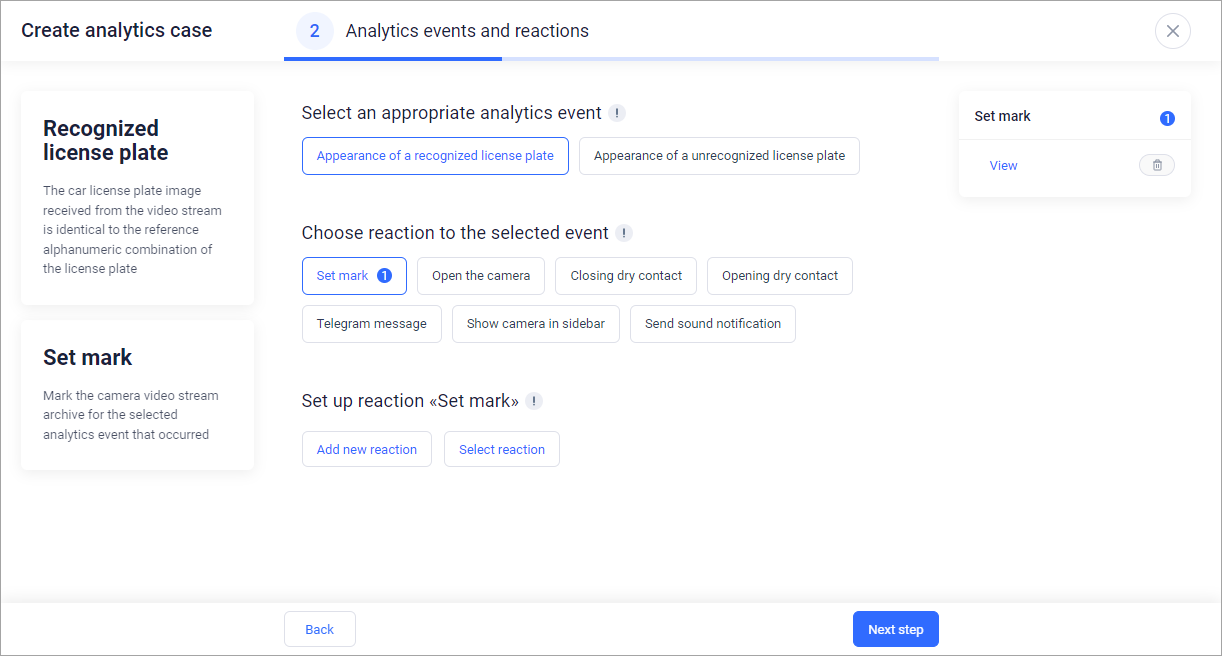
Step 2: «Analytics events and reactions»
Select an event:
Appearance of a recognized license plate
Appearance of an unrecognized license plate
Choose a reaction for the selected event:
Set mark
Open the camera
Telegram message
Show camera in sidebar
Send sound notification
Closing dry contact
Opening dry contact
Configure the reaction by choosing a convenient method:
Add a new reaction (see «Adding a new reaction»)
Select from the list of existing reactions (see «Selecting a reaction from the existing list»)
If necessary, add a reaction for the same or a different event. The counter next to the reaction name indicates how many times that reaction has been used
Click «Next» to proceed to Step 3
Step 2: «Analytics events and reactions»
Selecting an event, reaction, as well as setting the reaction are required fields.
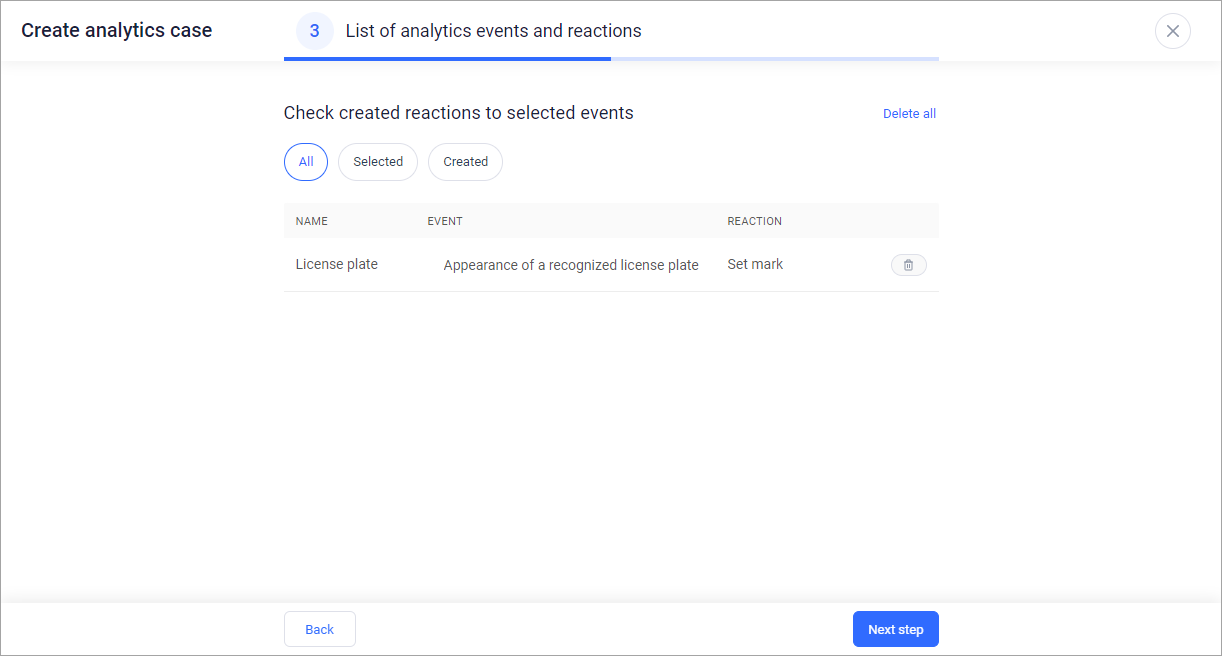
Step 3: «List of analytics events and reactions»
Review the created reactions for the selected events
If necessary, delete reactions
Click «Next» to proceed to Step 4
If all reactions are deleted, it returns to the beginning of Step 2.
Step 3: «List of analytics events and reactions»
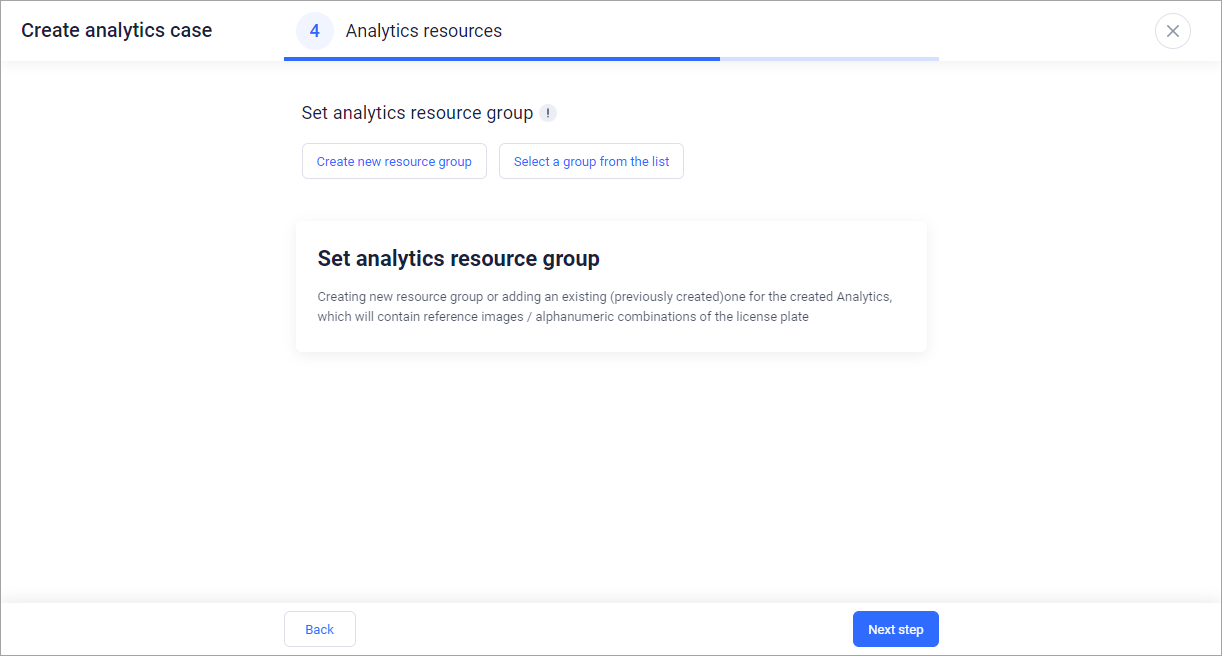
Step 4: «Analytics resources»
Assign an analytics resource group using one of the following methods:
Create a new resource group (see «Creating a new resource group»)
Select from the list of existing resource groups (see «Selecting a resource group from the existing list»)
Click «Next» to proceed to Step 5
To proceed to Step 5, at least one resource group must be selected.
The list of selected resource groups can be edited.
Step 4: «Analytics resources»
Step 5: «List of added analytics resources»
Review the created and added groups. If necessary, delete resource groups.
Click «Next» to proceed to Step 6
Clicking on a resource group allows you to view the contents of the group or delete resources in the created resource group.
If all resource groups are deleted, it returns to the beginning of Step 4.
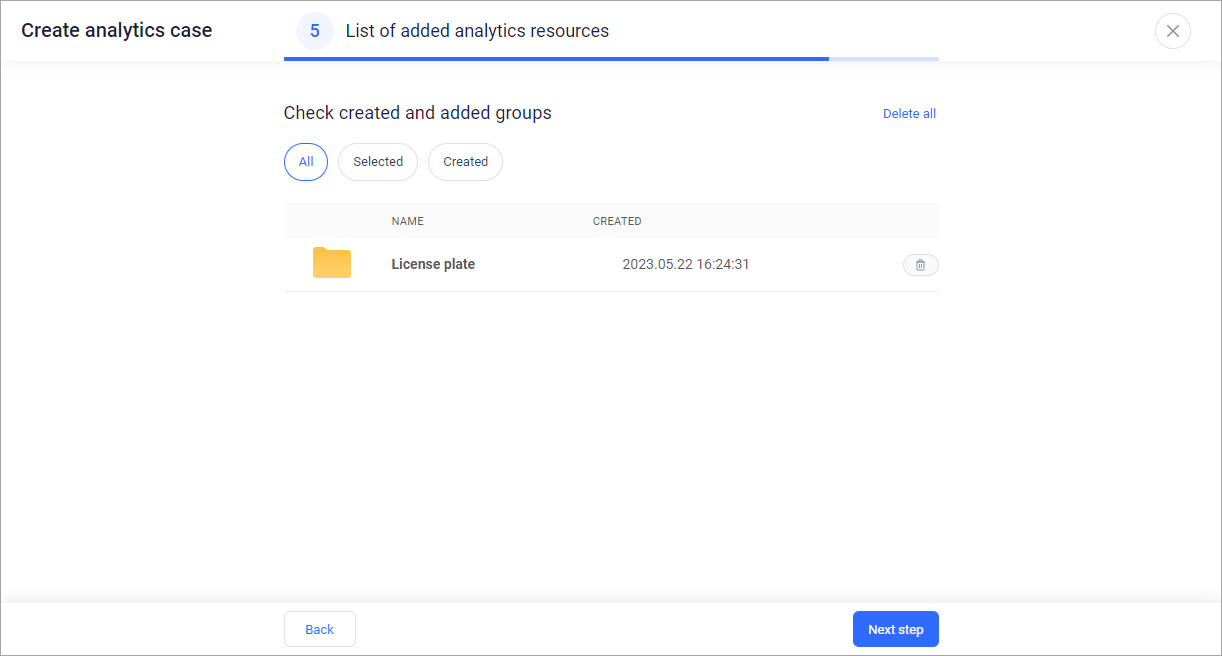
Step 5: «List of added analytics resources»
Step 6: «Analytics camera configuration»
Select cameras from the list and click «Add». Click «Select all» to add all available cameras. If all cameras are selected, the «Deselect all» button is displayed to cancel the selection of all cameras
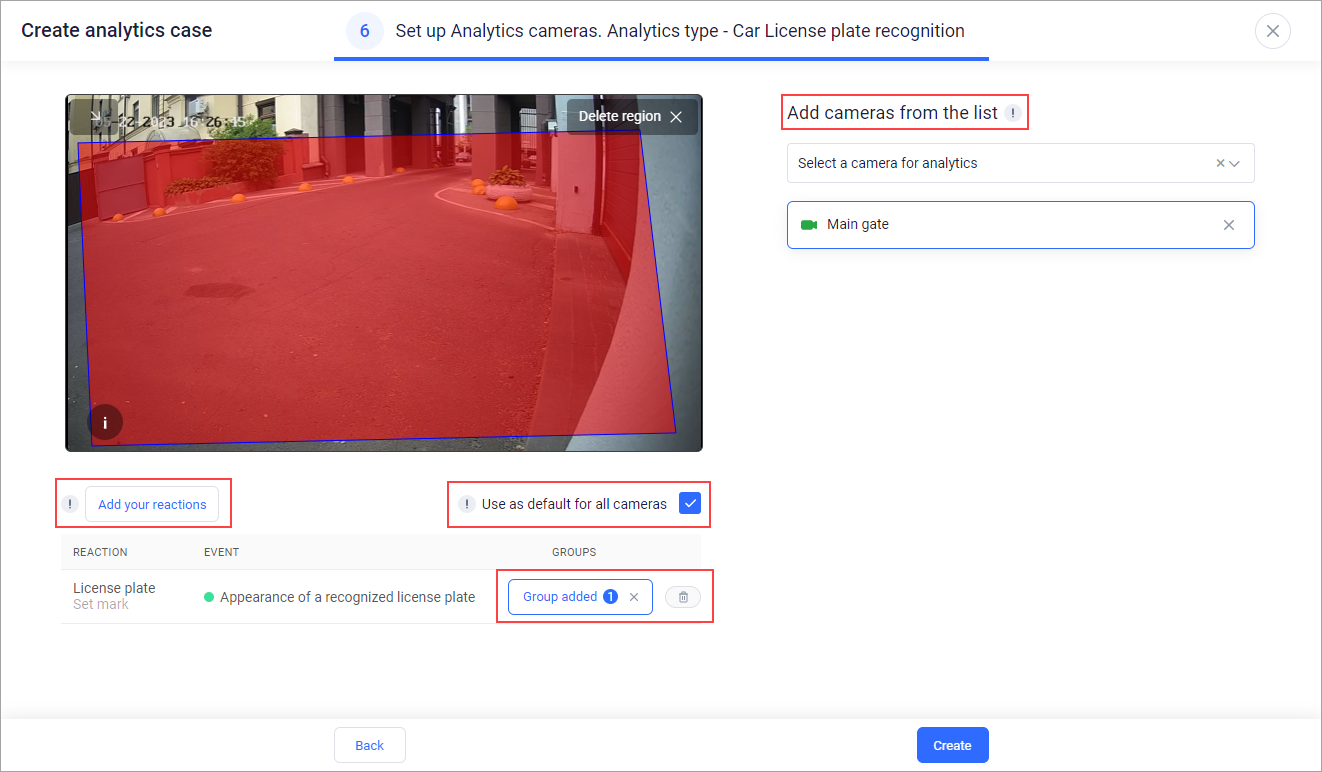
Step 6: «Analytics camera configuration»
Set camera configurations by clicking on the name of one of the selected cameras:
If necessary, add created reactions by clicking the «Add your reactions» button
Add a resource group from the previously added list by clicking the «Add group» button. You can delete the added group by clicking on the corresponding delete icon*
Edit reactions by clicking on the reaction name
Configure the area where license plate detection will take place. To do this, use the left mouse button to draw lines defining the area, and then connect the lines using the right mouse button (the area will be highlighted in red)*
Add or delete cameras from the list as needed
Check the «Use as default for all cameras» checkbox to apply the settings of this camera to all selected cameras
Click «Create»
*Fields are mandatory.
If multiple cameras were specified in the case, and some of them were not added due to an error during case creation, an error message is displayed. The case creation is performed, and the case is marked with an icon indicating the camera adding error. The mark is displayed until the next case update.
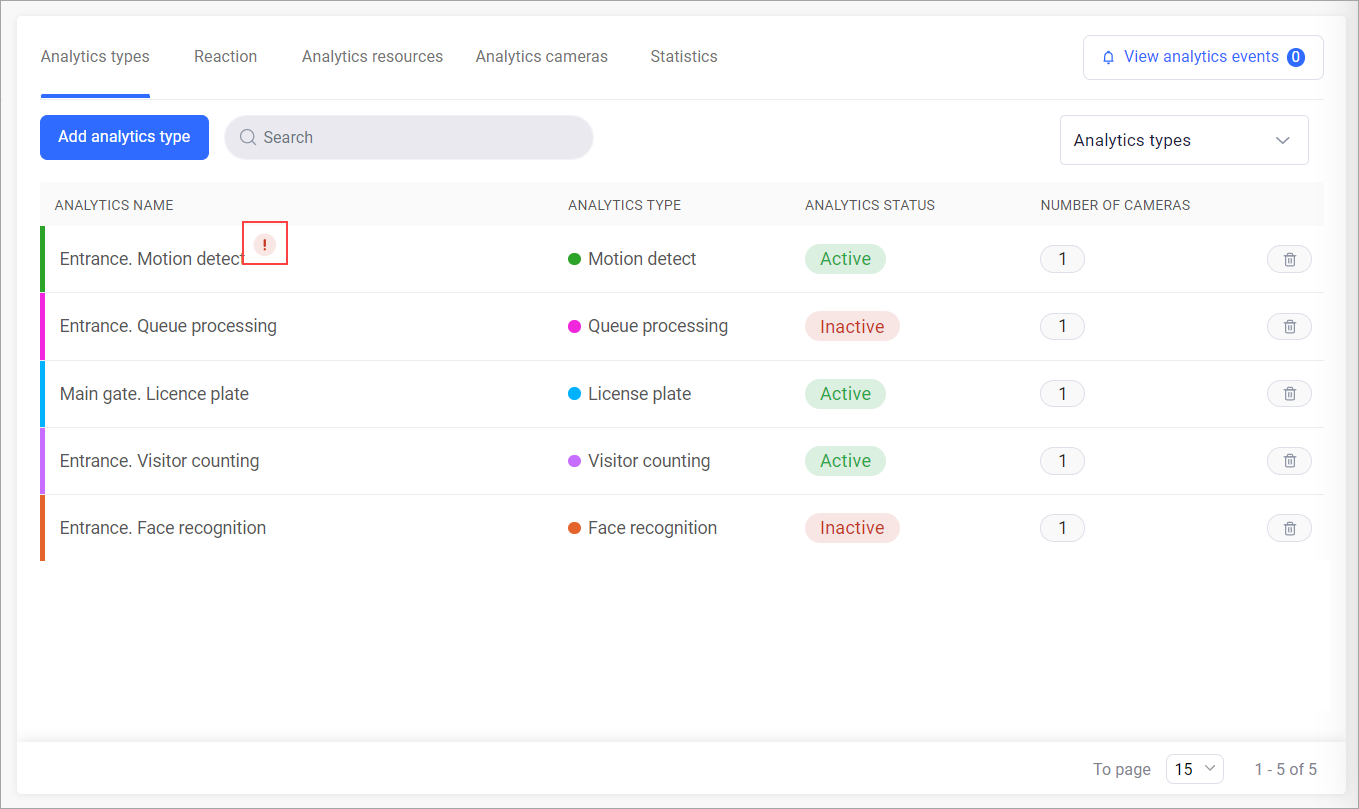
Error mark for camera adding error
If all specified cameras were not added due to an error during case creation, an error message is displayed. In this case, the case creation is not performed.