When the app is installed, proceed with a profile creation and authorization in the app.
Add a profile
To add a profile, use one of the following options:
-
Use the Create profile button.
-
Scan the QR code.
-
Use the Authorization page. For this option, see the Manage profiles documentation page.
Use the Create profile button
-
When you first enter the mobile app, use the Create profile button.
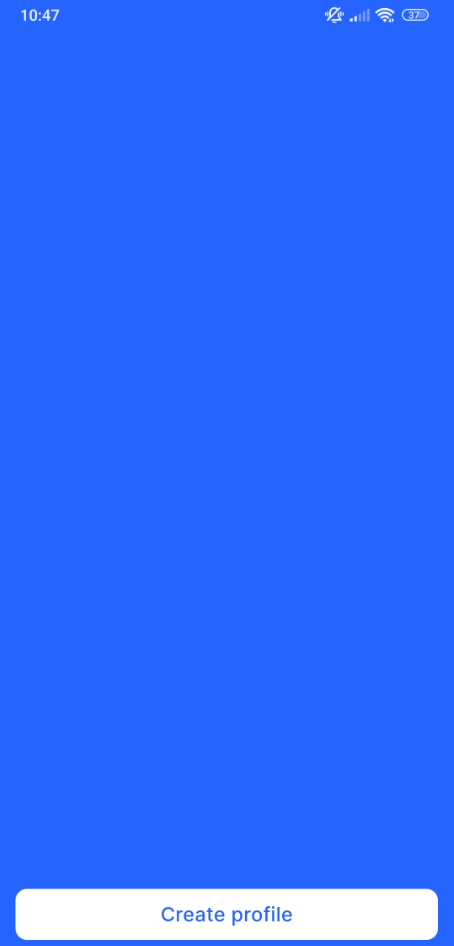
-
On the opened tab, perform the actions:
-
Specify a profile name.
-
Enter the URL address of the video platform server.
-
Select Save profile to save the profile. The URL will be automatically checked. You’ll be automatically redirected to the Profiles page if the URL is correct. On this page, the created profile is preselected for further authorization. If the URL is invalid, you’ll see a relevant notification. In this case, correct the URL.
.png?cb=50bbec018843c68a2028915dc8a22282)
-
Select Go to authorization to proceed with authorization.
-
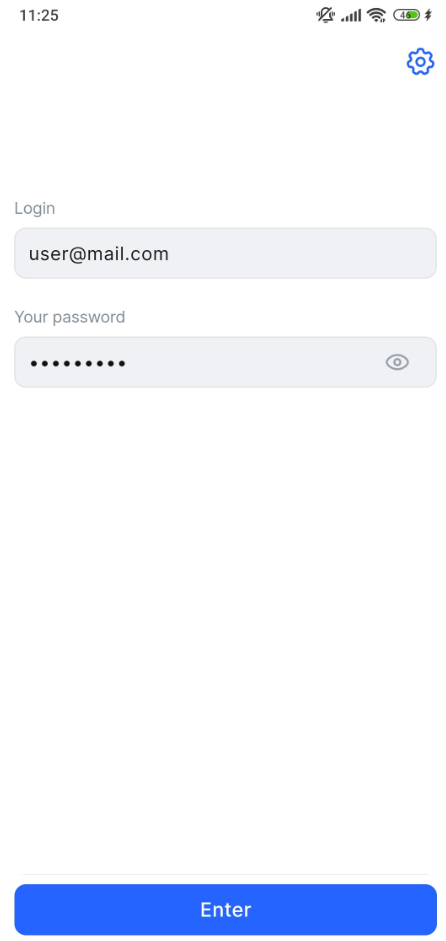
On the opened tab, enter your login and password and select Enter.
Scan the QR code
To create a profile scanning a QR code, you should access the Web client interface, the Profile section.
-
When you first enter the mobile app, use the Create profile button.
-
To activate the QR code scanner on your device, select Scan QR code. Allow the app to access your device camera.
-
To scan the QR code, open the Web client interface, the Profile section. Point the device camera at the QR code. When the QR code is successfully read, the Profile name and API URL fields are automatically prepopulated. You can edit them if required.
-
Select Save profile to save the profile. You’ll be automatically redirected to the Profiles page. On this page, the created profile is preselected for further authorization.
-
Select Go to authorization to proceed with authorization.
-
On the opened tab, enter your login and password and select Enter.
Authorize in the mobile app
You can authorize in the mobile app using either the standard method or a third-party service (if available):
-
If you have several profiles, select a relevant profile to authorize. For this, when you enter the mobile app, from the authorization page, select the Settings button. On the opened Profiles panel, select a checkbox of the relevant profile and Go to authorization. You’ll be redirected to the authorization page.
.png?cb=76dfdbaebb3d03423407c2695fbc5c4d)
-
On the authorization page, use one of the options:
-
Enter your login and password and select Enter.
-
If authorization via a third-party service is available, select the Enter through site button (this is an example of a possible button name). This option allows you to use your existing credentials from another service to enter the mobile app. Selecting this button will redirect you to the authorization page of the third-party service. Once authorized, you’ll be automatically returned to the mobile app as an authorized user.
.png?cb=918c7d12047b0a7bb23ab2e2962ff6f0)
If the administrator enabled the Display captcha on the client authorization page option, the user has to enter a captcha code while authorizing. The captcha code consists of uppercase and lowercase Latin letters (excluding the letter “O”) and digits from 1 to 9.
.png?cb=a58a20b135757f89e897c0ba2e5be0e4)
For devices with Android 14 and newer: Users will be prompted with a dialogue box seeking permission to send notifications the first time they launch the app after registering. This permission is required to receive notifications on incoming calls when the device screen is blocked.
Session limits and functionality restrictions
When a user logs in, the system automatically checks the maximum number of simultaneous sessions allowed for that account. Simultaneous sessions enable a user under a single account to access the application on various devices at once, such as a mobile app, a desktop client, or a web browser. The system administrator sets these session limits, which can be configured for individual users or applied globally to everyone.
If a user hits the session limit while logging in, the system will notify them and may restrict access to certain features. From there, the user has two options for how to proceed:
-
Continue with limited functionality. To do this, in the notification, select It’s clear. Users can remove the restrictions later by going to Settings > Sessions > Active sessions.
-
End a session to lift the restrictions. The notification includes a link to Active Sessions. Selecting this link takes the user directly to the Settings > Sessions > Active sessions page, where they can see details for all their current sessions and end the one they no longer need.
.png?cb=d48729f620008a39ae6ae4a79cc65fd5)
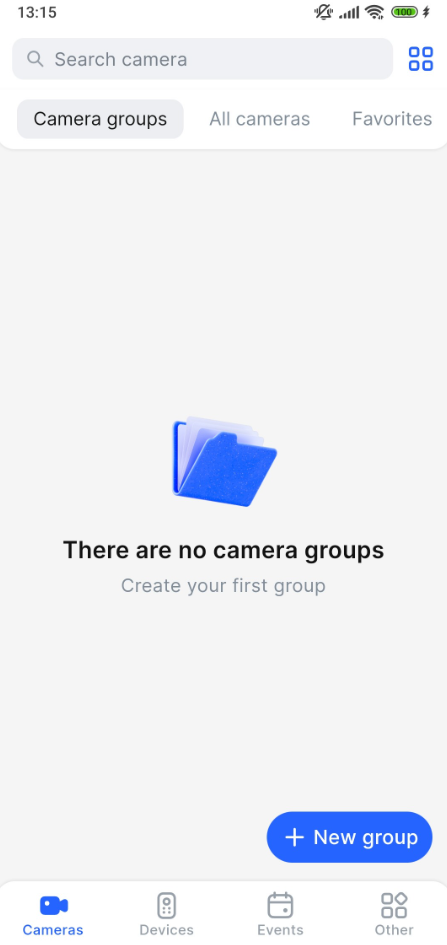
Once authorized, you enter the mobile app with the following tabs:
-
Cameras
-
Devices
-
Events
-
Other