
To get started with the Desktop client, download and run the installation file.
Once installed, a shortcut to launch the app becomes available on your desktop.
.png?cb=3d96d7f0163d367bd980fa63b6e54ef9)
-
Enter your login and password. The login and password are specified in the service agreement. You can also contact technical support.
-
Depending on the system settings, it may be necessary to enter an additional alphanumeric code (captcha). To receive a new code, select Refresh. The code is valid within a minute.
.png?cb=aea7abc8668617653241c1ad83da0559)
-
Select Manage video surveillance servers. See the details below.
-
Select Log in.
If the login, password, and server are specified correctly, you will be authorized and logged into the application.
Set up the video surveillance server
To authorize the application, at least one connection to the video surveillance server must be configured.
To create a connection, on the authorization form, select Manage video surveillance servers.
As a result, the server configuration window will be displayed.
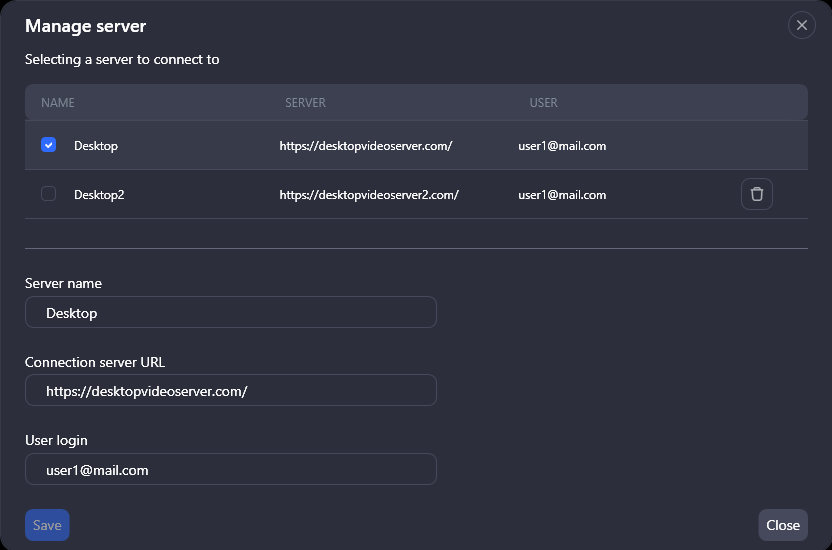
Complete the fields with relevant information:
-
Give a name to the server.
-
In the Connection server URL, enter the URL. It must contain the https:// prefix. If it wasn’t added manually, then when creating a connection, the prefix is automatically added to the address.
-
Enter a user login.
To save the introduced information, select Save. As a result, a new connection with the specified parameters will be added. Add additional connections as needed.
Adding a single video surveillance server connection automatically sets it as the default. For multiple connections, select the primary connection and save your changes.
To delete a server, select the Delete icon for this server.
A connection that is selected as the default connection cannot be deleted.
Next, to return to the authorization form, select Close.
Session and functionality limitations
When a user logs in, the system automatically checks the maximum number of simultaneous sessions allowed for that account. Simultaneous sessions enable a user to access the application on various devices at once, such as a mobile app, a desktop client, or a web browser. Session limits are defined by the system administrator and can be configured individually per user or applied globally to all accounts.
If a user hits the session limit while logging in, the system will notify them and may restrict access to certain features. From there, the user has two options for how to proceed:
-
Continue with limited functionality. To do this, in the notification< select Ok. User can remove the restrictions later by going to Settings > Account > Active sessions.
-
End a session to lift the restrictions. The notification includes a link to Active Sessions. Selecting this link takes the user directly to the Settings > Account > Active Sessions page, where they can see details for all their current sessions and end the one they no longer need.
.png?cb=3149755d2553fbfae77569d54e65a47d)