
Authorization
To enter video surveillance app, open your browser and navigate to the address of the VMS surveillance system.
On the login page, enter the username and password for your account.
.png?cb=7c26df61e6f352a8de91daa7fb908ac7)
The authorization page features the following options:
-
The language switcher.
-
The External Authorization button to log in through an external resource. Selecting this button, opens a new browser tab on the login page of an external resource.
-
Under System theme, you can find the drop-down list with the theme options. You can also change the theme after authorization when managing the user profile.
-
The Download the app and view product documentation button to reform the relevant actions. Selecting this button, navigates you to the page where you can download the mobile app and the Desktop client. See details below on this page.
Password expiration
Administrators can set password expiration dates for users. Upon expiration, users are prompted at login to create a new password for immediate access to the web interface. You can check your remaining password duration at any time by navigating to the Settings tab > Profile > General information.
Account expiration
Administrators can set an account expiration dates for users. These dates are automatically applied to all associated sub-users. Once an account expires, the user is restricted from logging in and will receive a notification explaining the status.
Reached limit of active sessions
When a user reaches the limit of active sessions, they will be informed during login that access to certain functions is restricted. To regain full access, select the link Active sessions from the notification and end any unnecessary sessions. To continue with limited access, select OK.
.png?cb=ded7b0d07263b0886e6e9698d0e2aa7d)
Captcha
Depending on the system settings, an additional field for entering an alphanumeric code (captcha) may be displayed.
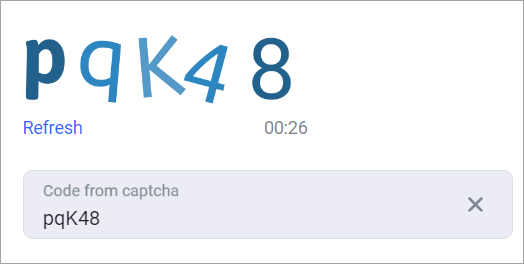
The code is composed of both uppercase and lowercase Latin alphabet letters, excluding the letter “O”, and includes numbers ranging from 1 to 9. If you have difficulty reading the displayed characters, select Refresh to automatically generate a different code. When the code is entered inaccurately, the system displays a notification and blocks authorization.
Download the app and view product documentation
When you select the Download the app and view product documentation button, you’ll be redirected to the page where you find the following options:
-
The QR codes and links to download the mobile apps:
-
For devices with Android OS.
-
For devices with iOS OS.
-
For Huawei devices with Android OS.
-
-
The Download Desktop app button to download the Desktop client.
-
The link to the product documentation page.
.png?cb=9bf72ac072d63d522b59a25d3cec0f21)
To return to the authorization page, select Back to the login page.
The Progressive web app
It is possible to use the VMS web client as PWA (progressive web app).
For more details on PWA, see this page.
Ensure that your browser supports PWA.
The PWA functionality is identical to that of the web client.
Launch PWA in Google Chrome
Below, you find an example of how to launch PWA in Google Chrome.
Open any page in the user’s web interface.
A download icon for PWA will be displayed in the browser’s address bar.
.png?cb=27c969c3f5284bc2ef04c781b94facd3)
Next, you’ll see the dialogue window with the request to confirm the installation. The action confirmation starts the automatic installation and launch of PWA.
.png?cb=71e05af1e0be5302c48c6cfe7a2c81a0)
Web interface
Upon successful authorization, you navigate to the web client interface.
Future logins will direct you to the first available layout in the list, provided there's an available layout.
.png?cb=78ce4222d9817b2e79e5e8ad5591ce52)
At the top of the window, you can find a toolbar.
.png?cb=0488408c2760508e224d6c5053372585)
The toolbar includes:
-
A logo. Selecting the logo, takes you to the Cameras section that displays a camera layout that was recently viewed.
-
The list of sections. You can find a description of each section below.
-
The Events button to open the sidebar with tracked events that also includes an analytics event counter.
-
A user avatar. Selecting the avatar enables the user to change a language and sign out.
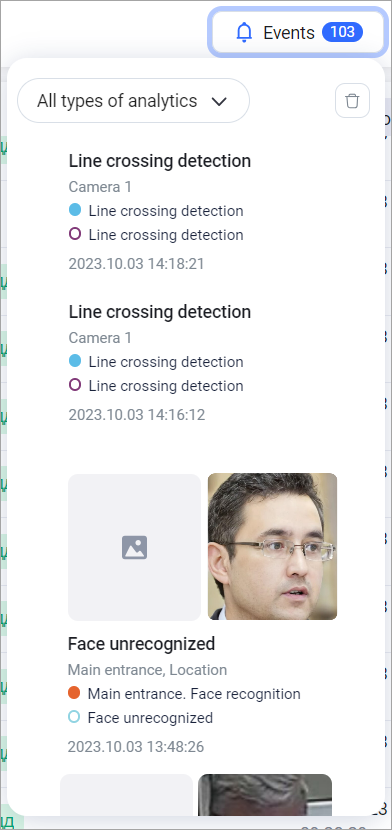
Events – the sidebar
Selecting the Events button, opens a sidebar. The panel displays analytics events for which the Show camera in sidebar reaction was set. To close the panel, select the Events button again.
For your convenience, you can move the sidebar to any location on the screen within the web client interface. To do this, left-click the sidebar to drag and drop it to a relevant location.
You can use an event filter by type of analytics on the sidebar. Multiple values selection is available to display only matching events on the sidebar.
In any given category of analytics, a maximum of 30 events can be displayed at once. If the number of events exceeds this limit, the system will replace older events with the most recent ones.
Selecting the event name, navigates you to the event on the analytics case page.