B2B Users
The B2B Users section contains the list of B2B users.
.png?inst-v=c246fb15-1530-4ba8-b650-c220381b36ae)
The list of B2B users
For each user, you can track the following details:
ID – the identification number of a user in the User Portal Manager.
Login – the User Portal registration login of a user.
Taxpayer identification number.
Tariff – a tariff plan name (if available).
Status – a tariff plan status. If a tariff plan isn’t added, the Service not added is displayed.
Created – the date and time when a user was created.
The View icon
to navigate to the user card.
The Edit icon
to edit user details.
You can perform the following actions from this area:
Search for B2B users by ID, login, name, and taxpayer number.
Filter by service status and tariff name.
Sort by ID, status and name of a tariff plan.
Set the number of listed items per page.
Edit details of a B2B user.
Navigate to a B2B user card.
Create a B2B user
To create a B2B user, select Create.
On the opened panel, complete the form.
In the User credentials section, all the fields are required.
.png?inst-v=c246fb15-1530-4ba8-b650-c220381b36ae)
Creating a user
Login. Complete the details provided by the customer.
The details must be saved by the customer in their CRM or billing system.
Password. Create a safe password for the B2B user.
Password Confirmation. Confirm the created password.
The password must meet the following criteria:
Contains at least 8 symbols.
Includes both uppercase and lowercase letters.
Contains at least one non-alphabetic character, such as numbers, punctuation marks, or special symbols.
The details specified in the Login and Password fields will be used by the B2B users to authorize on the video surveillance platform.
In the Create section, complete the following details:
Contact details of a B2B user. Leave comments if required.
The Name, Registration address, and Taxpayer identification number fields complete according to the information from the customer’s CRM or billing systems.
To complete the creation process, select Create.
As a result:
The created user will be available in the User Portal Manager.
The created user will be available on the video surveillance platform with the Blocked status. To change the status to Active, add and activate a tariff plan. For details, see the Attach and activate a tariff plan for a B2B user article.
Next, the created B2B user should be linked to a specific address where the service will be provided, or a to a private folder. See the detailed instructions in the Link a camera to a B2B user documentation section.
Edit details of a B2B user
To start editing details of a B2B user, use one of the following options:
In the list of B2B users, select the Edit icon for a relevant user.
In the card of B2B user, select the Edit icon at the top right of the page.
As the result, you navigate to the page where you can edit the details. On this page, you can edit the following:
A password.
An email.
A phone number.
A name.
A registration address.
A taxpayer identification number.
A contract number.
Notes.
Once editing is completed, select the Update button to save the changes.
A B2B user card
To navigate to the B2B user card, select the ID number of a relevant user or the Eye icon in the user line.
The user card features several information sections.
B2B User
In the B2B User section, you find the details of the user that were specified when they were created.
To edit the details, select the Edit icon at the top right of the page.
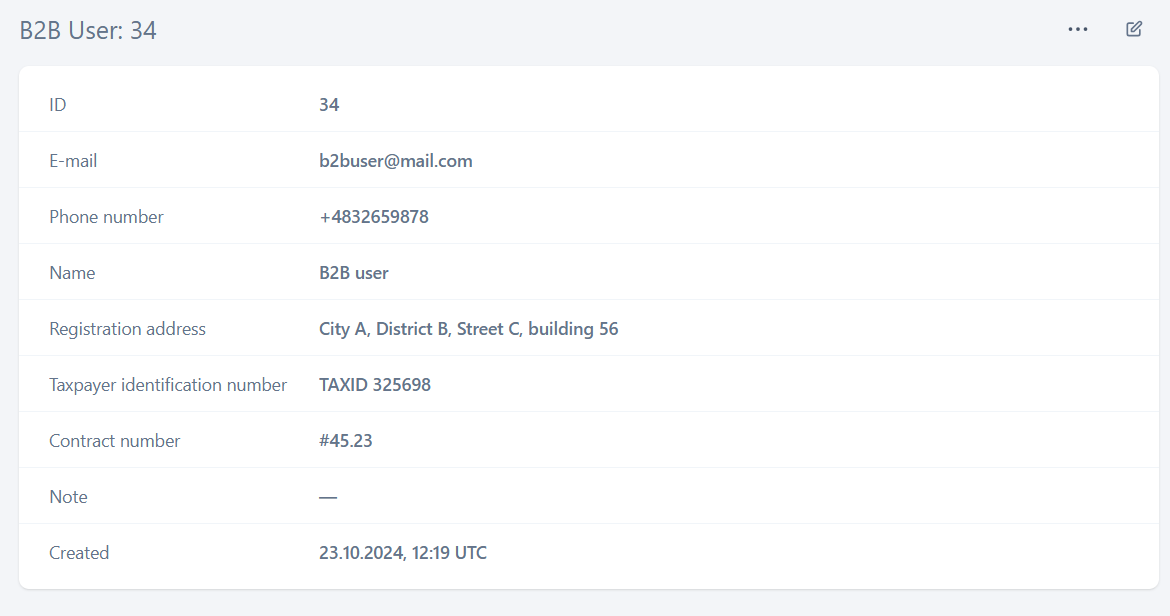
The B2B user details
User credentials
Under User credentials, you find the login of a B2B user. The login is assigned to a B2B user during the creation process. The login can’t be edited.

The login
Linked addresses (public access)
In this section, you can attach addresses to a user. These addresses have attached cameras with public access.
This option becomes available if the following is met:
Addresses are cretaed in the system.
Cameras are added to addresses.
For details on how to create addressesd and link cameras, see the Addresses documentation section.
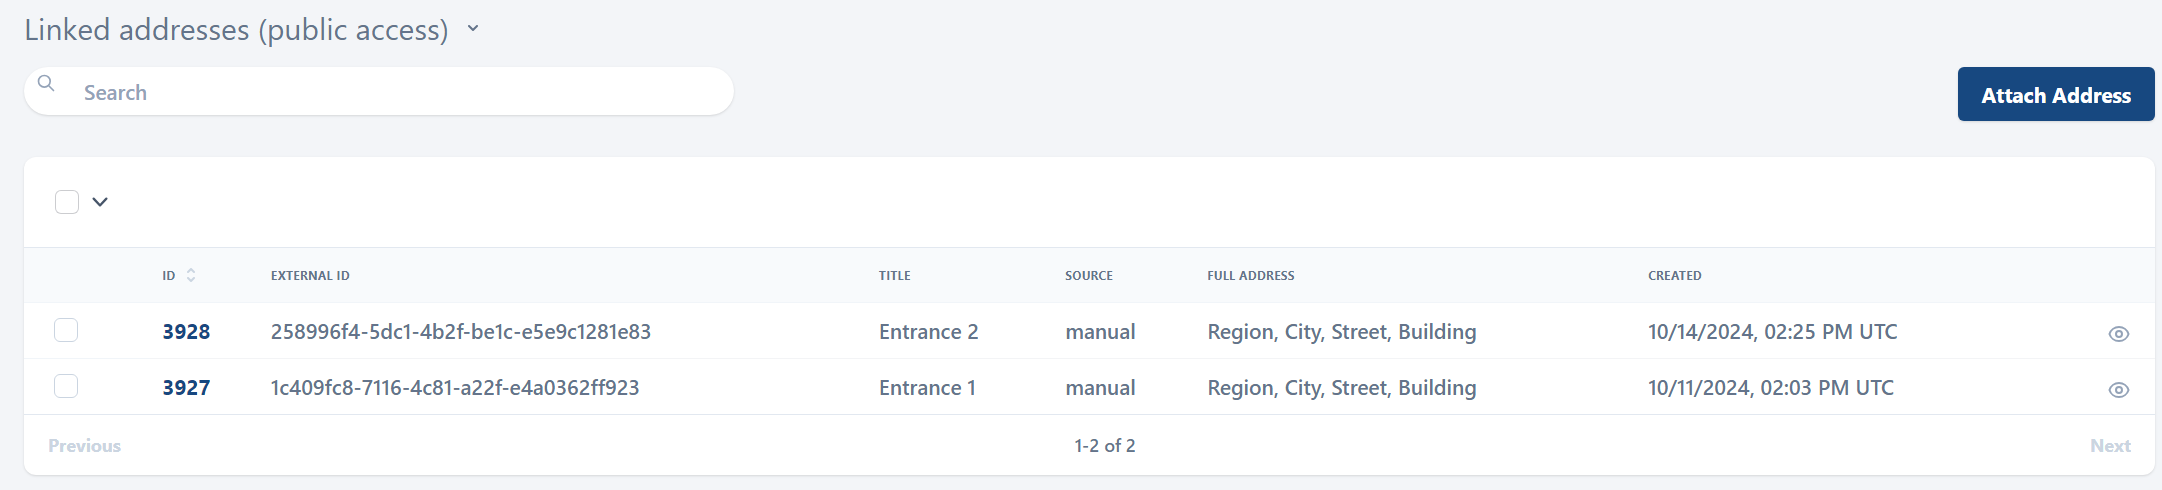
The list of addresses with publicly accessible cameras
Cameras can be attached to addresses in the following ways:
From within the card of the last address element in the Linked devices: Cameras (public access) section.
In the camera card, from within the Linked addresses (public access) section.
To link an address to the user, select the Attach address button.
On the opened page, from the Linked addresses (public access) drop-down list, select a relevant one, and select Attach Address. Once completed, the user will get access to the cameras attached to this address.
If a camera was initially linked to an address and synchronized, and only then was the user associated with the folder, changes will automatically synchronize with the video surveillance platform. The user gets access to all public cameras that are linked to the address.
If a user was initially linked to an address, and only then was a camera added to this address, you should perform synchronization. For this, from the user card, select the ellipses (…) icon at the top right and choose Sync cameras.
To detach an address, follow the steps:
Select the checkboxes of relevant addresses to detach.
From the Actions drop-down list, select Detach.
Confirm the action.
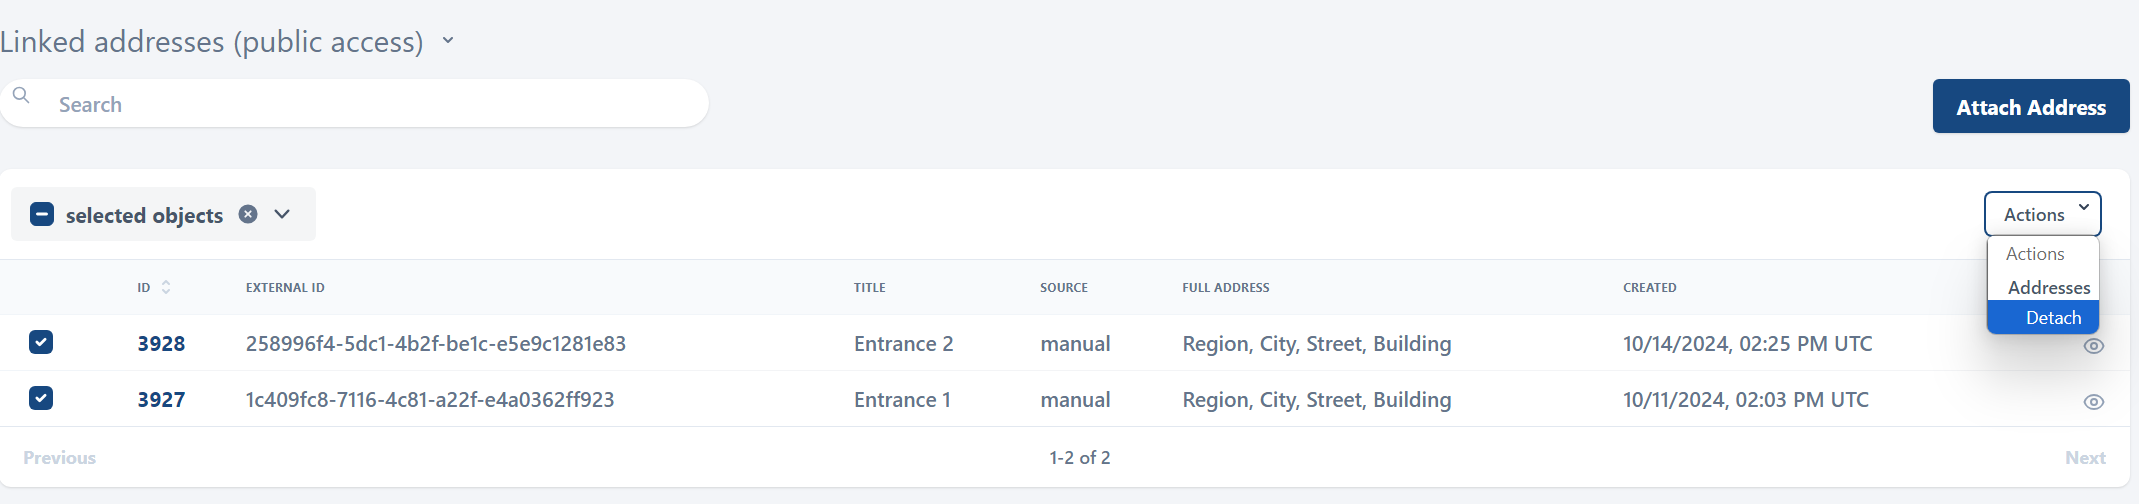
Detaching an address
Private folders (private access)
In the Private folders (private access) section, you can attach private folders to a user. These folders are attached to cameras with private access.
This option is available in the following cases:
Addresses are added in the system.
Addresses include private folders.
Cameras are linked to private folders.
For details on how to create private folders and link cameras to them, see the Private folders documentation section.
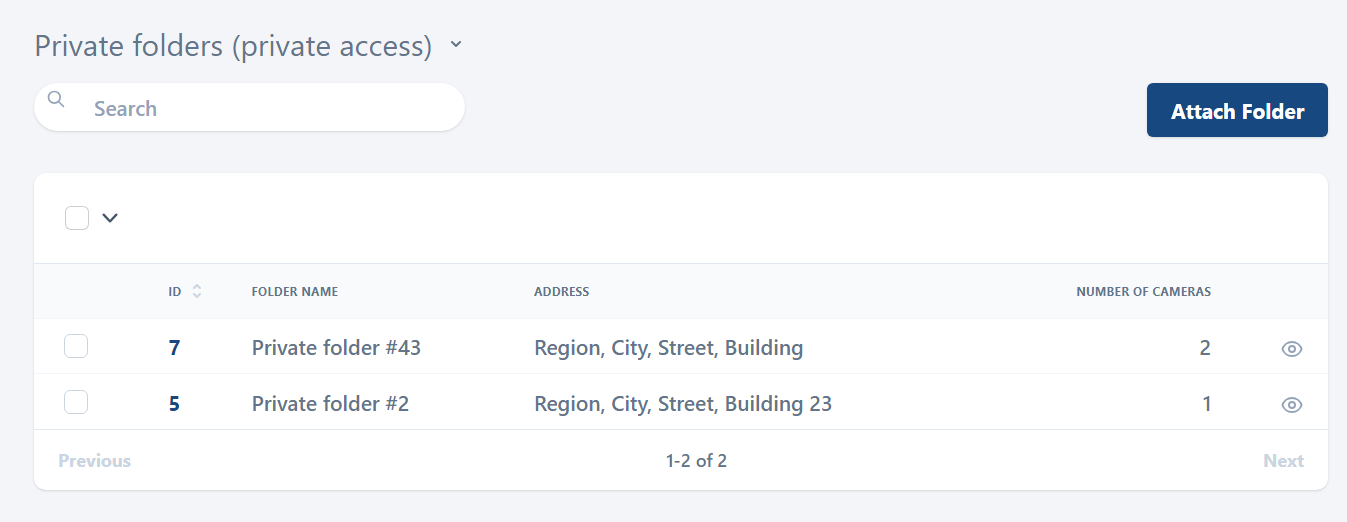
The Private folders (private access) section
You can attach a camera to a folder in one the following ways:
In the card of the last address element from the Linked devices: Cameras (private access).
In the camera card from the Private folder section.
To attach a folder, select Attach Folder.
On the opened page, from the Private folders (private access) drop-down, select a relevant folder, and select Attach Folder.
The list of folders includes the folders that aren’t associated with the current user.
If a camera was initially linked to a and address and synchronized, and only then was the address associated with the user, changes will automatically synchronize with the video surveillance platform. The user gets access to all publicly accessible cameras that are attached to the address.
If a user was initially linked to an address, and only then was a camera added to this address, you should perform synchronization. For this, from the user card, select the ellipses (…) icon at the top right and choose Sync cameras.
To detach a folder, follow the steps:
Select the checkboxes of relevant folders to detach.
From the Actions drop-down list, select Detach folder.
Confirm the action.
.png?inst-v=c246fb15-1530-4ba8-b650-c220381b36ae)
Detaching a folder
Tariff plan
In the Tariff plan section, you can track a tariff plan that is associated with the current user. For details about how to add and activate a tariff plan, see the Attach and activate a tariff plan article.
Analytics
Once a tariff plan is attached and activated, the Analytics section becomes available in the B2B user card. Here, you can specify a number of licences for each level that the user can apply on the video surveillance platform to create analytics cases.
.png?inst-v=c246fb15-1530-4ba8-b650-c220381b36ae)
Specified number of licences
You can’t edit the number of licences for the tariff plan with the Only live status. However, previously allocated licences remain visible on this page, the B2C user can’t create analytics cases.
Delete a B2B user
You can delete a B2B user who was manually added.
To delete a user, follow the steps:
Navigate to the B2B user card.
Select the horizontal ellipses icon (…) at the top-right.
Select Delete.
Confirm the action.